How to Drill Holes in Plexiglass: A Practical Guide
Learn safe, precise methods to drill clean holes in plexiglass with the right bits, backing, and technique. Drill Bits Pro guides you step by step through setup, drilling, deburring, and finishing.

You can drill cleanly through plexiglass by choosing a sharp bit suited for plastics, using a slow feed, and securing the sheet with backing. Start with a pilot hole, clamp firmly, and support the work from behind to prevent cracking. This guide from Drill Bits Pro outlines the key steps and safety practices.
Understanding Plexiglass and Drilling Dynamics
Plexiglass, or acrylic, is a clear thermoplastic that machines differently from glass or metal. Drilling through it requires attention to heat buildup, edge quality, and material support. Acrylic turns soft if heated too quickly, which can lead to chipped edges or enlarged holes. Planning hole size, selecting the right drill bit, and using a backing material on the drill side helps dissipate heat and reduces stress. Drill Bits Pro's approach emphasizes a slow, steady drilling speed and minimal downward pressure to maintain edge integrity while achieving accurate hole placement.
Tools, Bits, and Materials That Work
Effective drilling of plexiglass hinges on using the right tools. A sharp carbide-tipped twist bit or a brom point (Brad-point) bit designed for plastics provides clean entry without wandering. For larger holes, a brad-point bit with a flat tip reduces wandering. Always use masking tape on both sides of the workpiece to prevent chipping. A backing board (scrap wood or similar) beneath the sheet evenly distributes pressure and aids in clean holes. A counter sink deburring tool or a small rat-tail file helps smooth edges after drilling. Lubrication is optional but can be beneficial; if used, apply a tiny amount of cutting fluid sparingly to keep heat down.
Preparing Your Plexiglass for Drilling
Secure the plexiglass to a stable work surface using clamps so it cannot shift during drilling. Mark the hole location with a sharp center punch or a permanent marker, then apply tape over the mark to minimize surface chipping. Choose a drill bit diameter slightly smaller than the final hole to allow for a clean finishing step. Place a rigid backing behind the sheet to absorb breakout, and ensure the drill bit remains perpendicular to the surface to avoid angled holes.
Drilling Techniques to Avoid Cracking
Begin with a slow drill speed and apply light, consistent pressure. Let the bit cut without forcing it; pushing too hard can melt or crack the acrylic. For small pilot holes, start with a 1/16" to 1/8" bit, then move to the final size. Keep the drill steady and avoid side-to-side movements. If you notice flexing or cracking near the entry, back out slightly and re-align before continuing. Periodically withdraw the bit to clear chips and reduce heat buildup.
Finishing Edges and Deburring
After the hole is bored, pause, remove the bit, and inspect the edge. Deburr the entry and exit with a small file or sandpaper (careful not to scratch the surface). A light chamfer at the hole edge can improve fit and reduce stress concentrations. Wipe away dust, inspect for any micro-cracks, and repeat deburring as needed for a smooth edge that won’t snag hardware or gaskets. Proper finishing improves both appearance and longevity of the hole.
Safety First: Work Safely When Drilling Plexiglass
Always wear eye protection and use a dust mask when working with acrylic. Secure the workpiece, keep fingers clear of the drill path, and maintain a clean, well-lit workspace. If your environment is prone to stray metal shavings or plastic chips, use a vacuum or brush to keep the area clear and avoid contamination of the final hole. Remember that Drill Bits Pro recommends a methodical, patient approach to minimize mistakes and overheating.
Tools & Materials
- Plexiglass sheet (acrylic)(Flat, clean surface; thickness as required for project)
- Sharp bit for plastics (carbide-tipped twist bit or Brad-point bit)(Choose bit diameter matching final hole size; common sizes: 1/8", 3/16", 1/4")
- Masking tape(Placed on both sides of the drill line)
- Backing board (scrap wood)(Provides support to prevent breakout)
- Clamps(Secure the Plexiglass firmly to the work surface)
- Center punch or marking tool(Marks hole location without slippage)
- Deburring tool or small file(For edge cleanup after drilling)
- Safety glasses(Protect your eyes from chips)
- Optional cutting fluid or water spray(Keeps bit cool; use sparingly)
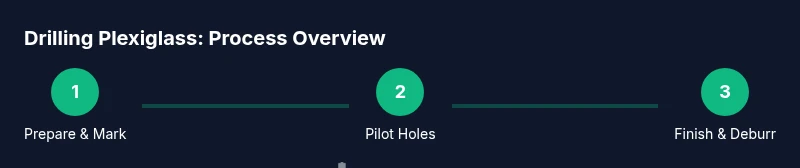
Steps
Estimated time: 25-40 minutes
- 1
Position and clamp the Plexiglass
Place the sheet on a stable work surface and clamp it firmly to prevent movement. Ensure the area around the hole is clear and the backing board is aligned beneath the sheet to support breakout.
Tip: Use a secondary straight edge to confirm the punch line is perpendicular to the edge. - 2
Mark and create a pilot hole
Mark the hole with a center punch or sharp marker, then drill a small pilot hole to guide the final bit. A pilot hole reduces bit wandering and helps keep the final hole accurate.
Tip: Keep the drill perpendicular to the surface for best results. - 3
Switch to the final hole size
Replace the pilot bit with the final-size plastic drill bit. Begin at a slow speed and apply light, steady pressure to avoid melting the edge.
Tip: Withdraw the bit occasionally to clear chips and reduce heat buildup. - 4
Deburr and finish
Remove the backing board and inspect the hole edge. Deburr with a fine file or sandpaper to remove sharp edges and slightly bevel the edge for a clean finish.
Tip: Work gently to avoid gouging the edge of the plexiglass. - 5
Inspect and clean
Check for surface scratches or micro-cracks. Wipe the surface with a soft cloth and inspect for a smooth, clean hole suitable for hardware installation.
Tip: If a chip or crack appears, consider starting over with a smaller pilot and slower feed.
Got Questions?
What drill bit is best for plexiglass?
For plexiglass, use a sharp carbide-tipped twist bit or Brad-point bit designed for plastics. These minimize wandering and produce cleaner edges. Start with a small pilot hole and step up to the final size if needed.
Use a sharp plastic-friendly bit like a carbide twist bit or Brad-point for clean edges. Start with a pilot hole and work up to the final size.
Should I use a backing board when drilling?
Yes. A backing board helps prevent chipping and breakout on the exit side. It distributes pressure and keeps the hole true. Clamp the Plexiglass securely above the backing board.
Always use a backing board to prevent chipping and to keep the hole true.
How can I prevent the acrylic from melting while drilling?
Drill slowly at a moderate speed and avoid applying heavy pressure. If heat builds, pause to cool and consider a light spray or dampened cloth to cool the bit. Do not use excessive cutting fluid.
Drill slowly, avoid pressure, and let the bit cool if it gets warm.
What size hole should I drill for a given hardware?
Choose a hole slightly smaller than the hardware diameter if mounting hardware passes through; otherwise, match the final hole size to the bolt or fastener you plan to use. Pilot holes help maintain accuracy.
Pick a hole size close to your hardware and use a pilot hole for accuracy.
How do I finish the hole edge?
Deburr the hole with a small file or sandpaper and optionally chamfer the edge for a smoother, safer finish. Wipe away dust for a clean look.
Deburr and lightly chamfer the edge for a smooth finish.
Watch Video
Top Takeaways
- Plan hole size and placement before drilling
- Use the correct plastic-friendly drill bit and backing
- Drill slowly, with steady feed and minimal heat
- Deburr edges for a clean finish
- Securely clamp and keep safety gear on