Can You Drill Plexiglass? Safe Techniques and Tools
Learn how to drill plexiglass safely with the right bits, speeds, and techniques. This guide covers tools, setup, step-by-step drilling, finishing, and common mistakes for DIYers and professionals.

Yes, you can drill plexiglass safely using the right setup: clamp the sheet, use a carbide-tipped or diamond-coated bit, drill at a slow speed with light pressure, and protect the surface with painter’s tape. Start with a pilot hole, then finish to the final diameter. Deburr edges after drilling.
What makes Plexiglass drillable and why technique matters
Plexiglass, commonly sold as acrylic, behaves differently from ordinary glass when drilled. It is a thermoplastic, which means it expands and contracts with heat and can craze or crack if the drill bit or motion generates too much heat or chatter. According to Drill Bits Pro, acrylic is usually forgiving in thin sheets but becomes brittle in thicker sections or under uneven pressure. Before you pick up a drill, understand that the surface you see can be marred by a standard twist bit if you press hard or spin fast, potentially leaving microfractures radiating from the hole. The correct approach combines material handling, bit choice, and controlled drilling conditions. Protect the surface with painter’s tape to dampen vibrations and to create a reference for the hole. If drilling near an edge, place the hole away from the edge and drill from the smooth side. Plan hole locations with a marker and practice on scrap pieces to dial in speeds and feeds before touching the final piece.
Choosing the right drill bits and speeds for plexiglass
For acrylic, choose carbide-tipped or diamond-coated bits designed for plastics. Regular twist bits can work, but sharp, high-quality bits reduce heat buildup and edge chipping. Start with a small pilot hole to guide the larger bit and keep the drill at a low speed with light pressure. Avoid aggressive feeding; the goal is a clean cut with minimal heat. If your drill press has a speed control, set it to a conservative setting and test on scrap material first. Lubrication is optional; a damp cloth or a few drops of water can help cool the surface without creating a mess. After drilling, inspect the edge for any micro-cracks and deburr as needed.
Prep work: securing, masking, and marking the work area
Preparation matters as much as the drill itself. Secure the plexiglass with clamps to prevent movement during drilling. Apply painter’s tape over the intended hole area to reduce surface chipping and to give you a clear drilling guide. Use a sharp center punch or a light mark to indicate the exact hole location so the bit starts precisely where you want it. If drilling near the edge, increase material support by using a sacrificial scrap beneath the sheet to prevent blowout.
The drilling process: practical steps and cautions
Begin by aligning the drill bit with the marked spot and starting with a light touch to create a tiny guide. Gradually apply pressure while maintaining steady speed; avoid pushing too hard, which can crack the acrylic. If you hear unusual chatter, stop and back the bit out to clear heat and debris. When you reach the final hole depth, stop and remove the bit slowly to prevent grabbing. Deburr the edge with a file or sandpaper to remove micro-splinters and to prevent injuries when handling the part.
Finishing touches: deburring, cleaning, and inspection
After drilling, deburr the hole edge using a deburring tool or fine sandpaper to minimize sharp edges. Wipe away any dust with a damp cloth and inspect for any micro-cracks radiating from the hole. If you observe rough edges or born cracks, refine the edge with light sanding and consider applying a protective edge guard or trim. Proper cleanup also helps extend the life of the part and maintains a clean aesthetic for your project.
Common mistakes and how to avoid them
Common mistakes include using the wrong drill bit for acrylic, drilling at high speed, applying excessive downward pressure, and failing to clamp the sheet securely. To avoid these, always use a bit designed for plastics, keep the speed slow, feed gently, and secure the plexiglass with clamps or a jig. Tape helps prevent chipping and gives you a visible hole guide. Practicing on scrap pieces reduces risk to the final workpiece.
Alternatives and safety considerations for plexiglass projects
If you’re unsure about drilling through thick acrylic, consider alternatives such as pre-fabricated holes, using a hole saw designed for plastics, or routing the edge with a step bit. Always wear safety goggles and protective gloves when handling plastic shavings. Work in a well-ventilated area to avoid inhaling fine acrylic dust, and dispose of scraps responsibly. For high-precision holes or critical tolerances, consult a fabrication shop or use a dedicated plastics drilling jig.
Tools & Materials
- Plexiglass sheet (acrylic)(Ensure thickness and final dimensions meet project needs)
- Clamps or vise(Secure sheet to prevent movement)
- Masking tape(Protect surface and mark hole location)
- Pilot drill bits (optional but recommended)(Sizes around 1/16" to start; vary by final hole size)
- Carbide-tipped drill bits or diamond-coated plastic bits(Sizes vary with final hole diameter; keep bits sharp)
- Drill with adjustable speed(Low to moderate speed; avoid high RPM)
- Lubricant or damp cloth (optional)(Only a damp cloth or water spray for cooling, not oil)
- Deburring tool or fine sandpaper (600-800 grit)(Smooth edges after drilling)
- Safety gear: goggles and gloves(Protect eyes from shavings; gloves for grip)
- Scrap acrylic for test cuts(Great for dialing in speeds and feeds)
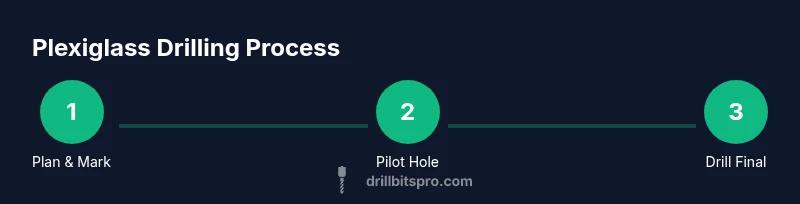
Steps
Estimated time: 20-40 minutes
- 1
Secure the plexiglass
Place the sheet on a flat, solid surface and clamp firmly. Ensure there is no movement when pressure is applied through the drill. This reduces edge chipping and misplacement of your hole.
Tip: Use a sacrificial backing board underneath to prevent tear-out on the drill exit side. - 2
Mark and protect the area
Apply painter’s tape over the drilling zone and mark the exact hole center with a sharp, precise mark. Tape helps prevent surface scratches and provides a visual guide for bit alignment.
Tip: Punch a tiny starting point with a center punch to avoid bit wandering. - 3
Create a pilot hole
Start with a small pilot hole using a sharp carbide-tipped bit at a slow speed. A pilot hole guides the larger bit and minimizes stress on the material.
Tip: Drill at a light feed rate to prevent heat buildup. - 4
Drill to final size
Switch to the final drill size, keeping the drill perpendicular to the sheet. Maintain steady, light pressure and moderate rotation speed to avoid chatter.
Tip: If the hole seems to float, pause and back the bit out to clear debris. - 5
Deburr and finish
Remove sharp edges with a deburring tool or fine sandpaper. Wipe away dust and inspect for any chips or micro-cracks around the hole.
Tip: Use a damp cloth to remove residue; dry thoroughly before assembly. - 6
Inspect and test
Check the hole for smoothness and fit the mating component. If the fit is too tight, slightly enlarge and re-check, ensuring no cracks propagate.
Tip: Test-fit on scrap before final usage to ensure precision.
Got Questions?
Can plexiglass crack when drilled?
Yes, plexiglass can crack if drilled too quickly, without support, or with excessive pressure. Using a pilot hole and slow speeds minimizes risk.
Plexiglass can crack if drilled too fast or without support. Start with a pilot hole and drill slowly.
What drill bits work best for plexiglass?
Carbide-tipped or diamond-coated bits perform best for acrylic. Ensure bits are sharp and use gentle feeds to prevent heat buildup.
Carbide-tipped or diamond-coated bits are best for plexiglass; keep the feed gentle.
Should I lubricate plexiglass while drilling?
Lubrication is optional; a damp cloth or light water spray can help cooling. Avoid oils that can contaminate the surface.
A damp cloth or light water spray helps cooling; avoid oil-based lubricants.
Can I drill multiple holes in plexiglass?
Yes, but ensure the material is well-supported and each hole is deburred. Plan spacing to avoid weakening the sheet.
Yes, with proper support and deburring.
Is a drill press better than a handheld drill for plexiglass?
A drill press offers consistent speed and vertical alignment, reducing drift and heat buildup. Use it if available for precision holes.
A drill press helps with precision and control; use it for best results.
Do I need to anneal plexiglass after drilling?
Annealing is not typically required for standard drilling applications. Allow cooled parts to rest before assembling.
Annealing is usually unnecessary; let the piece cool before use.
Watch Video
Top Takeaways
- Secure and support the sheet before drilling
- Choose carbide-tipped or diamond-coated bits for plastics
- Drill slowly with light pressure and use a pilot hole
- Deburr edges and inspect for cracks after drilling
- Protect the surface with masking tape and test on scrap first