How to Drill Through Tile Safely: A Step-by-Step Guide
Master tile drilling with the right bits and careful technique. This guide covers masking, center-punching, cooling, and a proven step-by-step method for clean, precise holes that won't crack glaze.

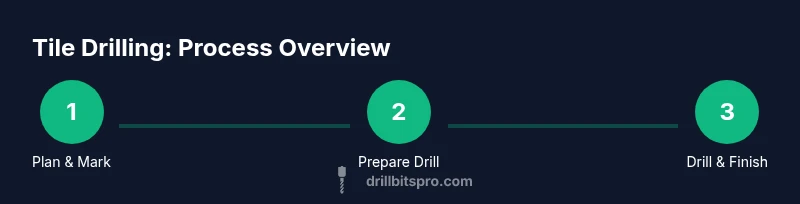
To drill through tile safely, follow a careful step-by-step approach. First locate and mark the drilling spot using painter’s tape to prevent slipping, then score with a center punch or diamond-tipped center tip. Choose a carbide-tipped tile bit or a masonry bit designed for glaze, and set your drill to low speed with light, steady pressure. Keep the bit cool with water or coolant, and drill through the tile slowly before penetrating the backing material.
Tile Drilling: Why It Demands Care
Tile is finished with a glaze that can crack or craze if you push too hard or drill too fast. Porcelain and ceramic tiles differ in hardness, which affects bit choice and speed. The glaze is thin compared to the backing material, so most damage occurs at the surface. According to Drill Bits Pro, your chances of a clean hole increase dramatically when you prepare the surface, select appropriate bits, and control heat and vibration. Understanding the material you’re drilling into—glazed ceramic, porcelain, or stone-look tiles—helps you tailor technique and tool choice for a flawless result.
In practice, you’re aiming for a controlled start that avoids skate, then a steady progression through the glaze without chipping the edge. This is especially important for visible installations like kitchen backsplashes or bathroom tiling where a bad hole is noticeable.
Tools and Materials You’ll Need
Having the right gear before you start saves time and protects the tile. The essential items include a carbide-tipped tile drill bit or a diamond-titiled bit for porcelain, painter’s tape, a center punch or start-dimple tool, a variable-speed drill, a water bottle or coolant, a masking sheet to protect surrounding surfaces, safety goggles, and hearing protection. Optional items include a drill guide or template for perfect alignment, and a humidity- or damp cloth to wipe away debris as you go. Proper PPE and a clean workspace reduce accidents and dust exposure.
Tip: Start with a small pilot hole to help the larger bit track straight, especially on glossy surfaces.
Surface Preparation, Marking, and Edge Protection
Edge protection is crucial to prevent glaze chips. Apply painter’s tape over the drilling spot to create a forgiving surface, then press down firmly to ensure tape doesn’t lift. Mark the center with a non-permanent marker or pencil. If you’re drilling through ceramic or porcelain, consider scoring the glaze with a center punch or using a diamond-tipped center point to create a precise starting point. This small indentation guides the bit and reduces wandering. Keep your work surface steady and clean; debris can cause the bit to slip as you begin.
Center-Punching, Marking, and Pilot Holes (Overview)
After marking, a light center punch creates a tiny indentation that helps the bit start accurately. A pilot hole using a smaller bit ensures the larger bit won’t wander once it begins to cut. Use water or a coolant to keep heat down, particularly on porcelain. The combination of tape, center-punch, and a pilot hole dramatically reduces the risk of glaze cracking and edge chipping. Drill slowly and apply minimal pressure at the start, then increase gradually as the hole opens.
Drilling Techniques and Cooling: The Core of the Process
Set your drill to the lowest practical speed. Use a steady, light pressure and let the bit do the cutting—don’t force it. Cool the bit with a spray bottle or a damp sponge as you progress; overheating is a major culprit for glaze cracking. If you encounter resistance, pause, withdraw the bit a quarter turn, and reapply coolant. For porcelain, consider a diamond-tipped bit or a tungsten-carbide carbide-tipped bit designed for hard surfaces. Maintain alignment with the marking tape or template to keep the hole centered.
Finishing Holes, Edges, and Sealing
Once the glaze is penetrated, switch to a brushing motion to remove debris from the hole. If you’re drilling into thick tile or stone-backed tiles, the backing can offer more resistance, so support the tile from beneath with a block or the edge of a workbench. After drilling, gently deburr the hole with a small round file or sandpaper wrapped in a cloth. Seal the edge if the hole is exposed to moisture, using a silicone sealant or appropriate grout sealer to prevent water ingress and tile movement. Clean any dust from the surface to maintain appearance.
Common Mistakes and How to Avoid Them
Rushing the process is the most common mistake; slow, deliberate techniques prevent cracking. Skipping masking tape or center punches increases the chance of chipping. Using the wrong bit for porcelain or glazed ceramic can dull quickly and produce rough edges. Always verify the bit’s RPM rating and ensure your drill has a low-speed setting. Finally, avoid drilling near tiles with thin edges or near grout lines where edge fragility is higher.
Tools & Materials
- Carbide-tipped tile drill bit(Use 1/8)
Steps
Estimated time: 30-45 minutes
- 1
Identify drilling spot and protect glaze
Locate the exact spot for the hole and apply painter’s tape over the area to prevent slipping and chips. Mark the center with a pencil or marker.
Tip: Masking tape also helps you gauge when you’re straying off-center; keep the area clean and dry. - 2
Set up the drill and bit
Install the carbide-tipped tile bit and set the drill to the lowest practical speed. Ensure the drill is stable and wired or charged, depending on your tool.
Tip: A slow start reduces glaze tearing; test on a scrap tile if possible. - 3
Start with a center punch and pilot hole
Gently create a small indentation with a center punch, then drill a small pilot hole to guide the larger bit.
Tip: Keep your hand steady and stop frequently to cool the bit. - 4
Drill through glaze with controlled pressure
Advance slowly, adding slight pressure as the bit bites into the glaze, then gradually through the backing.
Tip: Pause to cool the bit with water; overheating causes cracking. - 5
Deburr and seal
Remove burrs with a small file or sandpaper, then seal edges with silicone or grout sealer if needed.
Tip: Wipe away dust before sealing for a clean finish. - 6
Inspect and clean up
Check the finished hole for clean edges and proper depth; clear debris and store tools safely.
Tip: Document any issues for future projects.
Got Questions?
What tile types are safe to drill with standard bits?
Glazed ceramic tiles are the most forgiving for beginners when using proper technique. Porcelain tiles require diamond or carbide-tipped bits and slower speeds. For natural stone, special bits and deeper cooling may be necessary.
Glazed ceramic tiles are easiest to drill; porcelain and stone need appropriate bits and care.
Can I drill through tile without masking tape?
Masking tape helps prevent slipping and reduces glaze chipping at the starting point. It also gives you a visible guide for straight drilling.
Masking tape helps with grip and protects glaze during starting.
What should I do if the tile cracks during drilling?
Stop drilling, assess the break, and consider replacing the tile if the crack is severe. If the crack is minor, avoid continuing and start over on a fresh spot with proper technique and cooling.
If cracking occurs, pause, assess, and start over on a new spot with proper technique.
Is water cooling required for all tile drilling?
Water cooling helps manage heat and reduce glaze damage, especially on porcelain. Use a spray bottle or damp sponge to keep the bit and tile cool.
Water cooling is highly recommended to prevent heat-related cracks.
Which bit is best for porcelain tile?
A diamond-tipped or carbide-tipped tile bit designed for hard materials is best for porcelain. Avoid general masonry bits that wear quickly on glaze.
Use a diamond-tipped or carbide-tipped tile bit for porcelain.
How do I know when I’ve drilled deep enough?
Drill until you penetrate the backing material or reach the requested depth, and then carefully withdraw the bit to avoid chipping the edge.
Drill to the backing, then withdraw slowly to prevent edge damage.
Watch Video
Top Takeaways
- Mask the area and mark center to prevent slips.
- Use a carbide-tipped bit and low speed for clean holes.
- Cool the bit and tile to prevent glazing cracks.
- Finish with deburring and edge sealing if exposed.