How to Make Holes in Pots Without a Drill: A Drill-Free Guide
Discover drill-free ways to create drainage holes in pots. This practical guide covers tools, techniques, and safety tips from Drill Bits Pro to help DIYers and professionals drill without a power tool.

By using safe, drill-free methods, you can create clean drainage or ventilation holes in pots without a power drill. This guide shows practical, low-risk approaches using everyday tools or heat-based techniques, plus step-by-step tips to protect pot material. You’ll learn when to choose nails, awls, or heat and how to finish edges for longevity.
Drilling alternatives: why drill-free holes matter
When you’re planting in pots, drainage is essential to prevent root rot. If you don’t have a drill handy, you can still introduce drainage or ventilation holes using drill-free methods. This approach minimizes the risk of cracking thin-walled containers and preserves the cosmetic finish. According to Drill Bits Pro, the best outcomes come from selecting a method that matches your pot material and your comfort with simple hand tools. The central idea for how to make holes in pots without a drill is to create a small starter point, then gently widen it with controlled force. Start with a single hole at the base to test drainage, then adjust as needed. Surface protection and a stable work surface will reduce slips and chips. As you explore these techniques, remember that practice improves results, and patience prevents oversights. The goal is clean, controllable holes that won’t compromise the pot’s structure or your plants' health.
This section emphasizes why drill-free holes can be a smart choice: you avoid heat or impact damage to delicate pots and you retain the pot’s original finish. Drill-free methods also work well when you’re working with recycled containers or decorative pots that aren’t designed to be pierced with power tools. The key is to match the technique to the material (terracotta, ceramic, or plastic) and to manage your force carefully. Drill Bits Pro underscores that preparation, proper tool selection, and a patient approach lead to reliable drainage without cracking or warping. By keeping the workflow slow and deliberate, you can achieve consistent results across a range of pot types.
null
Tools & Materials
- Marker or pencil(For precise hole location and alignment)
- Hammer(Used to drive nails or punches gently)
- Nail or bradawl(Creates a starter hole without power tools)
- Masonry punch (optional)(Helpful for clean starter holes in ceramic/terracotta)
- Sharp metal rod or heated pin (for heat method)(Use with caution; keep a safe distance and ventilation)
- Safety gear (gloves, safety glasses)(Protect hands and eyes from chips)
- Ruler or measuring tape(To align multiple holes and keep spacing consistent)
- Fine-grit sandpaper or small file(Deburr edges after widening hole)
- Non-slip work surface or mat(Prevent pot from slipping during work)
Steps
Estimated time: 15-30 minutes
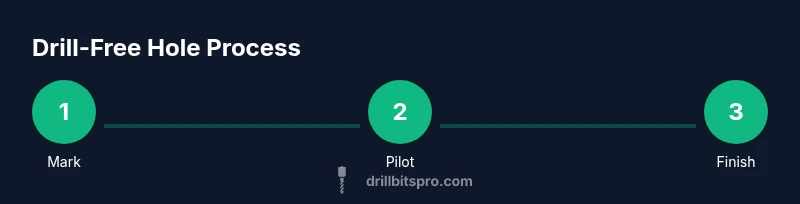
- 1
Mark the hole location
Position the pot on a stable, non-slip surface. Use the marker to indicate the exact spot for the drainage hole, ideally near the bottom third of the pot and centered in the base area. Double-check height to avoid compromising plant stability.
Tip: Double-check placement before starting; mislocated holes impair drainage and aesthetics. - 2
Create a starter hole
Place the nail or bradawl on the marked spot and gently tap with the hammer to create a small starter hole. Keep the pot supported to prevent cracks and chips. If you have a masonry punch, use it for a cleaner starter indentation.
Tip: Support the pot with your other hand or a block of wood to minimize movement. - 3
Gradually widen the hole
Gently widen the starter hole by tapping around its edge or by making incremental taps deeper into the same spot. Increase diameter slowly and check alignment frequently. Stop if you notice cracking or material stress.
Tip: Work slowly and avoid forcing material beyond its tolerance. - 4
Finish and deburr
Smooth the hole edge with fine sandpaper or a small file. Wipe away dust and inspect for burrs that could snag roots. If you’re using heat methods, cool the area before touching.
Tip: Wear gloves during sanding to protect from sharp edges. - 5
Test drainage and adjust
Place the pot over a tray and run water through the hole to verify drainage. If drainage is slow, widen slightly and retest. Ensure the edges are clean before planting.
Tip: Do not oversize the hole; balance drainage with pot integrity. - 6
Document results
Note the hole size, location, and material for future projects, and store tools safely. This helps you replicate a successful drill-free approach later.
Tip: Take a quick photo or jot down notes for consistency.
Got Questions?
Can I use a nail to create holes in ceramic pots?
Yes, with care. Use a sharp masonry nail and a light hammer strike to start a small hole, then widen gradually. Avoid forcing; ceramic can crack.
Yes, with care. Start with a small starter hole and widen slowly.
What size hole should I start with for drainage?
Begin with a small starter hole and enlarge gradually until water drains freely without signs of cracking. The exact size depends on pot material and plant needs.
Start small and gradually enlarge until drainage is good.
Is this method safe for plastic pots?
Yes, but avoid overheating. If you use heat, keep it minimal and work slowly to prevent warping or fumes.
Yes, but be careful with heat, and work slowly.
Will drill-free holes weaken the pot?
Widen holes conservatively and avoid large cavities that compromise strength.
It can weaken if you over-widen; proceed slowly.
Do I need to seal or treat the hole?
Generally not necessary for drainage holes; use plant-safe sealants only if you have a specific use or condensation concern.
Usually you don’t seal holes; only use plant-safe sealants if needed.
What about glazed ceramic pots?
Glazed surfaces are prone to cracking; use careful marking and light pressure; for larger holes, consider alternate methods.
Glazed pots crack easily; go slow, or seek a professional method.
Watch Video
Top Takeaways
- Choose a drill-free method suitable for your pot material.
- Mark, start small, and widen gradually for controlled drainage.
- Deburr edges and re-test drainage before planting.
- Wear safety gear and work on a stable surface.