Drill Hole Ceramic Pot: Step-by-Step Guide
Learn how to drill a clean, safe hole in a ceramic pot for drainage or customization. This expert guide from Drill Bits Pro covers tool selection, technique, safety, and finishing tips to minimize cracks and preserve pot integrity.

You can safely drill a hole in a ceramic pot for drainage by using the right tools and careful technique. This guide walks you through selecting the correct drill bit, preparing the pot, and drilling slowly with water cooling to minimize cracks. With proper support and finishing, you’ll create a usable, durable pot without damaging the ceramic.
Drilling a Hole in a Ceramic Pot: What You’ll Accomplish
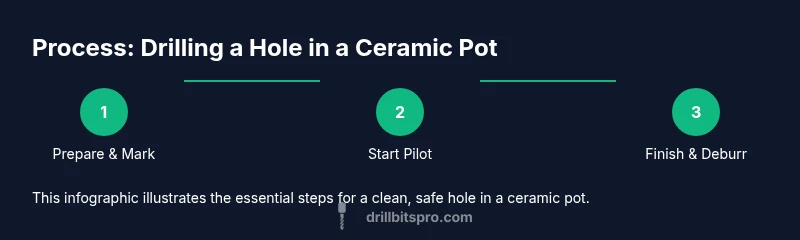
Drilling a hole in a ceramic pot enables proper drainage and customized fittings for plant care or decorative setups. The process requires respect for the pot’s glaze and body, plus the right bit and cooling method to prevent cracks. According to Drill Bits Pro, using a diamond-coated bit designed for ceramic surfaces, combined with continuous water cooling, dramatically reduces the risk of cracking while delivering a clean, true hole. This section outlines the core objectives: select the correct bit, guard the surface, drill at a slow speed, and inspect the edge for burrs after completion. When done correctly, the ceramic pot remains sturdy, functional, and ready for use.
Safety Essentials for Ceramic Drilling
Always wear safety goggles and gloves when drilling through ceramic. The shards and glaze can be sharp and create kickback if the bit binds. Keep a steady hand and protect your work surface with a soft mat or folded towel. Water cooling is non-negotiable: a spray bottle or shallow tray keeps the bit and glaze cool, reducing thermal stress that leads to cracks. The Drill Bits Pro team emphasizes that safety gear and slow, controlled technique are the foundation of a successful drill hole ceramic pot project.
Choosing the Right Bit for Ceramic Surfaces
Ceramic pots require a bit that can handle hard glaze and dense material without slipping. A diamond-coated bit or a carbide masonry bit rated for ceramic/porcelain surfaces is ideal. Start with a small pilot hole using a low-diameter bit if available, then gradually widen to the final size. The key is consistent, light pressure and continuous water cooling to prevent glazing from cracking or chipping. For best results, keep the bit cool and lubricated with water as you work, so heat buildup doesn’t compromise the pot.
Preparing the Pot: Marking, Padding, and Stabilization
Place the pot on a cushioned surface—foam, folded towels, or a rubber mat—to prevent slipping and minimize impact from any accidental slips. Use masking tape to mark the hole location; this helps prevent wandering and keeps the glaze intact around the entry point. If you’re drilling near the edge, consider placing the hole slightly inward from the rim to maintain pot strength. A center punch can help start the pilot hole precisely, but it’s optional if the bit has a sharp lead.
Marking and Centering the Hole for a Clean Drilling Start
Accurate marking is critical. Use a fine-tip marker or a pencil to dot the intended hole, then apply masking tape across the mark to prevent chipping. Align the pot so the surface is parallel to your drill so that the bit enters straight on. For glaze, begin with a light score along the mark to guide the bit. A successful start reduces glide and reduces the chance of slipping, producing a neat entry.
Drilling Technique: Slow Speed, Constant Water, and Gentle Pressure
Begin with a slow drill speed and minimal pressure to prevent glaze cracking. Use a diamond-coated or ceramic-rated bit, and apply a steady stream of water or hold a damp sponge against the surface to cool both bit and pot. As you progress, apply incremental pressure only as the hole enlarges, avoiding sudden pushes that may crack the pot. Regularly withdraw the bit to clear debris and prevent glazing from building up inside the hole.
Finishing the Hole: Deburring, Cleaning, and Edge Care
Once the hole reaches the desired size, back the bit out slowly to reduce edge tearing. Remove any burrs with a small, low-angle file or gentle sanding by hand; wet sanding can help minimize glaze chipping. Rinse and dry the pot completely before use, and if the pot will be exposed to plants, consider sealing the interior edge with a food-safe sealant to reduce water seepage along the glaze.
Troubleshooting Common Issues and How to Prevent Them
Cracking usually results from heat buildup, excessive pressure, or starting with the wrong bit. If you see micro-fractures near the entry, pause, cool the area, and reassess the bit choice. Slippage can be prevented by padding and taping the surface, or by using a center punch to create a precise prick mark. If the glaze chips, slow down and switch to a diamond-coated bit with continuous water cooling. Practicing on a scrap ceramic tile before working on the pot can build confidence and refine technique.
Alternatives When Drilling Isn’t Possible or Desired
If the ceramic pot is too fragile or glazed in a way that risks cracking, consider alternatives such as using a secondary pot with pre-drilled drainage, placing a breathable layer of fabric or mesh inside the pot, or drilling a drainage hole in the bottom of a planter tray beneath the pot. These options maintain aesthetics while providing drainage and air exchange without compromising the original ceramic piece.
Maintenance and Aftercare: Longevity of the Drilled Hole
Inspect the hole periodically for cracks or glaze wear, especially after freezing temperatures or rapid temperature changes. Clean the edge to prevent soil or mineral buildup, which can erode the edge over time. If you notice micro-fractures, apply a gentle sealant along the inner edge to reduce water intrusion and prolong pot life. Regular care helps maintain a clean hole and prevents gradual weakening of the ceramic.
Quick Reference: Key Principles at a Glance
- Use the right bit (diamond-coated or ceramic-rated carbide) for ceramic surfaces.
- Keep the surface cool with continuous water during drilling.
- Pad and clamp the pot to avoid slipping and cracking.
- Start with a pilot hole, then enlarge gradually.
- Deburr and clean the edge after drilling for a smooth finish.
Tools & Materials
- Diamond-coated drill bit designed for ceramic/porcelain(Prefer a small pilot bit first; ensure compatibility with your drill chuck)
- Carbide masonry bit (ceramic-rated) as an alternative(Use only if a diamond bit is unavailable; ensure glaze compatibility)
- Drill with variable speed control(Slow speeds reduce heat buildup and prevent cracking)
- Masking tape(Marks the location and helps prevent chipping)
- Water spray bottle or damp sponge(Keeps bit and glaze cool; prevents thermal stress)
- Safety goggles(Eye protection against shards)
- Soft padding surface (folded towels or foam mat)(Prevents slipping and cushions impact)
- Center punch or needle (optional)(For a precise starting point if the mark is difficult to locate)
- Marker or pencil(For precise hole location)
- Water container or tray(Collects cooling water and debris)
Steps
Estimated time: 25-40 minutes
- 1
Prepare workspace and materials
Clear the area, place a soft mat on the work surface, and gather all tools and the ceramic pot. Don’t rush this setup—ensuring a stable base prevents slips that could crack the glaze.
Tip: Double-check drill chuck and bit compatibility before starting. - 2
Mark the hole and protect the surface
Use masking tape to outline the hole location and mark with a fine point. The tape reduces glaze chipping and provides a visual guide for your starting point.
Tip: For edge holes, move the mark inward a bit to strengthen the rim. - 3
Secure the pot and align the drill
Place the pot on the padded surface; ensure it won’t roll. Position the drill so the bit enters at a right angle to the surface to avoid wandering.
Tip: If possible, have a helper hold the pot steady during the start. - 4
Create a pilot hole with slow speed
Begin with a small-diameter diamond-coated bit at the lowest setting. Apply light pressure and feed water onto the entry as you drill to dissipate heat.
Tip: Take short, controlled passes rather than forcing the bit through in one go. - 5
Progressively enlarge to final size
gradually switch to larger diameters or expand within small increments until you reach the desired hole size. Keep water flowing and periodically cool the section.
Tip: Withdraw the bit frequently to clear debris and inspect the edge. - 6
Deburr and finish the edge
Withdraw the bit slowly, then lightly deburr the inside and outside edges with a fine file or sandpaper. Rinse and dry the pot completely.
Tip: A damp sponge during deburring minimizes glaze shedding. - 7
Inspect and test the hole
Check for cracks around the entry and ensure the hole clears well for drainage or insertion of components. Test with water to observe flow and edge integrity.
Tip: If you see micro-fractures, stop and assess with a smaller bit before continuing. - 8
Optional sealing or liner considerations
If the pot will be outdoors or contact with soil, consider sealing the interior edge with a food-safe sealant to reduce water wicking and prolong life.
Tip: Avoid harsh solvents near glaze; ensure full drying before use.
Got Questions?
Can I drill a drainage hole in a ceramic pot?
Yes, with the right tools and technique. Use a diamond-coated or ceramic-rated bit, work slowly, and keep the surface cooled with water to minimize cracks.
Yes. Use a diamond-coated bit or ceramic-rated bit, drill slowly, and keep it cooled with water to avoid cracks.
What kind of drill bit should I use for ceramic?
A diamond-coated bit designed for ceramic/porcelain or a carbide masonry bit rated for ceramic surfaces works best. Diamond bits handle glaze and dense material more reliably.
A diamond-coated bit or ceramic-rated carbide bit works best for ceramic surfaces.
Will drilling cracks the pot?
Cracking is possible if you apply too much pressure or heat. Keep speed low, water cooling steady, and start with a small pilot hole before enlarging.
Cracking can happen if you push hard or heat the glaze. Drill slowly and keep it cooled.
Should I drill through glaze or not?
Drilling through glaze is doable with the right bit and technique, but use masking tape and start slowly to minimize glaze chipping and edge damage.
Yes, but start slowly and protect the glaze with tape to avoid chips.
What size should the hole be?
Start with a small pilot hole and enlarge gradually to the needed size. Choose a hole diameter that suits your drainage or fixture needs without weakening the pot.
Start small and gradually enlarge to the needed size.
Can I drill ceramic pots with glaze inside?
Yes, you can, but prioritize cooling and gentle technique to prevent chipping near the glaze. Consider practicing on a scrap piece first.
Yes, but use gentle technique and keep things cool.
Watch Video
Top Takeaways
- Choose the right ceramic-rated drill bit and cooling method.
- Mark and pad the pot to prevent glaze damage.
- Drill slowly with light, steady pressure and frequent water cooling.
- Deburr and inspect the edge to ensure durability.