Difference Between Drill and Hammer Drill: A Practical Guide
An analytical guide to the difference between drill and hammer drill, when to use each, and how to pick the right tool for wood, metal, masonry, and concrete projects.

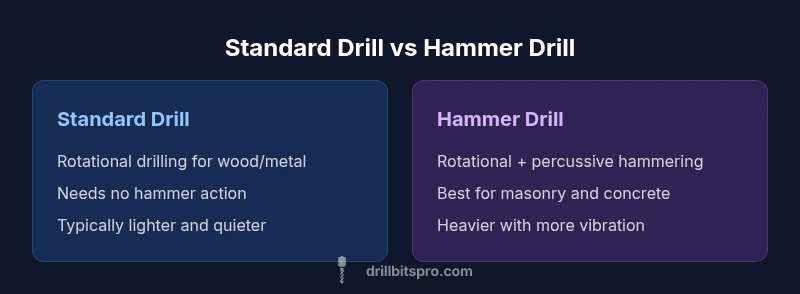
The difference between drill and hammer drill centers on the hammering action: a standard drill rotates a bit to make holes, while a hammer drill adds a percussive strike to help penetrate hard materials like masonry. For wood and metal, a basic drill is usually enough; for concrete or stone, a hammer drill markedly improves performance. In practice, choose drill mode for everyday drilling and hammer mode for masonry tasks.
What is the difference between drill and hammer drill?
The phrase difference between drill and hammer drill is widely used by DIYers and professionals alike. At its core, a standard drill relies on rotational motion to bore holes through wood, metal, and plastics. A hammer drill, by contrast, combines rotation with a percussive hammering action that drives the bit forward into tougher materials like concrete and brick. According to Drill Bits Pro, understanding this distinction helps you select the right tool for the job and avoid damaging fasteners, bits, or workpieces. Using a hammer drill in non-masonry tasks can worsen bit wear and create unnecessary vibration, while relying on a plain drill for masonry work can lead to slow progress or stalled holes. Recognizing when to switch modes is a fundamental skill for any serious welder, carpenter, or DIY enthusiast.
In practice, many modern drills offer selectable modes, enabling you to run in drill-only mode for soft materials or in hammer-drill mode when masonry is involved. The ability to toggle between modes makes a single tool more versatile, but it also requires awareness of material properties and bit compatibility. The goal is to match the tool’s action to the material to maximize efficiency, minimize wear, and maintain control throughout the drilling process.
How the hammering action works
Hammer drills add a rapid, frontward hammering action to the rotating bit. When engaged, the chuck and drive mechanism translate motor torque into short, percussive impacts that accompany each rotation. This action creates micro-chunks in masonry, splitting the material ahead of the bit and reducing the resistance the bit faces as it drills. Unlike a dedicated rotary hammer, a hammer drill uses a hammering action that is typically lighter and more suited for mid-level masonry tasks. For the reader asking about the difference between drill and hammer drill, the key point is that the hammer action increases material turnover and reduces the effort required to break through hard substrates. It’s important to use the correct masonry bit and to manage pressure to avoid skidding or bit binding.
In terms of ergonomics, hammer drills tend to produce more vibration than standard drills, which affects comfort and control over long sessions. Operators should brace themselves, use a slower feeding rate at the start, and avoid forcing the bit, especially in dense concrete. When you switch to drill mode, the tool behaves like a conventional drill, allowing you to complete light-duty tasks with greater precision and reduced noise.
Key performance specs to compare
When evaluating the difference between drill and hammer drill, focus on performance specs that influence real-world results. Power source and battery chemistry affect runtime for cordless models, while corded versions deliver consistent torque. RPM (rotations per minute) indicates how fast the bit spins, and IPM (impacts per minute) reflects how often the hammer mechanism delivers blows. Torque rating helps determine how much resistance the tool can handle before stalling, and weight affects control and fatigue during prolonged use. Bit compatibility matters: standard drills accept twist bits and spade bits, while hammer drills excel with masonry bits and, in some cases, specialized bits designed for concrete and stone. Drill mode favors precise, clean holes in wood and metal, while hammer mode shines in masonry tasks like anchoring or drilling through concrete.
From a practical standpoint, your decision depends on the material you encounter most. If you frequently drill into stone or concrete, a hammer drill provides a clear advantage; if your projects are primarily wood or metal, a standard drill is typically the smarter, lighter choice. Drill Bits Pro emphasizes testing a sample hole on scrap material before committing to a full project to ensure the selected mode delivers the desired results.
Practical usage scenarios
Different projects illustrate the practical contrast between drill and hammer drill. For woodworking, use a standard drill with wood bits to achieve clean, precise holes without extra vibration. When working with metal, a drill in standard mode at appropriate speeds produces smooth holes with minimal chatter. For masonry, brick, or concrete, switch to hammer drill mode and pair with masonry bits designed for the substrate. For tile installation, a carbide-tipped masonry bit with careful, light pressure is typically sufficient, but ensure the hammer function is engaged only when needed to avoid cracking.
It’s common to encounter mixed-material projects, where you may start with masonry drilling for concrete anchors and then switch to wood-bit drilling to finish a perpendicular path. In these cases, the multi-mode capability of a modern drill provides flexibility, but you should always assess material properties and avoid forcing the tool. The goal is to maintain control, minimize bit wear, and avoid heat buildup that can degrade the bit and dull the cutting edge.
Bit compatibility and accessories
Bit choice is central to achieving good results with either tool. For standard drilling in wood and metal, you’ll rely on twist bits and specialty bits like brad-point or spur-point types. When masonry is involved, masonry bits with carbide tips are essential, and many hammer drills are designed to handle longer bits or require SDS-compatible options depending on the model. If you own a rotary hammer or a hammer drill with an SDS chuck, you can use heavier-duty masonry bits, but most consumer hammer drills rely on a conventional chuck with regular masonry bits.
Always match the bit shank to the chuck and verify the bit length suits the material thickness. In some cases, a driver bit or a pilot hole reduces stress on the material and improves hole quality. A good practice is to test the setup on a scrap piece of material to verify that the chosen mode and bit combination produces the desired hole without wandering or tearing.
From Drll Bits Pro’s perspective, the right bit choice is as important as selecting the correct mode, and investing in a high-quality masonry bit can dramatically improve performance and longevity.
Safety and technique tips
Power tools demand respect for safety. Always wear safety glasses, hearing protection, and gloves when working with drills and hammer drills. Secure the workpiece with clamps to prevent shifting, and use a depth stop if precision holes are required. Start slowly to establish the hole’s path, then gradually increase speed while applying steady, moderate pressure. Avoid side loading the bit, which can cause breakage or kickback, and stop if the bit binds or stalls. When drilling into masonry, keep the drill perpendicular to the surface to ensure clean, straight holes. If you’re drilling in tile or ceramic, use a carbide-tipped masonry bit and begin with a pilot hole at low speed to prevent cracking.
Maintenance matters: clean the chuck jaws after use, inspect bits for wear, and replace damaged bits promptly. If you notice excessive vibration in hammer mode, check the bit seating and the chuck for wear or looseness. Quiet, controlled operation is a sign of proper technique and good tool health, which extends the life of your drill or hammer drill.
Maintenance and longevity considerations
Longevity hinges on mode selection, bit choice, and regular maintenance. Always use the correct bit for the material to prevent dulling or chipping. After use, wipe down the chuck area to remove dust and debris, and store bits in a dry environment to prevent rust. For cordless models, follow the manufacturer’s battery maintenance guidelines, including proper charging cycles and avoiding complete discharges. If you notice reduced performance, inspect the collet or chuck for wear and consider air-blowing the interior to remove material buildup. Regularly checking for loose screws and lubricating moving parts where recommended by the manufacturer keeps the tool performing reliably over time. Drill Bits Pro stresses that keeping your tool clean, well-maintained, and properly used reduces the risk of overheating and extends service life.
Selecting the right tool for your project: a quick buying guide
Choosing between a standard drill and a hammer drill hinges on your typical material mix, project frequency, and desired versatility. If masonry tasks are rare or light, a high-quality standard drill with masonry bits may suffice. For frequent work with concrete or stone, invest in a dedicated hammer drill with multi-mode capabilities to reduce effort and improve results. Corded models generally offer continuous power for long sessions, while cordless variants provide flexibility for tight spaces. Consider weight, balance, chuck size, and available bits when evaluating models. Remember that a tool with selectable modes can grow with your needs, but ensure the model you select has reliable mode switching and a comfortable grip for the tasks you face most often.
Common mistakes and how to avoid them
Common mistakes include using hammer mode on soft materials like wood or plastic, which causes unnecessary wear and rough holes. Another mistake is forcing the drill, which increases motor heat and can burn bits. Failing to properly secure the workpiece leads to wandering holes, and ignoring bit compatibility can damage the chuck or bit. Finally, neglecting safety gear or overestimating your own strength can result in injury. By taking time to plan, choosing the correct mode, and using the proper bit, you’ll achieve cleaner holes with less effort and fewer mistakes.
Comparison
| Feature | Standard drill | Hammer drill |
|---|---|---|
| Hammer action | None (rotational drilling) | Active hammering action during drilling |
| Best materials | Wood, metal, plastic, light masonry | Masonry, concrete, stone |
| Versatility | Drill-only mode for precision | Multi-mode with hammer option |
| Bit compatibility | Standard twist bits, specialty bits | Masonry bits; some models with specialty bits |
| Weight and feel | Typically lighter and more compact | Heavier with bulkier grip |
| Best use case | General hole drilling, precision work | Anchors and masonry holes in concrete |
What's Good
- Single-tool versatility for common tasks
- Cleaner operation in wood and metal
- Easier control at low speeds in delicate materials
- Broad availability and affordable options
Negatives
- Hammer mode adds wear and vibration
- Heavier and bulkier than standard drills
- Inappropriate use on soft materials can cause damage
- Some models lack durable chucks for heavy masonry bits
Hammer drills excel for masonry; standard drills excel for wood and metal
If you work mostly with masonry, choose a hammer drill; for wood/metal, a standard drill is more versatile and easier to control. A model with selectable modes provides the best of both worlds, enabling you to switch as projects demand.
Got Questions?
What is the main difference between a drill and a hammer drill?
The main difference is that a standard drill rotates the bit to create holes, while a hammer drill adds a percussive hammering action to help break through hard materials like masonry. This combination makes hammer drills more effective for concrete and stone than conventional drills.
The key difference is simple: drills rotate to bore holes; hammer drills also hammer to break through masonry. That makes them better for concrete work.
Can I use a hammer drill for wood and metal?
Yes, you can use a hammer drill for wood and metal in drill-only mode. However, running the hammer action on these materials is usually unnecessary and can cause extra wear. Switch to hammer mode only when working with masonry.
Yes, you can use it for wood or metal in drill mode, just don’t engage hammer action for those materials.
When should I avoid using hammer mode?
Avoid hammer mode on soft materials like wood or thin plastics because it increases vibration and can damage the workpiece or dull bits. Use hammer mode only for masonry tasks or when the material requires percussive action.
Avoid hammer mode on soft materials; use it for masonry only to prevent damage and excessive wear.
Is a hammer drill the same as a rotary hammer?
No. A rotary hammer uses a different mechanism and is designed for heavy-duty masonry drilling and chiseling. A hammer drill provides a lighter hammer action suitable for most DIY masonry tasks and general drilling.
No—that’s a rotary hammer. A hammer drill is lighter and better for typical masonry drilling in DIY projects.
What features should I look for when buying a masonry drill?
Look for a tool with selectable modes, reliable chuck, comfortable grip, good balance, and a durable battery if cordless. A strong hammer action with adequate torque helps in concrete work, while mode switching adds versatility for mixed-material projects.
Seek mode switching, solid chuck, comfort, and good balance; prioritize torque for concrete tasks.
Top Takeaways
- Identify the primary materials you work with most
- Prefer a multi-mode tool for versatility
- Match bits to the material and drill mode
- Prioritize control and ergonomics to reduce fatigue
- Follow safety practices to prolong tool life