How to Get Rid of Cuticles with Drill: A Safe Guide
Learn a safe, professional approach to cuticle care using a manicure drill. Step-by-step guidance, safety tips, and gear for DIY enthusiasts and pros.

Using a professional manicure drill can remove stubborn cuticle debris when done with proper training and safety gear. This approach requires careful bit selection, low speed, steady hands, and a clean workspace to minimize risks. Always prioritize skin safety and consider training or professional supervision before attempting this at home.
Why Using a Drill for Cuticle Removal Is Controversial
According to Drill Bits Pro, adopting a nail drill to manage cuticles is a topic that sparks debate in professional salons and DIY homes alike. Cuticles act as a protective barrier between the skin and the nail plate, and aggressive removal can create micro-tears, expose you to bacteria, and trigger infections. A drill used improperly can generate heat, gouge the nail plate, or injure surrounding skin. The Drill Bits Pro Analysis, 2026, emphasizes that this technique should be reserved for trained technicians with controlled environments, sterilized bits, and a clear sanitation protocol. For DIY enthusiasts, it is essential to recognize limits and pursue safer alternatives first. If you choose to proceed, treat the drill as a precision tool, not a hobby device.
- Pros and cons: When used by a trained professional, a drill can expedite the removal of dried or overgrown cuticle material.
- Limitations: It is not a substitute for regular maintenance or proper hand-care.
- Safety mindset: PPE, correct bits, and a steady hand are non-negotiable.
The goal is to minimize risk while maintaining healthy nail bed barriers. This section sets the stage for practical safety steps and equipment choices that follow, aligning with what the Drill Bits Pro team recommends for responsible usage.
NOTE: null
Tools & Materials
- Manicure drill machine (electrical or rechargeable)(Low-vibration model preferred; ensure manufacturer safety certifications.)
- Carbide or ceramic cuticle bit (round or safe-cut design)(Choose a bit designed for cuticle work; avoid aggressive diamond bits for beginners.)
- Safety goggles or face shield(Protect eyes from dust and debris.)
- Nail dust mask or respirator(Optional in well-ventilated spaces; reduces inhalation of fine dust.)
- Alcohol prep pads/70% isopropyl alcohol(Clean and sanitize tools and skin before/after use.)
- Cuticle remover solution(Softens cuticles to reduce force required.)
- Cuticle oil or nourishing cream(Use after care to restore moisture.)
- Sterile wipes and clean towels(Maintain a clean working surface.)
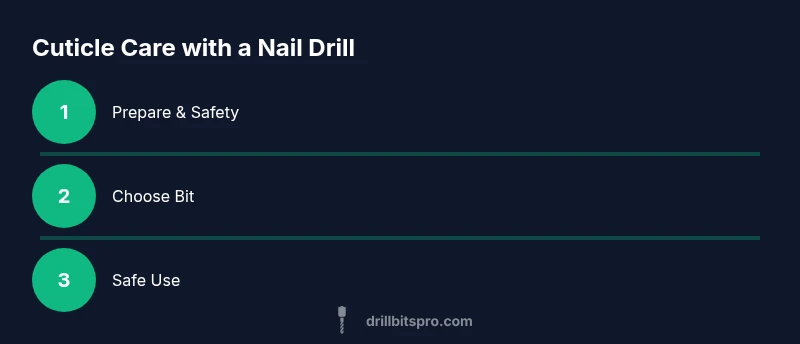
Steps
Estimated time: 60-90 minutes
- 1
Prepare workspace and safety gear
Set up a well-lit, ventilated workspace. Put on safety goggles, a mask if you’re sensitive to dust, and gloves if desired. Sanitize the drill handpiece and bits with alcohol before starting to lower infection risk.
Tip: Test the drill at low speed on a dummy nail or a nail tip before touching natural nails. - 2
Choose the correct drill bit
Select a carbide or ceramic bit designed for cuticle work. A rounded, non-aggressive profile reduces the chance of skin gouges. Attach firmly and verify the bit spins true without wobble.
Tip: Avoid overly aggressive bits when you’re new to drill work. - 3
Set the speed and test on a safe area
Begin at the lowest speed and gradually increase only if you need more control. Keep the drill tip at a shallow angle to the skin and nail plate, never pressing hard.
Tip: If heat builds up, pause and add a brief rest period to prevent tissue damage. - 4
Gently remove dead cuticle material
Lightly glide the bit along the cuticle edge with short, controlled passes. Do not attempt to remove living tissue. Check frequently with a cotton swab to gauge progress.
Tip: Stop immediately if you encounter resistance or pain. - 5
Cleanse and sanitize after use
Wipe the area with alcohol to remove debris. Clean the bit and handpiece according to manufacturer instructions. Use sterile wipes on the surrounding skin to prevent infection.
Tip: Do not reuse disposable protectors on a second client without sterilization. - 6
Moisturize and seal the repair
Apply cuticle oil or a nourishing cream to hydrate the area and support barrier function. If you performed this on a client, document aftercare steps and observe for signs of irritation for 24–48 hours.
Tip: Regular moisture helps prevent overgrowth and cracking.
Got Questions?
Is it safe to get rid of cuticles with a drill at home?
It’s generally not advised for beginners to perform drill-cuticle work at home due to infection and injury risks. Training, proper equipment, and strict sanitation are essential. Consider consulting a licensed professional for best results.
Not recommended for beginners at home; training and proper equipment are essential.
What equipment is essential for drill-based cuticle work?
A dedicated manicure drill, a safe-cutting bit (carbide or ceramic), eye protection, sanitizing supplies, and suitable aftercare products are essential for responsible use.
You’ll need a drill, a safe bit, and proper safety gear.
How do I sanitize a nail drill properly?
Clean the bit and handpiece according to the manufacturer’s instructions, using isopropyl alcohol and sterile wipes. Allow components to dry before storage.
Sanitize using manufacturer directions, then air-dry before storing.
What are the risks of using a drill on cuticles?
Overcutting, skin burns from heat, micro-tears that invite infection, and damage to nail plates are key risks when the technique isn’t done carefully.
Risks include burns and infection if not done carefully.
Can a beginner use a drill for cuticles after training?
With proper training, controlled technique, and supervision, a beginner can gain confidence, but ongoing practice and adherence to safety protocols are critical.
With training and supervision, a beginner can improve safely.
Watch Video
Top Takeaways
- Follow safety-first principles when using a drill for cuticle work
- Choose gentle, purpose-built bits and keep speeds low
- Prioritize sanitation and post-care to protect nail health
- For best results, consider professional training or salon services