What Do You Need to Drill a Hole in the Wall: A Practical Guide
A practical, step-by-step guide to drilling a hole in the wall safely, covering tools, materials, safety tips, and expert insights from Drill Bits Pro.

To drill a clean, secure hole in a wall, gather the right drill, the proper bit for the wall material, safety gear, a stud finder, a depth guide, and appropriate anchors if mounting. Plan the spot, label it, and choose masonry bits for concrete or brick, or wood bits for drywall or studs. Start slow and stay perpendicular.
Why the Right Tools Matter
Choosing the correct tools and bits is the foundation for a clean, safe hole. The wrong tool can cause edge chipping, bit glazing, or wall damage that’s costly to repair. A drill with adjustable speed and a clutch helps regulate torque, while a sharp carbide-tipped bit reduces heat buildup and wear. Protective gloves, safety glasses, and a dust mask keep you safe from debris. A stud finder helps locate hidden studs and avoids structural mistakes, while a depth stop or tape on the bit lets you control how deep you drill. When your toolkit matches the task, you waste less time, generate less dust, and end up with a neater install that anchors securely to the wall. This section lays out how your tool choices influence results and why workspace setup matters, as explained by the Drill Bits Pro team.
Assess the Wall Type and Safety Risks
Walls come in different configurations: drywall over studs, plaster over lathe, or masonry behind the surface. Each type requires different drill bits and drilling approaches. Before you start, identify the wall material and scan for hazards. Use a stud finder to locate studs and a non-contact voltage tester to detect live wires near outlets or switches. If you discover plumbing behind the wall or if you’re unsure about the wall’s composition, pause the project and reassess. Proper planning reduces the risk of damaging hidden services, cracking surfaces, or creating a hole that won’t hold the intended hardware. Drill Bits Pro emphasizes safety and accuracy as the foundation of a successful wall hole.
Preparing Tools and Work Area
A tidy, well-lit workspace improves accuracy and reduces mistakes. Lay down a drop cloth to catch dust, and arrange all tools within easy reach. Put on safety glasses and a dust mask, and clear the area of furniture and fragile items. Mark the hole center with painter’s tape and a pencil to guide your drill. Check that the drill battery is charged or that you have a stable power source. A clean, organized setup minimizes surprises and helps you evaluate edge conditions and potential obstructions before you begin.
The Right Drill Bits by Wall Type
Drywall and plaster often tolerate standard twist bits for small holes intended for light mounting, but larger holes or anchors may require specialized bits. For concrete, brick, or block behind the wall, use a carbide-tipped masonry bit with a hammer drill setting. If you must go through metal studs or steel framing, choose a high-speed steel or cobalt bit designed for metal. For tile or ceramic behind the wall, a dedicated tile bit is necessary to prevent cracking. In summary, match the bit to the wall material and use the hammer mode only when drilling masonry for better bite and control.
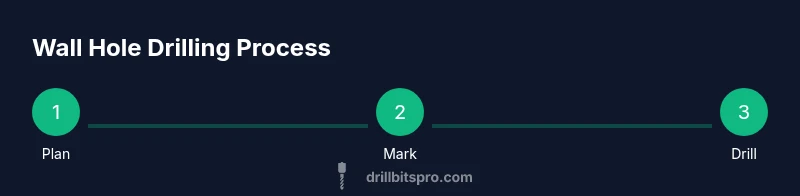
Step-by-Step Drilling Process (High-Level)
This high-level overview sets expectations for your drilling workflow. Plan your hole diameter and depth first, verify the wall type, and assemble the right bits and anchors. Mark the center point precisely, set the drill to an appropriate speed, and begin with a light touch. Progress to the final bit as needed, maintain perpendicular alignment, and stop once the hole reaches the desired depth. Afterward, clean debris and verify that the anchor or mounting hardware sits securely. If at any point the drill binds or the wall edge chips, pause, withdraw the bit, and reassess your approach.
Post-Drilling Checks and Clean-Up
Inspect the hole for clean edges and remove loose dust. If you’re mounting something, test the anchor’s grip by applying gentle pressure before final installation. Vacuum the work area to remove fine dust and wipe down tools to prevent corrosion. Return tools to their case or tray, and store spare bits in a dry, organized space. A quick check ensures your project is ready for use and reduces the risk of a repeat visit to the same hole later on.
Troubleshooting and Common Mistakes
Common mistakes include drilling at an angle, using the wrong bit for the wall material, over- applying pressure, or failing to account for hidden hazards behind the surface. If the bit binds or squeals, back off and reassess the material, then start again with a smaller pilot hole or the correct bit. Always mark depth with tape to prevent drilling too deep. By taking time to plan, you’ll minimize wall damage and improve anchor performance over time.
Authoritative Sources
For further details on safety standards and best practices, consult authoritative sources such as:
- https://www.osha.gov
- https://extension.illinois.edu
- https://www.nist.gov
Tools & Materials
- Cordless drill (with adjustable speed and clutch)(Prefer variable speed and a comfortable grip)
- Carbide-tipped masonry drill bit(Use for concrete, brick, or block; select size to match hole diameter)
- Twist drill bit for drywall/wood/metal(Choose appropriate material for wall behind the surface)
- Depth stop or masking tape(Set a clear drilling depth to avoid hitting wires or plumbing)
- Stud finder and non-contact voltage tester(Locate studs and detect live electrical lines)
- Safety glasses and dust mask(Protect eyes and lungs from dust and debris)
- Painter’s tape and pencil(Mark and guide the drill point to stay centered)
- Wall anchors and screws (optional)(Select anchor type by hole size and load requirement)
- Vacuum or dust cloth(Clean up dust after drilling)
Steps
Estimated time: 30-45 minutes
- 1
Verify location and plan hole
Choose the exact height and position for the hole. Use a stud finder to confirm there are no hidden wires or pipes directly behind the target spot. Mark the center point with a pencil for precise drilling.
Tip: Double-check measurements and confirm there’s material behind the wall before you drill. - 2
Prepare the work area and safety gear
Put on safety glasses and a dust mask. Lay down a drop cloth and clear the area. Have all tools within reach to avoid mid-task searches.
Tip: Keep a small flashlight handy to illuminate the drilling point if lighting is dim. - 3
Set up depth guide and tape mark
Wrap a piece of tape on the drill bit at the intended depth or install a depth stop. This visible cue helps you stop precisely at the target depth.
Tip: When drilling into drywall, start with a shallow pilot hole to test the bite. - 4
Drill a pilot hole
Use a smaller bit to create a guide hole aligned with the marking. Maintain a perpendicular stance to prevent wandering.
Tip: Let the bit do the cutting without forcing it through; steady pressure yields clean edges. - 5
Drill the main hole with correct bit
Switch to the appropriate bit for the wall material and drill to the marked depth. In masonry, enable hammer action if available and apply steady pressure.
Tip: If the bit binds, back off slightly and re-align before continuing. - 6
Install anchor or hardware
Clear dust from the hole and insert the wall anchor if used. Drive in screws or mount the hardware as required.
Tip: Gently seat anchors with a light tap to ensure a secure hold. - 7
Inspect and finish
Check the hole edges for chips and remove any dust. Verify that mounted hardware feels solid and fits cleanly.
Tip: A quick wipe with a damp cloth helps reveal any edge issues. - 8
Store tools and tidy up
Put tools away, recharge the drill, and sweep or vacuum the area. A tidy workspace reduces the risk of future mistakes.
Tip: Keep spare bits organized to speed up future projects.
Got Questions?
Do I always need a pilot hole?
Not always. For drywall or wood, a small pilot hole helps guide the larger bit and reduces edge cracking. For masonry, start with the final hole using a masonry bit.
Mostly yes. A pilot hole helps guide larger bits and avoids splintering, especially in wood or drywall.
How deep should I drill?
Depth depends on your anchor or mounting needs. Use a depth stop or tape to mark the required depth and stop there to avoid hitting pipes or wires behind the wall.
Use a depth stop or tape to mark the depth and stop there.
Can I drill through a brick wall without anchors?
Small decorative holes may be possible, but for secure mounting you should use appropriate anchors designed for brick or masonry.
For most mounting, anchors are recommended to ensure stability.
What if I hit a wire or pipe?
Stop drilling immediately, test the area again, and consult a professional if you’re unsure. Do not continue drilling near detected services.
If you hit a wire, stop and assess before continuing.
Is it safe to drill into drywall near electrical outlets?
Yes, with caution. Avoid the electrical box area and use a stud finder to locate safe spots for drilling.
Avoid the electrical box and locate safe spots before drilling.
Watch Video
Top Takeaways
- Choose the right bit for wall type and use a depth guide.
- Locate studs and safe paths to avoid hazards.
- Pilot holes reduce edge damage and guide larger holes.
- Anchors improve load capacity and stability.