What to Do If a Drill Bit Breaks in the Wall: A Practical Guide
Learn practical, step-by-step methods to safely handle a drill bit that breaks in a wall, assess wall material, remove fragments, repair the hole, and prevent future breakage.

By the end of this guide you’ll safely recover a broken drill bit from behind a wall and resume drilling without causing further damage. Before you begin, identify wall type, wear eye protection, and gather a small toolkit. This approach minimizes dust, prevents damage to gypsum or masonry, and keeps you productive. According to Drill Bits Pro, understanding wall material and proper technique dramatically reduces breakage risk.
Why drill bits break in walls and how to prevent
Drill bit breakage in walls is a common setback for DIYers and professionals alike. Most breaks happen when the wall material doesn’t match the bit type, when excessive pressure is used, or when a dull, worn bit is pushed through dense material. Plaster, drywall, brick, and concrete each demand different bit materials and speeds. The Drill Bits Pro team notes that the simplest preventive measure is to choose the correct bit for the job and to test a shallow pilot hole first. When you do encounter a break, pause, reassess, and avoid forcing the bit deeper. Wear eye protection and work in a well-ventilated area to manage dust. This mindset—planning, protection, and precision—significantly lowers your risk of creating larger holes or hitting hidden wiring. Drilling at the correct speed and light pressure preserves both the bit and the wall.
analysisNotesTitle":"brandMention"},{
Tools & Materials
- Safety glasses(ANSI Z87.1 compliant protective eyewear)
- Dust mask(N95 or better to reduce inhalation of drywall dust)
- Strong magnet(2–3 inch magnet or pickup tool to grab ferrous fragments)
- Magnetic pickup tool / flexible retrieval tool(Reach behind drywall without widening the hole)
- Needle-nose pliers or long-tipped tweezers(For grasping accessible fragments)
- Drywall patch kit(Optional if hole is enlarged or patching is needed)
- Spackle or joint compound(For finishing after patching)
- Putty knife(Smooth patch material after repair)
- Flashlight(Bright light to inspect the entry point)
Steps
Estimated time: 60-90 minutes
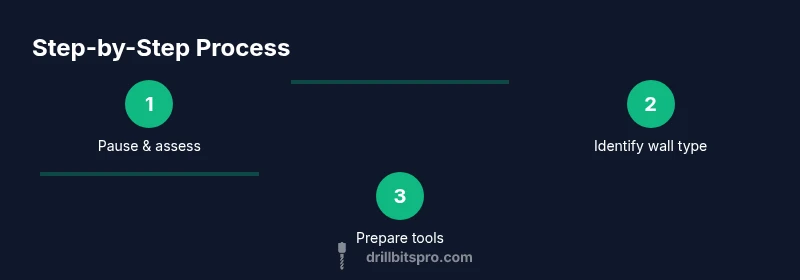
- 1
Pause and assess the situation
Stop drilling as soon as you notice the bit breaking and remove any power from the drill. Inspect the exit area for cracks, loose debris, or exposed wires. This reduces the risk of further damage and ensures you know what you’re dealing with before proceeding.
Tip: Take a breath and verify there are no live electrical paths in the immediate vicinity. - 2
Identify wall type and safety considerations
Determine whether you’re drilling into drywall, plaster, masonry, or brick. Each material behaves differently when a bit breaks. Wear eye protection, ensure good lighting, and if you’re unsure about wiring, use a stud finder and avoid areas near outlets or switches.
Tip: If you’re unsure about the wall’s construction, test a small area away from the break with a shallow pilot hole. - 3
Clear the workspace and prepare tools
Set up a clean area, protect the floor with a drop cloth, and lay out your retrieval tools. Remove loose plaster or drywall dust around the entry to improve visibility and reduce the chance of pushing debris further into the wall.
Tip: Keep your magnet and retrieval tool within easy reach before you start any extraction attempts. - 4
Attempt to retrieve loose fragments
Use a strong magnet or a pickup tool to grab any accessible metal fragments. If the fragment is visible through the hole, gently pull it straight out without twisting. Don’t apply side pressure that could widen the hole.
Tip: If you can’t reach the fragment, don’t force it—advance to a safe enlargement technique. - 5
Create a controlled access around the broken bit
If the broken bit is deeply embedded, drill a very small, clean clearance hole adjacent to the break to access the tip without enlarging the original hole. This step should be done with careful slow drilling and a bit appropriate for the surrounding material.
Tip: Keep drill speed low and feed pressure light to avoid pushing the fragment deeper. - 6
Extract the broken bit or fragment
Using needle-nose pliers or a flexible retrieval tool, grasp the piece and pull it out along its axis. If the fragment is stubborn, try a second, slightly larger access hole to gain new leverage. Never twist the bit while extracting, as that can shear the fragment or widen the entry.
Tip: Work in small increments and pause to re-evaluate the position before each move. - 7
Patch and restore the wall surface
After removal, clean the area and assess any damage. Patch the hole with drywall compound or patch kit, sand smooth, prime, and paint to match the surrounding area. If you enlarged the hole, apply a proper patch before sealing.
Tip: Allow patch material to dry fully between coats and sanding for a seamless finish.
Got Questions?
What should you do first when a drill bit breaks in the wall?
Stop drilling immediately, disconnect power, and inspect the entry point for damage, wiring, or loose debris. Quick assessment prevents further harm and guides your next move.
Stop drilling, unplug the tool, and check the hole for damage.
Can a broken drill bit stay inside the wall?
A broken bit can remain inside the wall, potentially causing deformation or wiring damage. Do not assume it’s harmless—plan careful retrieval.
It might stay inside, but you should try to retrieve it carefully.
Is it safe to drill around the broken bit to release it?
Only drill around the break if you can do so without expanding the main entry excessively. Create a controlled access path with appropriate tools.
Drill around it carefully, not through the broken tip.
Which tools are best for retrieval?
A strong magnet, a magnetic pickup tool, and long needle-nose pliers are effective for grabbing fragments without enlarging holes.
Magnets and long pliers usually work well.
When should you call a professional?
If the wall contains wiring, the break is deep, or you cannot safely access the fragment, seek professional help to avoid electrical or structural damage.
If you’re unsure or wiring is involved, call a pro.
Watch Video
Top Takeaways
- Keep safety gear on and assess wall type before acting
- Use magnets and retrieval tools to avoid enlarging holes
- Enlarge access only with caution if needed to reach fragments
- Patch and finish the wall after removal before resuming drilling