What to Do If You Don't Have a Drill
Discover practical, budget-friendly ways to make holes without a drill. Borrow, rent, or use hand tools—plus safety tips and step-by-step guidance for DIY projects.

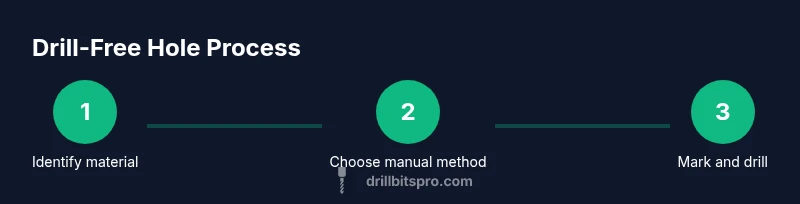
If you don’t own a drill, you can still tackle many jobs by borrowing or renting one, or using hands-on alternatives. Start by identifying your hole size and material, choose a manual method (hand drill, brace, awl, or screw and pilot hole), and plan for safety. This guide offers practical, budget-friendly options and step-by-step tips.
Why a Drill-Free Approach Makes Sense
For many DIY tasks, owning a power drill isn’t strictly necessary. You can save money, reduce clutter, and still achieve precise results by using manual methods, renting equipment, or borrowing a tool when you need it. A drill-free approach also forces you to slow down and plan, which often leads to cleaner holes and fewer mistakes. The Drill Bits Pro team notes that for occasional projects, a well-chosen manual technique or rental option can be faster to start and more cost-effective than buying a new power tool. When you prepare properly, you’ll avoid surprises and stay productive. This mindset works well for hanging lightweight shelves, assembling frames, mounting hardware, or drilling pilot holes for screws. The emphasis is on measurement, control, and working with the material rather than forcing the tool to do all the work. By considering options before you drill, you empower yourself to complete projects more efficiently and with less equipment.
Assess Your Project: Size, Material, and Time
Before selecting a method, clearly define the hole size and the material you’ll work with. Wood responds well to braced hand drilling, while metal often requires a center punch and a precise starting point. Masonry demands different handling and sometimes a specialized manual bit. A pilot hole is typically worth the extra step—it reduces wood splitting, prevents bit wander, and helps alignment. Consider the surface finish you want: rough openings can be acceptable for some projects, but furniture or cabinetry generally benefits from clean edges. The time you save by planning ahead can be substantial: estimate the number of holes, test on scrap, and batch your actions to minimize tool changes. Drill-free work shines when you bring the right tool for the job and maintain patient, steady progress. Drill Bits Pro’s research stresses that correct preparation often trims overall project duration and improves final fit and function.
Borrowing, Renting, or Buying: Practical Options
If you don’t own a drill, there are cost-effective routes to get the job done. Borrow from a neighbor or friend, search a local tool library, or rent from a hardware store for a weekend. Each route has benefits: borrowing is free but depends on availability, renting gives access to newer or specialized bits, and buying a basic manual tool provides long-term flexibility for future drill-free tasks. When evaluating options, consider the frequency of use, the expected hole size, and whether you’ll need additional bits or accessories. For most small projects, a hand drill or brace plus a simple center punch can cover a surprising variety of tasks. With careful planning, you can complete your project without owning a conventional drill while still achieving reliable results.
Manual Alternatives: Hand Drills, Braces, and Punches
Key manual approaches include a hand drill, a brace, a center punch, and sharp bits suitable for the material. A brace provides smooth, controlled rotation and can handle larger holes in wood; a hand drill is more compact and convenient for tight spaces. A center punch creates a precise starting point, helping prevent wander on metal and plastic. For masonry, you may rely on a sharp point and a selected manual bit, but progress will be slower and you’ll need patience. Clamp the workpiece firmly to prevent slips and maintain a perpendicular alignment for accuracy. Start with a small pilot hole and gently increase in stages to reach the final diameter. Keep spare scrap pieces to verify alignment before drilling into the final piece.
Safety and Accuracy Without Power Tools
Safety comes first when drilling by hand. Always wear eye protection, gloves, and a dust mask as appropriate. Secure the workpiece with clamps or a vise, and keep your free hand away from the cutting path. Use sharp bits and maintain a steady, moderate pace; forcing a bit can cause breakage or injury. Marking the exact hole location with a ruler and square improves accuracy and reduces the chance of misalignment. Practice on scrap material to calibrate your technique before working on the final piece. If you feel tired or unstable, take a break and reassess your approach. Clean your tools after use to keep them sharp and ready for the next drill-free task. This discipline aligns with Drill Bits Pro guidance on practical, scalable DIY drilling.
Prepare for the Next Project: Build a Minimal Drill-Free Toolkit
Set yourself up for success by assembling a compact drill-free toolkit you actually use. Include a hand drill or brace, a small set of sharp bits, a center punch, clamps, a measuring tool, a pencil for layout, safety glasses, and a scrap material stock for quick testing. Keep these items organized in a dedicated box or bag so you can grab them quickly. Maintain a habit of testing on scrap before committing to the final piece, and store spare bits in their case to prevent loss. This lightweight setup helps you complete many common tasks—like hanging, aligning, or pre-drilling screws—without owning a power drill. The Drill Bits Pro team emphasizes that proactive preparation reduces frustration and shortens project timelines.
Tools & Materials
- Tape measure(For measuring hole diameter and layout)
- Pencil or marker(For marking drill points)
- Brass center punch(Helps prevent wandering on metal)
- Hand drill or brace(Best option when no power drill available)
- Sharp drill bits (hand-powered or manual)(Choose appropriate material (wood, metal, masonry))
- Clamp or vise(Keeps workpiece stable)
- Safety glasses(Eye protection)
- Hammer(For bracing or driving punch)
Steps
Estimated time: 30-60 minutes
- 1
Assess project and material
Identify hole size and surface material; decide if you’ll use wood, metal, or masonry techniques. This initial assessment sets the tool choice and approach.
Tip: Always confirm measurements before starting. - 2
Choose manual method
Select the most effective manual option based on material and hole size—brace for larger wood holes, center punch for metal, or a hand drill for light tasks.
Tip: Match method to material and hole diameter. - 3
Mark the center point
Mark the exact spot with a ruler and pencil; use a center punch if available to prevent wandering.
Tip: Double-check location from multiple directions. - 4
Drill the pilot hole
Begin with a small pilot hole using the chosen manual tool; keep the tool perpendicular and maintain a steady pace.
Tip: Keep the bit sharp and don’t rush. - 5
Enlarge to final size
Progressively widen the hole with appropriate bits, applying steady, even pressure and clearing debris as you go.
Tip: Withdraw the bit to clear chips regularly. - 6
Finish and inspect
Inspect hole alignment and edge quality; rework in small increments if needed. Deburr edges for a clean finish.
Tip: Test fit with the final component before committing.
Got Questions?
What is the easiest method to make holes without a drill?
The easiest method depends on material: for wood, a brace or hand drill; for metal or masonry, use a center punch and a sharp hand drill or punch. Practice on scrap to confirm control and fit.
Use a brace or hand drill for wood, and a center punch with a sharp hand bit for metal or masonry—practice on scrap first.
Can I borrow or rent a drill instead of buying one?
Yes. Check neighbors, tool libraries, or rental shops; inspect the tool and wear PPE. This is often cost-effective for occasional projects.
Yes—borrowing or renting is a smart option for infrequent needs.
How accurate can holes be without power tools?
Accuracy depends on technique and material. Use layout marks, guides, and a slow, steady hand to achieve clean pilot holes and aligned final holes.
With careful marking and a steady hand, you can achieve good accuracy.
Is it safe to use hand tools for masonry holes?
Masonry requires carbide-tipped bits and proper pilot holes; hand methods are slower and can cause bit binding. Wear safety gear and work slowly.
Hand masonry drilling can be done but is slow and requires care and PPE.
When should I consider renting or borrowing instead of buying?
For a one-off project or infrequent use, renting or borrowing is cost-effective; evaluate expected use and cost. If you expect many projects, buying may be justified.
If you only need it occasionally, renting is often smarter.
Watch Video
Top Takeaways
- Plan before you drill to avoid rework
- Choose a manual method that matches material and hole size
- Safety gear is non-negotiable for drill-free work
- Mark clearly and test on scrap before final work