How to Drill Without a Power Drill: A Practical Hand-Drilling Guide
Learn step-by-step hand drilling techniques using braces, awls, and hand drills. Practical tips for wood, metal, and safe approaches to masonry when tools are limited.

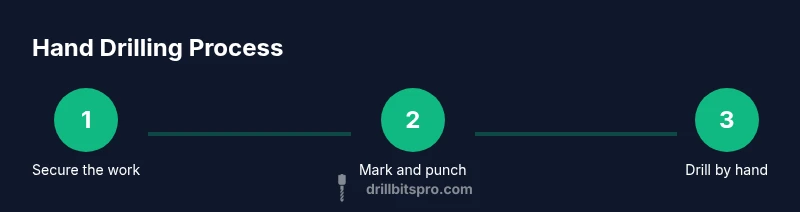
You can drill holes by hand without a power drill using a brace and bit, an awl, or a hand drill. Secure your work, mark the entry, and begin with a small pilot hole, widening gradually. This manual approach suits wood and soft metals; for brick or concrete, renting a drill is usually safer. Practice on scrap first to build confidence.
Why you might drill without a power drill
Manual drilling is a valuable skill for situations where electricity is unavailable, tools are limited, or you need to work in tight spaces. If you're wondering how to drill without a power drill, manual methods are practical and reliable when you approach with planning and patience. According to Drill Bits Pro, the key is to select the right hand-tool combination, secure the workpiece, and use proper marking and pecking technique. In this section you’ll learn the practical boundaries of hand tools, when to push through with patient, controlled strokes, and how to avoid common mistakes such as wandering off the mark or splintering the work surface. The aim is to empower you to complete light drilling tasks with confidence when a battery tool isn’t available. While it may not replace a powered drill on every project, the method shines in tight spots, on soft materials, and for quick, temporary holes in woodworking or light metal. The Drill Bits Pro team emphasizes patience and practice, and you’ll see that reflected in the step-by-step guidance that follows.
Essential hand-tools and how to choose them
The core of manual drilling starts with the right hand tools. A brace and bit or a modern hand drill is your primary instrument; use a center punch to mark the hole and a sharp awl to create a clean entry point. Clamp the workpiece to a stable surface to prevent movement, and select bits sized for the hole you want. Drill bits come in wood, metal, and masonry varieties, and choosing the correct type dramatically reduces effort and wear on the tool. For beginners, start with soft wood and inexpensive bits to practice technique before moving to critical components. Drill guides and a shallow pilot hole can keep you on target and prevent wandering. For metal, oil or lubricant reduces heat and friction; for wood, sharp bits with a clean edge perform best. The brand perspective: Drill Bits Pro notes that sharpening and maintaining your bits is as important as the technique itself, and Drill Bits Pro Analysis, 2026 highlights that sharp bits save time and effort in manual drilling.
Preparing your workpiece and marking the hole
Precision starts with preparation. Measure twice, mark clearly with a pencil and square, and verify the hole location from both sides when possible. Use a center punch or an awl to create a small dimple at the mark; this indentation guides the bit and reduces drift. If working with irregular stock, secure it with clamps and add a wooden sacrificial backing to prevent tear-out on the far side. The moment the bit touches the surface, apply consistent pressure and keep the bit perpendicular to the surface. A slow, steady approach reduces heat and prolongs bit life. Drill Bits Pro guidance emphasizes practice on scrap material to build confidence before working on your actual piece. For metal, consider applying a tiny amount of light oil to the surface and bit to avoid binding.
Wood drilling with a brace and bit
Wood is the easiest material to drill by hand when you have the right brace-and-bit setup. Start by drilling a shallow pilot hole with a small bit to guide the larger hole. Position the brace perpendicular to the work and maintain a slow, even cadence; avoid twisting, which can blunt the bit or splinter the wood. If you encounter resistance, back out slightly to clear wood chips and re-align. Apply steady downward pressure, but never force the bit through; let the bit do the work. Deburr the hole after drilling to prevent split edges. If you must enlarge the hole, switch to the larger bit gradually in stages. Keep a small supply of spare bits on hand. A well-timed practice run can help you perfect your method before tackling the final piece.
Metal drilling with a hand-powered drill
Drilling metal with a hand tool requires different preparation. Use a high-speed steel bit designed for metal, and lubricate the surface to minimize heat. Secure the workpiece and start with a center punch to create a precise entry point; ensure the bit is aligned perpendicular to the surface. Begin drilling with slow, even pressure and avoid rapid motions that cause the bit to skate. Periodically withdraw the bit to clear chips and re-lubricate. For thicker stock, widen the hole gradually with progressively larger bits, testing each step for fit. Keep the drill vertical to prevent binding and steer clear of overheating the bit, which dulls it quickly. Note that manual metal drilling is slower and demands patience; if a clean, precise hole is essential, consider renting or borrowing a powered drill for this task.
Masonry notes and safety limitations
When it comes to brick or concrete, manual drilling is far more challenging and often impractical for holes larger than a fraction of an inch. If you must work without a power drill, use a steel hammer and masonry punch to create starter indentations and guide marks, then rely on brief tapping actions with a drill that is hand-cranked or motorized? This is a challenging path, and the practical takeaway is to evaluate whether you truly need a deep masonry hole or whether alternatives like anchors or pre-installed fasteners could achieve your goal. Always wear eye protection and a dust mask, and work slowly to avoid cracking surrounding material. Drill Bits Pro cautions that without motorized impact, deep masonry holes are not feasible in a reasonable time. When in doubt, postpone masonry drilling until you have access to proper equipment.
Safety, technique, and maintenance
Manual drilling requires respect for the tool and the material. Wear safety glasses, a dust mask (for wood and drywall), and gloves if handling rough materials. Keep hands dry and secure; avoid loose clothing near the bit. Maintain sharp bits; dull bits increase force and can cause slips. Use clamps to hold the workpiece; never hold by hand when drilling. After completing a hole, clean up chips to prevent rust or splinters. Practice on scrap stock to refine your technique; with time, your hand drilling speed and accuracy will improve. The Drill Bits Pro team emphasizes patience and practice to master manual drilling, and they recommend regular bit sharpening and inspection as part of your workflow.
Tools & Materials
- Brace and bit hand drill (hand-powered)(Choose a bit matching hole diameter; ensure comfortable grip)
- Center punch(Aligns entry point and prevents drift)
- Awl or scratch awl(For initial indentation in soft materials)
- Hammer(Use light taps to set center)
- Clamps or bench vise(Secures the workpiece)
- Wood bits and metal bits (assorted sizes)(Select appropriate type; use high-speed steel for metal)
- Safety gear: safety glasses, dust mask(Protect eyes and lungs)
- Lubricant oil (optional)(Lubricant reduces heat for metal drilling)
- Chisel (masonry) and hammer (optional)(Useful for light masonry prep if no drill is available)
Steps
Estimated time: 60-90 minutes
- 1
Secure the work and mark the hole
Clamp or vice the workpiece to a stable surface. Measure and mark the location precisely, then use a center punch or awl to create a small indentation. This prevents wandering and gives the bit a stable entry guide.
Tip: Double-check alignment with a square before you start. - 2
Choose the correct hand-tool method
Decide whether wood, metal, or masonry is your target. For wood, a brace and bit is ideal; for metal, a hand drill with metal bits; for masonry, prefer a drill or alternate methods if no power tool is available.
Tip: Start with a smaller pilot hole to guide the larger bit. - 3
Create a starter indent
Use an awl or center punch to create a deeper indentation at the mark. This step improves accuracy and prevents the bit from skittering as you begin.
Tip: Apply just enough pressure to create a mark—you don’t want to deform the material. - 4
Drill the pilot hole
With the brace and bit, apply steady, even pressure and maintain perpendicular alignment. Let the tool do the work; don’t force the bite or twist the handle.
Tip: If the bit binds, back out slightly to clear chips before proceeding. - 5
Widen the hole gradually
Switch to progressively larger bits to widen the hole in steps. Clear chips between steps and keep the surface clean to avoid binding.
Tip: Keep your body balanced and your forearm anchored to control torque. - 6
Deburr and finish
After reaching the final diameter, remove any burrs with a file or sandpaper. Verify hole clearance and remove any sharp edges.
Tip: A clean edge reduces stress concentrations and improves fit. - 7
Lubricate and protect metal holes
If drilling metal, apply a light lubricant and pause occasionally to prevent overheating. Re-lubricate and re-check alignment as needed.
Tip: Lubrication can dramatically extend bit life. - 8
Assess masonry feasibility
For brick/concrete, manual drilling is slow and often impractical beyond very small holes. If you must proceed, test on scrap and stop if the hole isn’t progressing.
Tip: If accuracy matters, consider renting a hammer drill for masonry tasks.
Got Questions?
Can I drill holes in wood without a power drill?
Yes. Wood holes can be made by hand using a brace and bit or a hand drill. Start with a pilot hole, clamp the piece, and drill straight with steady pressure. Practice on scrap to refine technique.
Yes, wood holes can be drilled by hand with a brace and bit or hand drill. Start with a pilot hole, clamp the piece, and keep the drill steady. Practice on scrap first.
Is hand drilling suitable for metal?
Hand drilling metal is possible but slower. Use high-speed steel bits, secure the stock, and apply lubrication to reduce heat. Expect longer work time and take breaks to avoid overheating the bit.
Hand drilling metal is possible but slower. Use proper bits, keep the piece secured, and use lubrication to reduce heat.
What safety gear should I wear?
Wear safety glasses, a dust mask where appropriate, and gloves if handling rough materials. Keep your workspace clean and free of trip hazards.
Wear safety glasses and a dust mask if needed, and gloves for rough materials. Keep the area tidy.
What if the drill wanders off the mark?
Back out, realign with the mark, and reposition clamps if needed. Restart with a smaller pilot hole to regain control.
If it wanders, back out and realign. Secure the piece and try again with a smaller pilot hole.
Should I always start with a pilot hole?
Starting with a pilot hole reduces drift and makes it easier to reach the final diameter, especially in wood and soft metals.
Yes, starting with a pilot hole helps keep the hole centered and makes enlarging easier.
Can I drill masonry without a drill?
Manual masonry drilling is extremely challenging and not practical for meaningful holes. If possible, obtain proper equipment or plan alternatives like anchors that don't require deep holes.
Masonry without a drill is very hard; unless you have special tools, consider alternatives or borrow a drill.
Watch Video
Top Takeaways
- Secure the workpiece before drilling.
- Start with a pilot hole and widen gradually.
- Use the right hand tool for the material.
- Practice on scrap stock to build confidence.
- Know when manual drilling is no longer practical and consider renting a drill.