What to Do If You Drill a Hole Too Big in Drywall
Urgent, step-by-step drywall hole repair: patching, backing, sanding, priming, and painting to restore a seamless wall without replacing panels.

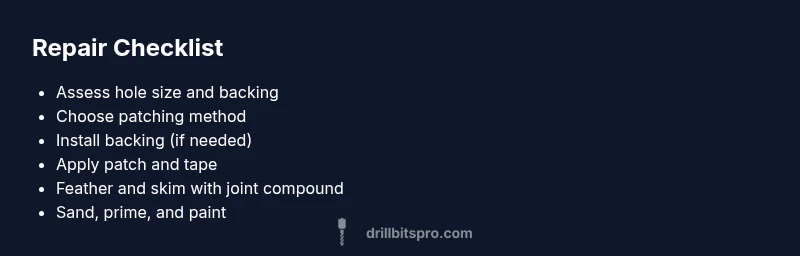
1) Stop drilling and evaluate the hole size and location. 2) Choose a patching method appropriate for the hole (mesh patch for small to medium holes; repair plate for larger gaps). 3) Install backing behind the wall if needed, then apply joint compound in thin, feathered layers. 4) Sand smooth, prime, and paint for a seamless finish.
What to do if you drill a hole too big in drywall
When you accidentally drill a hole that’s too big, it’s not the end of the world. According to Drill Bits Pro, oversized holes are a common mishap, but they can be repaired with a methodical approach. The key is to act calmly, avoid creating new damage, and choose a patching strategy that matches the hole’s size and location. In this guide, you’ll learn why holes widen, how to back them properly, and the best ways to feather in compound so the finished wall looks smooth and professional. You’ll gain practical steps you can follow in a home shop or on a job site, with safety considerations and time-saving tips along the way. By the end, you’ll feel confident selecting the right patch, securing backing, applying joint compound, and achieving a paint-ready surface that blends with surrounding drywall.
Assess the hole: size, location, and backing
Start by sizing up the hole. A small nick is treated differently from a large square or star-shaped opening. Measure the widest span and note the depth if the hole goes all the way through. Location matters too: holes near corners, seams, or outlets may require extra support or a different patching method. Check behind the drywall for backing material—studs, insulation, or hollow space can determine the repair approach. If you can’t access the backside, you’ll need a patch that includes a backing or a backing piece. Also inspect edges: torn paper or loose gypsum can compromise adhesion. The more you know about the hole, the easier it will be to choose a patch, collect the right materials, and plan the application sequence.
Patch options for small to medium holes
For holes up to about 2 inches in diameter, a self-adhesive mesh patch or a metal repair patch is often enough. Center the patch over the hole and press firmly to embed it into the underlying surface. Then apply a thin layer of joint compound over the patch, feathering beyond the patch edges. Let it dry, sand lightly, and repeat if needed. Mesh tape under a skim coat gives you extra strength if the surrounding drywall is slightly brittle. If you want a cleaner look, you can also use a ready-made drywall repair patch that includes a backing piece; these systems create a solid repair without opening the wall. In all cases, work in thin layers and avoid piling compound in the center, which can crack as it dries.
Patch options for large holes
Large holes require more substantial reinforcement. Cut a clean square around the damaged area, then back the hole with a solid piece of scrap drywall or a patch plate. Secure the patch with screws into a backing (a strip of wood or scrap drywall for rigidity) and apply mesh tape around the seam. Apply a generous layer of joint compound, smoothing out to feather the edges to the surrounding wall. Allow to dry completely; add subsequent coats of joint compound in thin layers, sanding between coats. For very large openings, you might need to install a new drywall patch using a drywall patch kit or replace a panel section. The goal is a flat, paintable surface, not a bulging patch, so patience with drying and feathering is essential.
Materials and tools you’ll need
To fix an oversized drywall hole, gather these common items: drywall patch or patch plate, mesh or paper tape, joint compound (and setting-type compounds for faster drying), a drywall saw or utility knife, a putty knife set (2–6 inch and 6–10 inch), a sanding block or sponge, a low- to medium-grit sandpaper, primer, and paint. Backing materials include a small wood strip or scrap drywall for rigidity. A cordless drill, screws, and a screwdriver help secure patches. Safety gear matters: wear eye protection and a dust mask to handle drywall dust. Having a straightedge or metal ruler helps keep coats even. When you have the right tools at hand, patching becomes a straightforward, repeatable process, and you’ll minimize repair time and rework.
Steps
Estimated time: 60-120 minutes active work, plus 2-4 hours drying time
- 1
Prepare the area
Clear debris, protect floors, and mark the hole. This ensures you can work cleanly and accurately.
Tip: Wear a dust mask to avoid inhaling drywall dust. - 2
Choose your patching method
Decide between a mesh patch, repair plate, or larger drywall patch based on hole size and backing availability.
Tip: For larger holes, plan backing first to prevent future cracking. - 3
Create or locate backing
If needed, install a backing board or a strip of wood behind the hole to anchor the patch.
Tip: A backing improves adhesion and prevents patch sag. - 4
Apply patch and tape
Center the patch, press firmly, and apply mesh or paper tape around the seam.
Tip: Embed the tape fully to avoid air pockets. - 5
First coat of joint compound
Spread a thin layer over the patch and feather about 2–3 inches beyond the edges.
Tip: Don’t overfill the center; it can cause sags. - 6
Dry and sand
Let the compound dry completely, then sand smooth with fine grit.
Tip: Wipe away dust before adding more compound. - 7
Second and final skim coats
Apply additional thin coats, building a seamless transition with feathered edges.
Tip: Allow full drying between coats for best adhesion. - 8
Prime and paint
Apply stain-blocking primer, let dry, and paint to match surrounding walls.
Tip: Texture matching may require a light stipple or spray texture.
Diagnosis: Hole in drywall larger than expected or patch not adhering properly
Possible Causes
- highHole size exceeds patch backing or patch size
- mediumInadequate backing behind the hole
- lowDamaged surrounding drywall/paper reducing adhesion
Fixes
- easyUse a larger patch or patch plate with proper backing, then re-adhere
- easyInstall a backing behind the patch (scrap drywall or wood strip) and apply mesh tape + joint compound
- hardFor very large holes, cut out a larger area and replace a drywall section or use a patch kit with backing
Got Questions?
Can I patch a drywall hole without replacing the entire wall?
Yes. Most holes can be repaired with patches, tape, and joint compound. The key is choosing the right patch and providing proper backing to ensure a durable repair.
Yes. Most holes can be fixed with patches, tape, and compound. The trick is choosing the right patch and backing for a solid repair.
What patch materials work best for larger holes?
For large holes, use a drywall patch plate or a patched drywall piece with backing, then reinforce with tape and multiple coats of joint compound.
For big holes, patch plates or backing-backed drywall pieces work best, plus multiple coats of joint compound.
How long before I can paint after patching?
Drying time depends on the compound used. Typically, wait 24 hours between coats and another 24 hours after the final coat before painting, ensuring fully cured surfaces.
It usually takes about a day for each coat to dry, so plan for a day or two before painting.
Should I remove damaged paper around the hole?
Yes. If edges are torn, carefully cut away damaged paper to create a clean edge for the patch to adhere to.
Yes, trim away any torn paper so the patch can grip a clean edge.
Is it safe to patch near electrical outlets?
Turn off power to nearby outlets and follow safe practices. If unsure, consult a licensed electrician or professional.
Turn off power to nearby outlets. If in doubt, call a pro.
When should I call a professional?
If the hole is larger than a patch can handle, if you detect hidden structural damage, or if you’re uncomfortable working overhead or with electrical lines, seek professional help.
Call a pro if the hole is big, you sense structural problems, or you’re unsure about safety.
Watch Video
Top Takeaways
- Assess hole size before patching
- Back patches with backing for stability
- Feather edges in thin coats
- Prime before painting for a seamless finish
- Call a professional for complex structural damage