How to Fix Drill Holes in Drywall: A Practical DIY Guide
Learn a proven, step-by-step method to fix drill holes in drywall. This guide covers prep, patch options, finishing, and painting for a seamless repair—backed by practical tips from Drill Bits Pro.

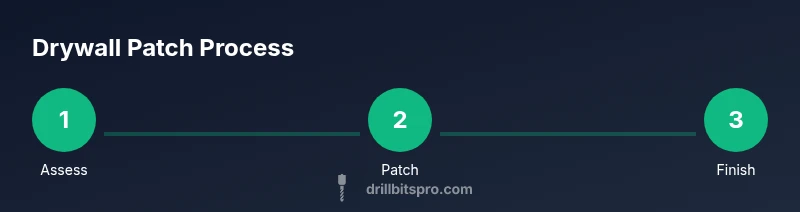
You can fix drill holes in drywall with a patch, joint compound, and careful feathering for a seamless finish. Start by assessing the hole size, choosing a patch method, and protecting your area. With patient layers and proper sanding, you’ll hide the damage and restore the wall’s smooth surface.
Assess Hole Size and Prep
Patching drywall starts with a clear assessment of the hole. Small holes from nails or screws (less than 1/4 inch) can be filled with lightweight spackling, while larger holes need a drywall patch and reinforcing tape. Before patching, remove loose material around the hole with a putty knife and gently clean the area to reduce dust. Protect the floor and nearby surfaces with a drop cloth and painter's tape. As the Drill Bits Pro team notes, precise prep prevents patch lines from showing after painting and reduces drying time gaps. Safety first: wear eye protection and a dust mask when sanding.
Patch Options and Patch Kits
There are several patch options depending on hole size and drywall condition. For tiny holes, pre-mixed joint compound or spackle works well with a single thin layer. For medium holes (roughly 1/4 inch to 2 inches), consider a drywall repair patch or self-adhesive patch, reinforced with paper or fiberglass mesh tape. For large holes, cut a backing piece of drywall and secure it with screws, then cover with joint compound. Drill Bits Pro recommends choosing patch materials with good adhesive strength and easy feather edges to minimize sanding time. Always use proper safety gear and ensure work area is ventilated.
Patching Small Holes (1/8" to 1/4")
Small holes are patch-perfect for quick fixes. Apply a thin layer of spackling or joint compound with a small putty knife, then smooth across the hole and feather the edges beyond the hole. Wipe away excess material and let it dry per the product label. Lightly sand the patch once dry and apply a second thin coat if needed for a perfectly smooth surface. A steady hand and light strokes yield the cleanest patch.
Patching Larger Holes or Damaged Areas
Larger holes require a patch that provides structure. Cut a rectangle of drywall to fit the hole, then back it with a scrap piece of backing board behind the repair area. Secure with screws into the studs or blocking, then cover with patch compound and tape to bridge seams. Apply multiple thin coats, allowing each to dry before applying the next. Feather edges far beyond the hole to blend the patch with surrounding drywall. Drilling into a stud or wiring behind the hole requires caution—confirm stud locations using a stud finder.
Finishing, Priming, and Painting
Once the patch is dry and sanded smooth, wipe away dust and prime the repaired area. Priming seals the patch and evens the surface so the final paint color matches. Apply your final coats of wall paint, allowing adequate drying time between coats. A light glaze or touch-up around the patch can help the repair disappear into the wall. For best results, repaint the entire wall section if the surrounding paint is aged or discolored. Drill Bits Pro emphasizes using a high-quality wall primer for consistent color and adhesion.
Common Issues and Troubleshooting
Patch lines, feathering inconsistencies, or visible tape are common problems if patches aren’t adequately feathered or dry times were insufficient. If the patch shows through after painting, apply an extra thin coat of joint compound to smooth the edge, then sand and re-prime before repaint. Dust buildup during sanding can affect finish; use a damp cloth to wipe dust between coats. If you’re patching around outlets or switches, turn off power and test for warmth or smoke near the patch area, and ensure you’ve avoided any wiring behind the wall.
Maintenance and Pro Tips
To keep drywall in good shape, store drills and bits away from moisture and avoid high-torque drilling into the same spot. Use a pilot hole when mounting light fixtures to reduce wall damage. Regularly inspect patched areas for hairline cracks after seasonal changes and touch up as needed. The Drill Bits Pro team recommends keeping a small patch kit on hand for quick fixes and storing joint compound and sandpaper in a dry place to extend their life.
Tools & Materials
- Safety gear (goggles, dust mask)(Protect eyes and lungs from dust.)
- Drop cloth or plastic sheeting(Protect floors and furniture.)
- Putty knives (2" and 6")(Use for applying and smoothing patch materials.)
- Drywall patch or self-adhesive patch kit(Choose based on hole size.)
- Drywall mesh tape or paper tape(Reinforces patches on larger holes.)
- Joint compound / spackle (pre-mixed)(Multiple thin coats recommended.)
- Sandpaper (120-220 grit)(Smooths feathered edges.)
- Primer(Seal patch before painting.)
- Paint matching wall color(Finish patch to blend with wall.)
- Scissors or utility knife(Cut patches and tape to size.)
- Ruler or tape measure(Accurate patch sizing.)
- Dust pan/brush and vacuum (cleanup)(Keeps workspace clean.)
Steps
Estimated time: 60-120 minutes active, plus 2-4 hours drying
- 1
Inspect hole and prep area
Assess the hole size and shape, then clear loose material. Place a drop cloth, mask, and eye protection. This prep reduces dust spread and helps the patch adhere properly.
Tip: Mark the hole edges with a light pencil line to guide patch placement. - 2
Choose patch method and assemble materials
Select patch type based on the hole size. For small holes, a patch plus joint compound suffices; for larger holes, back the patch with a backing board and tape. Gather all required tools to minimize trips to the toolbox.
Tip: If you’re patching near a stud, use a backing piece to secure the patch for rigidity. - 3
Apply patch to small holes
Apply a thin coat of joint compound to cover the hole, then press in the patch or patch kit. Smooth the edges to blend with the surrounding surface and let dry before the next coat.
Tip: Work in thin layers; thick coats crack as they dry. - 4
Reinforce large holes with tape and backing
For bigger holes, apply mesh tape over the patch and secure with an additional thin layer of joint compound. If needed, insert a backing board behind the hole for solid support.
Tip: Apply tape centered over the hole and press to remove air bubbles. - 5
Apply multiple coats and feather edges
Apply the first coat, let it dry, then add a second and third coat, each wider than the last. Feather the edges far beyond the hole to ensure a smooth transition with the wall surface.
Tip: Avoid sloping patches that end abruptly at the edge of the hole. - 6
Sand, prime, and paint
Lightly sand the dried patch until smooth, wipe away dust, apply primer, then finish with matching wall color. A consistent finish depends on even sanding and careful color matching.
Tip: Use a sanding block to maintain a flat, even surface. - 7
Inspect and clean up
Check for any remaining irregularities, touch up as needed, and store tools. A quick final check ensures the patch is invisible under normal lighting.
Tip: Take photos of the repair for future reference.
Got Questions?
Can I patch drywall holes without replacing the sheet?
Yes. Most drill holes and small to medium cracks can be repaired with patches, tape, and joint compound without replacing drywall. Large holes may require patching with backing material and a quick drywall sheet replacement.
Yes. Most holes can be repaired with patches rather than replacing the entire sheet.
What patch material works best for small holes?
Lightweight spackle or joint compound with a small putty knife works well for small holes. It dries quickly and sands flush with the wall.
Spackle or lightweight joint compound is ideal for small holes.
How long does patching take to dry?
Drying time depends on the compound and coat thickness. Thin coats typically dry in about 1-2 hours; thicker coats may require 24 hours. Always check the product label before applying a second coat.
Dry times vary; keep coats thin and wait for full cure between coats.
Do I need to prime after patching?
Yes. Priming seals the patched area, helps paint adhesion, and reduces the chance of patch shadowing after painting.
Priming is recommended after patching to ensure even paint coverage.
Are mesh patches stronger than paper tape?
Mesh patches provide a quick fix and distribute patch material evenly, but paper tape with joint compound remains the traditional, durable option for cracks and holes near seams.
Mesh is convenient; paper tape is the classic durable choice for seams.
What safety gear is essential?
Wear safety goggles and a dust mask whenever sanding or cutting drywall to protect eyes and lungs from dust.
Goggles and a dust mask are essential for drywall work.
Watch Video
Top Takeaways
- Assess hole size before patching to choose the right method.
- Feather edges with multiple thin coats for a seamless finish.
- Prime before painting to seal the patch and ensure color match.
- Safety first: wear PPE and keep dust under control.