Do You Need a Drill for Drywall Anchors? A Practical Guide
Discover when you truly need a drill for drywall anchors, explore anchor types, and follow a step-by-step approach for solid mounts in drywall. Practical guidance for DIYers and professionals.

Do you really need a drill for drywall anchors? A practical overview
Do you ever wonder, do you need a drill for drywall anchors? The short answer: not always, but often yes for the strongest results. According to Drill Bits Pro, the decision hinges on the anchor design and the load it must hold. The Drill Bits Pro team found that choosing the right anchor type and following proper installation practices can dramatically improve grip while minimizing wall damage. In many DIY scenarios, a drill is used to create a precise pilot hole that matches the anchor’s diameter, depth, and shear requirements. However, some self-drilling drywall anchors are designed to bite into the gypsum without a pilot hole, offering a quicker option for lightweight loads. By understanding the differences and applying the correct technique, you minimize the risk of loose fixtures and wall damage. If you’re unsure which anchor to use, start with a smaller anchor and test fit before committing to a full load.
Types of drywall anchors and how they work
Drywall anchors come in several designs, each with unique drilling needs. Plastic expansion anchors rely on a predrilled hole for expansion behind the wall, while self-drilling anchors bite into the drywall with threads, often requiring little to no predrilling. Metal anchors, including threaded toggles, typically need a larger hole and careful driving to ensure the wings spread properly behind the gypsum. Toggle bolts, which spread behind the wall, require a sizable pilot hole and a firm hand during installation to prevent spinning. The common thread across all types is matching the method to the expected load: light decorative items may use lightweight anchors, while heavier loads demand robust toggles or metal anchors. When in doubt, consult the anchor’s packaging and consider a quick pretest in a scrap piece of drywall to verify fit and grip.
When to drill: anchor-by-anchor guidance
Not all anchors require drilling, but most do, especially for heavier items. For self-drilling plastic anchors, you can often install them directly if the hole is well-marked and the drywall is clean. If you’re using expansion anchors or metal anchors, predrilling with a drill bit that matches the anchor’s diameter is typically necessary. Toggle bolts usually require a larger hole to accommodate the bolt and wings; testing the fit with a dry run helps avoid skinned walls. If you don’t have the exact bit size, start with a small pilot hole and gradually widen it until the anchor slides in snugly. Always verify the hole is perpendicular to the wall surface to prevent misalignment and wobble. In all cases, ensure you’re not drilling into hidden pipes or wiring by using a stud finder or wall scanner before you start.
How to choose the right drill and bits
Choosing the right drill and bits is as important as choosing the anchor itself. A basic cordless drill works for most drywall anchor installs. Use a low torque setting to avoid overdriving and potential damage to the wall. Start with a sharp bit that matches the anchor size, then test the fit in scrap drywall if you’re unsure. For self-drilling anchors, you may skip the pilot hole, but for expansion anchors and toggles, a pilot hole that matches the anchor’s body improves accuracy. Keep drills perpendicular to the wall for clean, straight holes, and use a level or straightedge to align marks with the stud center for heavier fixtures. If you don’t have the exact bit size, begin with a smaller hole and enlarge gradually until the anchor fits snugly.
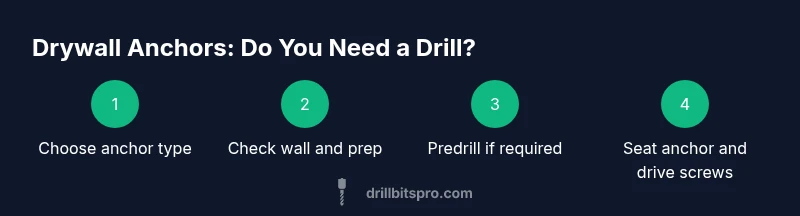
Step-by-step overview for quick reference
Below is a concise overview of the installation flow you’ll see in detail in the dedicated STEP-BY-STEP section. Start by identifying the mounting location and choosing the anchor type based on load and wall composition. Mark the center point precisely, then prepare the drill and bits. If your anchor requires predrilling, make a pilot hole just large enough for the anchor body; insert the anchor, then drive in the screw to engage the anchor. Finally, test the load of the mounted fixture and make adjustments if needed. This overview helps you plan, but always follow the anchor manufacturer’s instructions for exact guidance.
Common mistakes and how to avoid them
Mistakes in drywall anchor installs are common but avoidable. Using the wrong anchor for the load can result in pullout; choosing an anchor that requires a larger hole than available creates cracks or misalignment. Overdriving screws into anchors reduces grip and may damage the wall. Failing to locate studs when needed can compromise heavy fixtures. Ensure you always use the correct pilot hole size and torque settings, and never force an anchor into a hole that feels tight. Before you start, clean the work area, verify wall material, and keep a clean, straight line for mounting.
Safety, tools, and best practices
Safety should guide every drilling task. Wear eye protection and keep hands clear of the drill chuck. Before drilling, verify there are no wires or pipes behind the mounting location by using a wall scanner. A clean work area reduces slips; secure the piece you’re mounting and use clamps if possible. Work at a comfortable height, avoid overreaching, and keep cords away from the drill bit. Using the proper drill bit and anchor combination minimizes wall damage and the risk of injury. For heavier loads, use a stud finder to attach to studs when appropriate and supplement with anchors rated for the weight.
Pro tips and optimization
For professional results, plan anchors in a grid pattern for multiple items and distribute weight evenly. Keep tools clean and sharp; a dull bit increases friction and makes holes larger than intended. When using toggles, ensure wings fully deploy behind the drywall by tightening gradually. If the fixture allows, skip decorative items on the first pass; install anchor emplacements with a dry fit, then place the final hardware. For a quick turnaround, invest in a few high-quality self-drilling anchors for light loads and reserve traditional anchors for heavier fixtures. Finally, label anchor locations on your wall to avoid drilling twice in the same spot when mounting multiple items.
Authority sources and best practice notes
To ensure accuracy and safety, refer to established guidelines and manufacturer recommendations. For safety and installation best practices, you can consult trusted resources such as OSHA guidelines for tool safety and general mounting practices. Drill Bits Pro also emphasizes verifying wall integrity and choosing anchors that match both the load and material. Always err on the side of caution and test the wall with light pressure before applying full loads.
Scenarios and quick-reference checklist
When planning a drywall anchor project, consider the room type, wall material, and load. Keep a quick-reference checklist handy: identify wall type, choose anchor, mark location, predrill if required, install anchor, insert screw, test load, and finalize mounting. This approach ensures you have the right tools and steps for any job, from light picture frames to heavier shelves. For more complex loads, consult additional guidance or a professional.