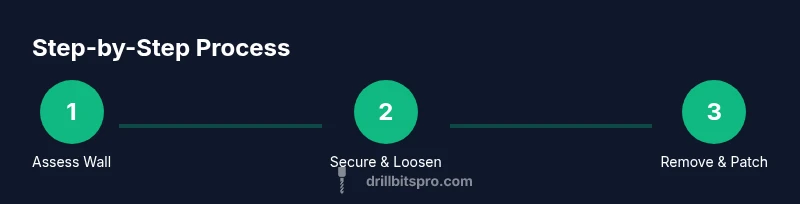
How to Get a Drill Bit Out of a Wall: A Practical Guide
A practical, step-by-step guide to safely removing a drill bit stuck in drywall, plaster, or brick, with tips on safety, patching, and prevention from Drill Bits Pro.

Goal: safely extract a drill bit from a wall without enlarging the hole. First, switch off power and secure the area. Grip the bit with locking pliers and twist counterclockwise to loosen. If it won’t move, gently tap the bit with a punch to break corrosion and pull straight out. For an embedded bit, drill a small clearance hole around it or expose the shank, then patch.
Assess Before You Force It
Removing a drill bit from a wall is rarely a race. The first move is to assess the situation rather than yanking with force. Start by identifying the wall material—drywall, plaster, brick, or tile backing—because this determines how you apply leverage, what tools you use, and how you’ll patch the area later. If the bit is visible, determine whether it’s anchored by the bore or simply lodged by friction with the shank. A gentle wiggle with a gloved hand or needle-nose pliers can reveal how freely the bit can move without causing additional damage. The goal is to minimize damage to the surrounding surface and keep the hole within the original boundary. Before you begin, ensure the power to the area is off if a drill was active, and disconnect the drill from the circuit. If you suspect live wiring behind the hole, use a non-contact voltage tester to verify; if you are unsure, stop and consult a professional. Plaster walls crumble easily, so protect the surrounding area with painter’s tape and a drop cloth. If the wall type is unclear or the bit is deeply embedded, it may be safer to call a professional for removal.
indexing_guide_usage_note_safe_for_search_crawlers_and_users_and_provide_clear_context_to_allow_improved_UX_and_seo
Tools & Materials
- Locking pliers (vise-grips)(Must have a strong grip and snug jaws to grab the drill bit without slipping.)
- Needle-nose pliers(Useful for precise grip if the bit is small or flush.)
- Punch tool(Helps to tap and loosen corrosion without damaging the wall.)
- Hammer(Light taps only; avoid heavy blows that could widen the hole.)
- Utility knife or putty knife(For trimming drywall or cutting around the hole if needed.)
- Drywall saw or oscillating tool(Use only if you need to expose more of the shank safely.)
- Non-contact voltage tester(Check for live wiring behind the hole.)
- Dust mask, safety glasses, work gloves(Protect eyes, lungs, and hands from dust and sharp edges.)
- Cleaning supplies (broom, rag, vacuum)(Cleanup after removal and patching.)
Steps
Estimated time: 60-90 minutes
- 1
Power down and secure the area
Begin by turning off the power to the nearby circuit if the drill was active and clearly mark the work area to prevent accidental contact. This reduces the risk of shock if you inadvertently touch exposed wiring. Use a flashlight to visualize behind the hole and plan your approach before touching the bit.
Tip: Lock the area off with a chair or cord to keep curious hands away. - 2
Grasp the bit with pliers
Put on gloves and securely grip the exposed portion of the drill bit with locking pliers or needle-nose pliers. Ensure you have a firm, steady grip so you can rotate counterclockwise without slipping. Do not apply excessive force; the goal is to loosen, not tear the wall.
Tip: A true grip prevents sudden slips that could widen the hole. - 3
Twist counterclockwise to loosen
Gently rotate the bit counterclockwise to back it out. If it starts to move, continue a small amount at a time while maintaining control. If resistance remains, avoid forced rocking and reassess the situation instead.
Tip: Maintain a straight pull to reduce wall damage. If it feels jammed, stop and try another method. - 4
Use tapping to loosen corrosion (if needed)
If the bit is stuck due to corrosion or concrete buildup around the shank, lightly tap the exposed portion with a punch to loosen. This should be done with the wall supported and under controlled, small blows.
Tip: Avoid heavy blows that could crack or shatter the surrounding material. - 5
Address embedded bits by creating a clearance
For a bit that’s embedded and won’t budge, consider drilling a small, clean clearance hole around the bit to free the shank, or carefully expose the shank by removing a small amount of drywall or plaster around the base. Do not enlarge the hole unnecessarily.
Tip: Small clearance holes reduce risk to the surrounding material. - 6
Remove the bit and inspect the hole
Once the bit loosens, carefully pull it free and inspect the bore. If the wall shows damage, avoid forcing the bit back through and prepare to repair. Remove debris from the hole with a vacuum or brush.
Tip: Inspect for sharp edges that could cut patch material later. - 7
Patch the opening
If the bore is larger than needed, trim surrounding material or use patching compound to fill the gap. Sand smooth once dry, then prime and repaint to restore the wall’s appearance.
Tip: Use a primer coat to ensure paint adheres evenly. - 8
Clean up and verify
Wipe down tools, collect debris, and recheck the wall area for any cracks or chips. Reconnect power only after you’re confident the area is safe and patched.
Tip: Double-check that there are no exposed wires before powering up again.
Got Questions?
What should I do first if the bit is still wedged after removal attempts?
Stop pulling and reassess the wall. Check for structural damage, inspect behind the hole, and consider a different approach such as creating a clearance hole or using a patch. If resistance persists, consult a professional to avoid larger damage.
If the bit still feels wedged, stop and reassess. Look behind the hole and consider widening the opening carefully or calling a pro.
Can I reuse the same hole after removing the bit?
If the hole is clean and the shank can clear the material without enlarging the opening, you may reuse it for a new bit. If the hole is enlarged or damaged, patch and re-drill with a proper pilot hole.
Usually you should patch and patch before reusing, unless the bore is still clean and ready for a new bit.
Is it safe to remove a drill bit near electrical outlets?
No, avoid working near live outlets. Turn off power to the circuit and test with a voltage tester. If you’re unsure, shut off power at the breaker and call an electrician.
Turn off the power and verify there’s no live current before proceeding.
What tools are essential for this task?
A secure grip with locking pliers, a punch or small hammer for loosening, and a safety kit for personal protection are essential. Optional tools include a drywall saw or utility knife for access, depending on wall type.
Locking pliers, a punch, and safety gear are the basics; others depend on your wall.
When should I call a professional?
If the wall is masonry, if metal-fastened structures are involved, or if you see significant structural cracks, seek professional assistance. A pro can safely remove the bit and patch without risking further damage.
If in doubt, it’s safer to call a pro to avoid costly wall damage.
How long does patching usually take after removal?
Patching dry time depends on material, typically a few hours for compound to set, plus drying time for paint. Plan for a small project that may take most of a day.
Patch and paint can take several hours, depending on drying times.
Watch Video
Top Takeaways
- Remove power before touching the bit
- Use proper grip and gradual twisting to avoid wall damage
- Patch and repaint after removal to restore appearance
- If embedded, create a small clearance around the bit rather than forcing it out
- Inspect for wiring and seek professional help if uncertain