How to Prevent Drill Blowout: A Practical Guide
Learn proven techniques to prevent drill blowout across wood, metal, and masonry. This step-by-step guide covers prep, bit selection, speed control, backing, and safe practices from Drill Bits Pro.

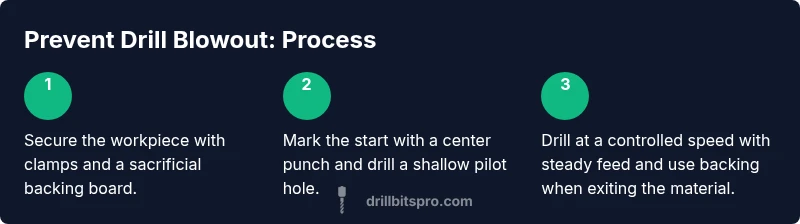
You can prevent drill blowout by choosing the right bit for the material, securing the workpiece, starting with a center punch and a pilot hole, and maintaining controlled speed and steady feed. This quick guide highlights essential steps and safety practices to keep holes clean and accurate across wood, metal, and masonry.
Understanding drill blowout and how it happens
Drill blowout is the jagged, torn exit you sometimes see when a drill exits the far side of a workpiece. It happens when cutting forces, heat, and bit geometry combine unfavorably, causing fibers to rip rather than cut cleanly. Blowout is more likely with dull bits, aggressive feeds, poor backing, or misaligned entry/exit. By understanding that blowout stems from heat buildup, material resistance, and cutting geometry, you can design drilling steps that reduce those factors and preserve hole quality across different materials.
Key factors that contribute to blowout
Several interrelated factors drive blowout. Material hardness and grain direction affect how the bit interacts with the surface. Bit geometry and sharpness determine how cleanly the material is cut. Speed and feed rate control heat generation and cutting aggressiveness. Backing and support minimize exit splintering, while a precise starting point (center punch or pilot hole) prevents wandering. Dull or damaged bits dramatically increase friction and resistance, making blowout far more likely. In practice, treating all these factors as a system helps you prevent blowout before it starts.
Prep work to prevent blowout
Pre-drill planning is where most blowouts are prevented. Inspect the material type and select an appropriate bit. Secure the workpiece with clamps or a vise, and place a sacrificial backing board beneath the exit surface to absorb impact and prevent tear-out. Mark the drilling point with a center punch or prick a small guide hole to keep the bit aligned. For metal, use a shallow pilot hole and light lubrication to reduce heat. For masonry, use a proper hammer drill bit and maintain a steady, low-speed feed. Keeping the work area clean and having spare bits handy also contributes to clean starts and exits.
Approach for different materials: wood, metal, masonry
Wood: Favor brad-point or sharp twist bits and always back with a scrap block to limit tear-out. Metal: Begin with a small pilot hole, keep the bit cool with cutting oil, and avoid heavy pressure. Masonry: Use a carbide-tipped bit, start slow, and punch through with short, controlled passes. Across all materials, center punching, proper perpendicular alignment, and a steady grip reduce deflection. A quality backing board is essential for any material to minimize exit damage.
Backing, support, and exit-hole protection
A sacrificial backing board dramatically reduces exit splintering by absorbing force and preventing the cut fibers from tearing as the bit leaves the surface. Clamp the work firmly to prevent movement, and keep a consistent stance to avoid binding. For larger holes, consider step drilling with progressively larger bits to spread the cutting load and heat. Clear debris and chips frequently to prevent binding and maintain cutting efficiency throughout the process.
Maintaining your bits and drill to reduce blowout risk
Sharp, clean bits cut with less resistance, produce less heat, and stay aligned more easily. Inspect bits for chips or dull edges and replace or sharpen as needed. Keep the chuck clean and ensure it grips the bit securely to avoid slipping. Use correct pilot hole size and maintain perpendicularity to the work surface. Regular maintenance, including cleaning the chuck and checking for wear, significantly reduces blowout risk over time.
Common mistakes and quick checks
Common mistakes include drilling too fast with excessive feed pressure, skipping the backing board, using dull bits, and neglecting center punching. Not securing the workpiece invites movement and wander, which leads to blowout. Quick checks after a test hole include inspecting edge quality, confirming perpendicular alignment, and adjusting speed or bit choice if the hole shows signs of tearing. By building a routine of these checks, you’ll prevent blowout before it happens.
Operational considerations and safety culture
Developing a drilling routine that emphasizes secure holding, proper tool selection, and controlled speeds supports both safety and productivity. Wear eye protection and a dust mask, and keep your workspace organized to reduce missteps. With consistent practice and attention to cutting geometry, you’ll achieve cleaner holes, less material damage, and longer bit life across project types.
Tools & Materials
- Drill/driver (with variable speed)(Prefer a drill with a slow start and adjustable torque)
- Assorted drill bits (wood, metal, masonry)(Include sharp pilot bits and brad-point or carbide bits)
- Center punch(To mark starting point and prevent wandering)
- Clamps or a vise(Secures the workpiece firmly)
- Sacrificial backing board(Absorbs exit impact and prevents tear-out)
- Lubricant or cutting oil (metal drilling)(Keeps bit cool and reduces heat)
- Masking tape or marking fluid(Prevents bit wandering on smooth surfaces)
- Safety goggles and dust mask(Eye/respiratory protection)
- Workpiece scrap stock(For backing and alignment)
- Drill press (optional)(If precise perpendicular drilling is required)
- Vacuum or brush for chip removal(Keeps cutting area clean)
- Measuring ruler or calipers(Ensures correct hole dimensions)
Steps
Estimated time: 60-90 minutes
- 1
Secure the workpiece
Clamp the material firmly to a stable surface. Add a scrap backing beneath the exit side to minimize tear-out and maintain alignment. Verify there is no wobble and the setup is ready for cutting.
Tip: Use at least two clamps and check for movement before starting. - 2
Mark the starting point with a center punch
Create a small indentation at the drilling point to prevent wandering as the bit begins. For metal, place a center punch at the exact center; for wood, an awl or prick punch works well.
Tip: Firmly hold the punch and apply a light tap to avoid shifting the point. - 3
Choose and prepare the bit
Select a sharp bit appropriate for the material. If metal, consider a pilot bit and apply a light lubricant; for wood, use a brad-point or sharp twist bit and ensure teeth are clean.
Tip: Confirm the bit is properly seated in the chuck before starting. - 4
Start with a pilot hole
Drill a shallow pilot hole to guide the larger bit and reduce exit tear-out. Use a smaller diameter bit than the final hole and maintain perpendicular alignment.
Tip: Keep the bit cool and avoid rapid thrusts during the pilot stage. - 5
Maintain controlled speed and steady feed
Set the drill to a conservative speed and apply steady, even pressure. Increase pressure gradually only as the cut advances cleanly, avoiding aggressive chomping that can cause deformation.
Tip: If the bit starts to slow, pause and re-align rather than forcing it through. - 6
Use backing and support during exit
Maintain backing board contact until the bit exits to absorb the last of the cutting force. Pause briefly as the bit clears the material to prevent tearing at the exit edge.
Tip: Always keep a scrap block under the exit path when possible. - 7
Lubricate and cool for metal drilling
Apply cutting oil or coolant to reduce heat buildup that can degrade bit edges and increase risk of blowout. Wipe away excess chips to maintain cutting efficiency.
Tip: Reapply lubricant as needed after several passes or when chips turn gummy. - 8
Inspect and finish
After drilling, inspect the hole for clean edges and perpendicularity. Remove burrs with a deburring tool if necessary and clean the area before the next operation.
Tip: Document any issues for future setups and adjust bit choice or feed accordingly.
Got Questions?
What is drill blowout and why does it happen?
Drill blowout is torn or jagged material at the exit of a drilled hole. It happens when cutting forces, heat, and bit geometry combine unfavorably, often due to dull bits, fast feeds, or poor backing.
Blowout is when the hole edge tears as the drill exits. It happens from heat, force, and dull bits, so you prevent it by sharpening bits and using proper backing.
Should I always use a pilot hole?
Using a pilot hole guides the larger bit, reduces wandering, and minimizes exit damage. It's especially helpful for metals and hardwoods with dense grain.
Yes. A pilot hole guides the larger bit and reduces wandering and exit tearing.
Can a drill press help prevent blowout?
A drill press enforces perpendicularity and consistent pressure, which significantly lowers blowout risk, especially on larger holes or precise work.
A drill press helps keep the bit perpendicular and steady, which reduces blowouts.
What are the best practices for masonry drilling to avoid blowout?
Use the correct masonry bit, set a slow pace, and apply gentle pressure with occasional light lubricant to keep the bit cool and cutting efficiently.
For masonry, use a carbide bit, drill slowly, and avoid pushing hard at once.
Is backing material always necessary?
Backing material dramatically reduces edge tear-out by absorbing cutting forces at the exit. Always use a sacrificial block when possible.
Yes. Backing is essential to minimize exit tear-out.
Watch Video
Top Takeaways
- Secure the workpiece before drilling.
- Start with center punch and pilot holes.
- Choose sharp, material-appropriate bits.
- Control speed and feed to minimize heat.
- Back with a sacrificial board to prevent tear-out.