How to Use a Drill Safely: A Practical Guide
Learn practical, step-by-step drilling safety with PPE, setup, bit choice, and technique for wood, metal, and masonry. Drill Bits Pro shares actionable guidance to minimize risk and maximize precision.

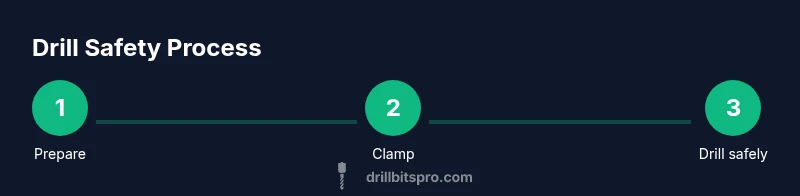
You can drill safely by planning the task, selecting the right drill and bit, and using proper PPE and technique. Secure the workpiece, clamp it firmly, and keep hands away from the rotating bit. Start at low speed, feed steadily, and unplug the drill to change bits. Inspect tools afterward and store safely.
Core safety mindset for drilling
Safe drilling begins long before you press the trigger. According to Drill Bits Pro, you set yourself up for success by planning the task, choosing the right tools, and preparing a clean, organized workspace. A deliberate approach reduces kickback, minimizes waste, and protects your hands and eyes. Treat every hole as part of a larger job where quality and safety are interdependent. Start by surveying the material, expected hole size, and any hidden hazards like nails or screws. Then sketch a mark, clamp the workpiece, and verify you have a clear path for the drill and the cord or battery. This mindset anchors the rest of your steps and keeps you focused on predictable results over impulsive actions.
Personal protective equipment and workspace setup
PPE and work area discipline are non-negotiable. Wear safety glasses or a face shield, hearing protection for longer sessions, and a dust mask if dust is a concern. Keep hair tied back and remove loose clothing to reduce snag risk. A tidy workspace with good lighting helps you see details clearly and reduces accidents. Secure your workpiece with clamps or a vise, so you don’t have to hold it with your hands while the bit spins. Position the power cord (or battery) so it cannot snag on the drill or become tangled with the work. A dedicated waste tray or vacuum keeps chips and dust under control and improves accuracy.
Choosing the right drill and settings
The correct drill and settings are as important as the bits themselves. A drill with variable speed and a torque clutch helps you adapt to different materials and prevents over-torquing. For most DIY tasks, a modern cordless drill with a 12–20V rating provides ample control, but a corded drill can offer more consistent performance for heavy-duty jobs. Always verify the chuck is fully open when changing bits, ensure the bit is straight, and tighten securely. Start with a low speed to avoid skidding, then increase as the bit bites and the material clears. If your drill has reverse functionality, use it to back out the bit if it binds.
Selecting the correct drill bit and shank size
Different materials demand different bits and shanks. Wood uses brad-point or twist bits; metal requires high-speed steel or cobalt bits; masonry needs carbide-tipped bits. Match the bit shank to your drill chuck (common sizes include 1/4
3/8
1/2
5/16
3/16
1/8
8mm ). If you’re drilling a large hole in wood, consider drilling a pilot hole first to reduce splitting and to guide the larger bit. Always keep bits sharp and replace dull bits promptly; dull bits generate more heat and can damage both bit and workpiece.
Safe starting and steady drilling technique
Position the bit on the marked point, clamp securely, and begin at a very low speed to establish contact. Apply steady, even pressure without forcing the bit; let the tool do the work. Keep the drill perpendicular to the surface to ensure a clean, straight hole. Use a shallow pilot hole for guidance and depth marks (tape on the bit is helpful) to prevent over-penetration. If the bit stalls or wanders, release the trigger, back out slightly, re-align, and start again at a lower speed.
Drilling by material: wood, metal, masonry
Different materials require tailored approaches. Wood drills at higher speeds with sharp bits; drift and burn marks indicate dull bits or too much pressure. For metal, use slower speeds and add cutting oil to reduce friction; ensure proper chip clearance. Masonry drilling needs hammer-action or percussion mode and steady pressure; start with a center punch to prevent wandering. Always confirm the surface is cleared of debris before continuing, and take breaks if the bit heats up. Drill progressively, removing dust or chips to maintain visibility and accuracy.
Tool maintenance, inspection, and safe storage
After drilling, inspect the drill, bit, and battery or cord for wear or damage. Clean away dust and chips; store bits in a labeled case to prevent rust and misplacement. Check the cord for cuts or exposed wires and replace damaged insulation immediately. Charge batteries as needed and avoid leaving them in extreme temperatures. Keeping tools sharp, clean, and correctly stored extends their life and keeps safety levels high.
Common mistakes to avoid and how to recover
Common holes in the safety armor include wearing loose clothing, ignoring kickback risk, using dull bits, and failing to secure the workpiece. Revisit your PPE and workspace setup if you notice shavings erratically ejecting or the drill pulling unexpectedly. When a problem occurs, stop immediately, remove power, assess the cause, and rebegin with proper alignment and a suitable speed. Remember, patience beats rush—slow, deliberate drilling yields better results and reduces the likelihood of injury.
Authority sources
For further reading on safety standards and recommended practices, refer to trusted sources such as OSHA and NIOSH. These agencies provide guidelines on handling power tools, PPE selection, and safe work practices that complement hands-on drilling training. See the sources below for more detail:
- OSHA Hand-Tools and Power-Tools Safety: https://www.osha.gov/hand-tools
- NIOSH Power Tools Safety Topic: https://www.cdc.gov/niosh/topics/power-tools/default.html
Pre-start safety checklist before you begin
Before you drill, run through a quick checklist: secure the workpiece with clamps, wear approved PPE, inspect the drill and bit for wear, choose the correct bit, set the appropriate speed, ensure the chuck is tight, align the bit with your mark, and clear the area of clutter. Confirm enough lighting and ventilation if working indoors, and have a plan to stop if something feels off. A prepared setup minimizes surprises and keeps you in control throughout the process.
Tools & Materials
- Drill (corded or cordless)(Ensure it has variable speed and a functioning clutch; keep batteries charged if cordless.)
- Appropriate drill bits for the material(Wood bits, metal bits, and masonry bits in separate sets.)
- Clamps or a vise(Secure your workpiece firmly to prevent movement.)
- Safety glasses or face shield(Eye protection is mandatory for all drilling tasks.)
- Hearing protection(Use earplugs or earmuffs for extended drilling sessions.)
- Dust mask or respirator(Only necessary for dusty materials; ensure ventilation.)
- Marker, center punch, or tape for depth(Marks help with alignment and depth control.)
- Depth stop or masking tape to mark depth(Prevents over-penetration and protects underlying surfaces.)
- Lubricant or cutting oil for metal drilling(Recommended for hard metals; reduces heat.)
- Clean-up tools (broom/vacuum, brush)(Keeps the workspace tidy and clear for safety.)
Steps
Estimated time: 20-60 minutes
- 1
Prepare the workspace
Clear the area, set up a stable work surface, and secure the workpiece with clamps. Inspect the drill, bits, cords or batteries, and PPE. Gather all materials before starting to avoid distractions.
Tip: Use a separate tray for waste chips to keep the area clean and safe. - 2
Select the correct drill and bit
Choose the right drill bit for the material. Ensure the bit shank fits the chuck and is tightened securely. If uncertain, refer to the bit labeling or manufacturer guidance.
Tip: Always use the sharpest bit you have for clean holes and less heat. - 3
Mark and align
Mark the drilling point precisely and, if possible, create a small pilot hole to guide the larger bit. Check that the drill is perpendicular to the surface before starting.
Tip: A center punch helps prevent wandering on metal and masonry. - 4
Set speed and torque
Set the drill to a low speed first and adjust as the bit bites. Use the clutch or torque control to prevent over-torquing and bit breakage.
Tip: Begin with a conservative setting and increase only after contact is established. - 5
Begin drilling
Gently touch the bit to the surface to create a guide, then apply steady pressure without forcing. Maintain a straight angle and monitor chip flow.
Tip: Let the bit do the work; forcing it increases heat and wear. - 6
Monitor and back out
If the bit binds, release the trigger and back out slowly. Clear debris before continuing and re-approach with a lower speed.
Tip: Never twist or yank the drill to free a stuck bit. - 7
Finish and inspect
Withdraw the bit, stop the drill, and inspect the hole and surrounding area. Clean up chips and store tools properly.
Tip: Check for burrs and deburr edges if needed. - 8
Maintain and store
Wipe down the drill, check the cord or battery connections, and store in a protective case away from moisture.
Tip: Keep bits organized to extend tool life. - 9
Review safety and close-out
Before leaving, review the checklist to ensure nothing is overlooked and the workspace is safe for the next task.
Tip: A quick post-job review reduces chances of overlooked hazards.
Got Questions?
What PPE should I wear when drilling?
Wear safety glasses, hearing protection, and a dust mask if needed. Tie back long hair and avoid loose clothing. PPE protects you from chips, noise, and dust.
Wear safety glasses, hearing protection, and a dust mask when needed. Tie back hair and avoid loose clothing for safety.
How do I choose the right drill bit for wood?
Use sharp brad-point or split-point bits designed for wood. Drilling a pilot hole for larger holes reduces splitting and guides the bit.
For wood, choose sharp wood bits and consider a pilot hole for large holes.
Can I drill without clamps?
Clamping is essential to prevent movement. If you cannot clamp, use a jig or a non-slip mat and hold carefully while working, but clamps are strongly preferred.
Clamps are essential to prevent movement; use a jig or non-slip mat if clamps aren’t available.
What should I do if the drill bit binds?
Release the trigger, back the bit out slowly, check alignment, and restart at a lower speed. Clear chips and ensure the bit is straight.
If it binds, release, back out slowly, re-align, and start again at a slower speed.
Is it safe to drill with a cordless drill?
Yes, cordless drills are safe when used properly and with a charged battery. Maintain a steady speed and keep your grip firm.
Cordless drills are safe if used properly with a charged battery and steady technique.
Why is a pilot hole important?
A pilot hole guides the larger bit, reduces wandering, and prevents material splitting or tearing when drilling.
Pilot holes guide larger bits and help prevent splitting or wandering.
Watch Video
Top Takeaways
- Plan before you drill
- Secure the workpiece every time
- Choose the right bit and settings
- Drill with steady pressure, not force
- Inspect tools and clean up after drilling