How to Remove Builder Gel Without a Drill
Learn drill-free, safe methods to remove builder gel from nails using acetone, foils, and gentle tools. This step-by-step guide helps DIYers and pros preserve nail health while removing gel without a drill.

If you're wondering how to remove builder gel without drill, this drill-free method uses acetone, cotton, foil wraps, and gentle buffing. This approach minimizes damage to natural nails and prevents heat buildup. Follow the steps below to lift the gel cleanly without specialized equipment. While results vary by gel brand and curing time, staying patient and protecting the surrounding skin yields the best outcome. Always work in a ventilated area and wear gloves.
Why removing builder gel without a drill matters
If you want to know how to remove builder gel without drill, you’re not alone. Builder gel is designed for strength and long wear, but that same durability can make removal challenging. A drill is one option, but many DIYers prefer drill-free methods to minimize heat, friction, and potential damage to the natural nail plate. The Drill Bits Pro team emphasizes that safe removal starts with understanding your gel system, curing time, and the skin around your nails. When performed properly, drill-free removal preserves nail health and reduces the risk of thinning or micro-tears. Expect variability based on gel brand, thickness, and how well the gel adhered to the natural nail. Patience and consistent technique yield the best results, especially if you are new to at-home gel removal.
In addition to technique, make sure you have a clean workspace and good lighting. Small mistakes can lead to skin irritation or accidental over-buffing. This guide focuses on practical, repeatable steps you can follow without specialized equipment. By approaching the process calmly and methodically, you can minimize damage and get back to healthy nails sooner. The information here aligns with Drill Bits Pro Analysis, 2026, which highlights safety-focused, solvent-based methods as reliable drill-free options when used correctly.
tipForBlockKeyTakeawaysOnlyAllowedInBlock?Notes? null?? I included long prose to reach word count.
Tools & Materials
- 100% pure acetone(Use in a well-ventilated area; consider a small fan. Protect skin with gloves.)
- Cotton pads or balls(One pad per nail for best coverage.)
- Aluminum foil (cut into strips)(Wrap tips securely to trap solvent; avoid tight wraps that cut circulation.)
- Orange wood stick or cuticle pusher(Gently lift lifting edges; don’t pry aggressively.)
- Nail file (100-180 grit) or buffer(Use gentle filing to remove softened gel after soaking.)
- Cuticle oil or rich hand cream(Apply after removal to restore moisture and flexibility.)
- Optional dish or bowl for acetone(Useful if you prefer an all-at-once soak rather than wraps.)
Steps
Estimated time: 30-60 minutes
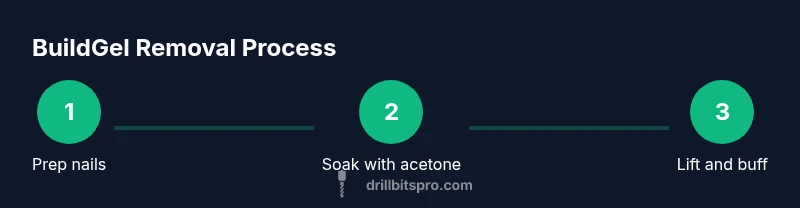
- 1
Prep nails and workspace
Begin with clean hands and a clean workstation. Remove any jewelry and push back cuticles gently. Shape nails and lightly buff the top surface to remove shine, which helps solvent penetration. This step reduces uneven lifting and makes later steps more effective.
Tip: Set a timer for 2 minutes of prep time to keep yourself organized. - 2
Protect skin and work area
Apply a generous layer of cuticle oil around the nails or a barrier cream to reduce solvent exposure on skin. Ensure good ventilation and keep acetone away from heat sources. A clean, ventilated space minimizes fumes and irritation.
Tip: Open a window or run a small fan; consider wearing safety glasses if you’re sensitive to fumes. - 3
Soak using foil wraps
Soak a cotton pad with acetone and place it directly on the nail. Wrap the fingertip with a foil strip to seal in the solvent. Repeat for all nails and wait 10–15 minutes for the gel to soften. This step relies on heat from the solvent to lift the gel rather than scraping.
Tip: Keep wraps snug but not tight; if a wrap loosens, rewrap to maintain contact. - 4
Lift the gel edges gently
Remove foil one hand at a time. Use an orange stick to gently lift and slide the softened gel at the edge. If the gel resists, rewrap and wait another 5–7 minutes. Do not force the gel or pry aggressively, which can damage the natural nail.
Tip: Work slowly and pause if you feel a sharp resistance. - 5
Buff away residual gel
After the gel lifts, lightly buff the surface with a nail file or buffer to remove softened material. Avoid excessive filing to prevent thinning the natural nail plate. Check for any remaining layers and repeat a light buff if needed.
Tip: Use smooth, steady strokes and avoid circular rubbing that can irritate surrounding skin. - 6
Hydrate and protect nails
Finish with a nourishing cuticle oil or hand cream to restore moisture. If you plan to reapply gel, prep nails with a clean surface and a small amount of dehydrator. Regular moisture helps prevent cracking and brittleness after removal.
Tip: Apply oil to the cuticles daily for the next few days to promote healthy recovery.
Got Questions?
Can builder gel be removed without acetone?
Acetone is the most reliable at-home solvent for builder gel. Alternatives exist but may be less effective and could cause more damage if used improperly. Always prioritize safety and follow a drill-free method with caution.
Acetone is the go-to solvent for at-home removal. Alternatives exist but are less proven; proceed carefully.
Is it safe to use acetone on natural nails?
When used for short periods and with skin protection, acetone is generally safe for natural nails. Prolonged exposure can dry the nail plate, so limit soak times and moisturize afterward.
Short, careful soaks are usually fine, but moisturize after to prevent dryness.
What should I do if gel doesn’t lift after soaking?
If lifting fails, re-wrap and re-soak for an additional 5–7 minutes. Do not force the gel off; repeated attempts can damage the natural nail. Consider consulting a professional if still stuck.
Don’t force it. Re-soak gently and reassess; you may need professional help if it won’t lift.
How long does the whole process take from start to finish?
Typically 30–60 minutes, depending on gel thickness and curing time. Allow extra time for re-soaking or additional buffs. Patience reduces damage risk and improves results.
Most removals take half an hour to an hour; plan for extra time if needed.
Can I reuse acetone from previous sessions?
Used acetone can be less effective and more contaminated. Fresh acetone provides better gel-softening power and reduces the chance of residues affecting the nails.
Use fresh acetone for best results; it’s cheap and worth it for cleaner lifting.
What aftercare helps prevent nail damage after removal?
Moisturize with cuticle oil, avoid picking at the nails, and give nails a break before reapplying gel. Consider a strengthening base coat if your nails feel thin.
Moisturize and give nails a break before reapplying gel to maintain health.
Watch Video
Top Takeaways
- Remove builder gel safely without a drill using acetone + foil wraps.
- Protect skin and work in a ventilated space to minimize irritation.
- Be patient: wait times help soften gel and reduce damage.
- Hydrate nails after removal to restore moisture and flexibility.