Can You Drill Into Metal Studs? A Practical Guide
Learn how to drill into metal studs safely and effectively. This step-by-step guide covers bit choices, pilot holes, anchors, safety tips, and common mistakes to avoid for DIY and professional projects.

Yes, you can drill into metal studs, but you must use the right tools and technique. Choose a sharp cobalt or carbide bit, clamp securely, and drill slowly with steady pressure. Start with a pilot hole to prevent bending, and use the appropriate anchors for your load. Always check for wires or pipes behind the wall.
Can You Drill Into Metal Studs? Understanding the Basics
Metal studs are common in modern interiors and often used in walls for their straight profiles and fire-resistance. Drilling into metal studs is different from drilling into wood: steel provides a harder surface and can conduct heat more quickly, so it requires the right bit, a controlled drill speed, and proper preparation. According to Drill Bits Pro, understanding the material and thickness of typical metal studs helps you plan hole size and placement without compromising wall integrity. When you know what you’re drilling into, you can mount fixtures, run cables, or attach brackets with confidence while maintaining structural performance. The goal is precise placement, clean holes, and secure fasteners that won’t loosen over time. Keep in mind that metal studs are often thinner than wooden members, so avoid drilling too close to edges or long spans that could weaken the frame.
A practical rule is to treat metal studs as precision members: mark locations clearly, measure twice, and drill once. The approach differs based on wall construction, whether you’re punching a hole for wiring, mounting a heavy shelf, or inserting a wall anchor. With the right preparation, you’ll achieve clean results and a reliable mount without compromising the stud’s load path.
Tools and Materials You'll Need
Before you start, gather the essential tools and materials. You’ll want a sharp cobalt or carbide drill bit designed for metal, a drill with adjustable speed, and a pilot bit smaller than your final hole. A stud finder with metal mode helps locate the stud’s center and avoid fasteners. Marking tools, a square, and clamps keep the work area stable. Safety gear like safety glasses is a must. For anchors, choose options rated for metal studs and the expected load. A deburring tool or thin file helps clean up the hole edges after drilling. Finally, consider a small mallet or punch to start a guide point if the metal is particularly smooth. Remember, a steady hand and proper technique beat brute force every time.
Selecting the Right Drill Bit for Metal Studs
The best results come from using bits specifically designed for metal, not wood or masonry bits. A cobalt or carbide-tipped drill bit penetrates steel more cleanly and resists dulling under metal’s hardness. Avoid standard wood bits, spade bits, or auger bits, which bind or overheat quickly in metal. Keep the bit sharp and cool by drilling at a moderate pace and allowing the bit to do the work; forcing it increases heat and can deform the hole. If you’re drilling near a seam or box, use a punch mark to prevent wandering and start with a small pilot hole to guide the larger bit. For repeated mounting, consider a drill bit set sized for both pilot and final hole diameters, and store bits in a clean, dry environment to extend their life.
Pilot Holes, Speed, and Drill Technique
Pilot holes are your friend when drilling into metal studs. Start with a small, clean pilot hole to guide the larger bit and reduce binding. Use a slow to moderate drill speed; high speeds heat metal and dull bits faster. Apply steady, even pressure without pushing aggressively, letting the bit bite into the metal rather than skidding across the surface. If you feel the bit binding, back out, clear the debris, and start again with a fresh hole. For thicker studs or heavier loads, a pilot hole is even more important to maintain hole quality and to minimize studs’ deformation. After drilling, deburr the hole edges to prevent sharp edges from biting your fasteners or compromising insulation and drywall.
Anchors and Fasteners for Metal Studs
Metal studs require anchors designed to grip metal and distribute load. For light-duty hangings, self-tapping screws or thread-cutting anchors that are compatible with steel perform well when paired with a prepared pilot hole. For heavier loads, select toggles or metal-to-metal anchors that specify metal stud use and load rating. Always ensure the anchor size matches the hole and the screw type matches the anchor. Using incorrect anchors can lead to pull-out or wall damage. If your wall uses a track or channel, you may need specialty fasteners or anchors that are rated for steel framing. Plan your layout to avoid critical service lines behind the drywall and ensure your fasteners won’t collide with electrical boxes.
Safety, Codes, and Common Mistakes
Safety comes first when drilling into metal studs. Turn off power when near electrical runs, wear safety glasses, and keep hair or clothing away from the drill bit. Verify the wall cavity contents with a stud finder and metal-detection mode; never assume there are no wires behind the drywall. Common mistakes include drilling without pilot holes, applying excessive pressure, using dull bits, and drilling too close to the stud edge. These pitfalls can bend or weaken the stud, damage drywall, or create loose mounts. By choosing the right bit, using pilot holes, and following a controlled drilling technique, you’ll avoid these issues and maintain wall integrity. Drill Bits Pro stresses verifying the load path and selecting appropriate anchors for the expected weight.
Real-World Scenarios and Troubleshooting
In many installations you’ll mount shelves or brackets on metal studs. The key is to pick the right anchor and drill size from the start. If you encounter a dull bit or if the bit overheats and “drags,” back out, pause to cool the bit, and clear debris before continuing. If you hit a wire, stop and re-evaluate with a detector. For unusual wall configurations or mixed materials, plan your layout on the wall with tape and a pencil, mock-drill a hole in a scrap piece of drywall, and then transfer the dimensions to the wall. By anticipating challenges and selecting suitable tools, you’ll complete the project with precision and safety.
Tools & Materials
- Cordless or corded drill(Variable speed is helpful; set to low for metal.)
- Cobalt or carbide drill bits for metal(Sharp and appropriate for steel studs.)
- Pilot drill bit (smaller than final hole)(Guides the larger bit and reduces wandering.)
- Anchors rated for metal studs(Toggle or self-drilling anchors based on load.)
- Stud finder with metal mode(Locate center of studs and avoid electrical runs.)
- Marker or tape for marked locations(Ensure precise placement.)
- Safety glasses(Eye protection at all times.)
- Deburring tool or file(Clean edges after drilling.)
- Clamps or vice grips(Secure workpiece if needed.)
Steps
Estimated time: 20-40 minutes
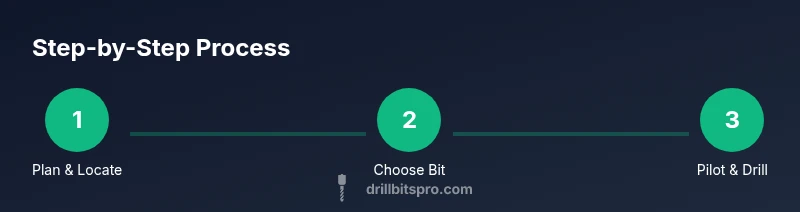
- 1
Plan and locate
Identify the exact mounting point and locate metal stud centers using a metal-detecting stud finder. Mark the spot clearly with a pencil or masking tape. This prevents misalignment and ensures a clean guide for drilling.
Tip: Double-check behind the wall for cables or pipes before drilling. - 2
Prepare the drill and bit
Attach a cobalt or carbide bit suitable for metal and set your drill to a low speed. Confirm the bit is sharp and capable of cutting metal surfaces without snagging.
Tip: Lubricate or cooling is usually not required for light metal drilling; keep the bit cool by avoiding high pressure. - 3
Drill a pilot hole
With your selected pilot bit, begin at the marked location and drill a small pilot hole. Keep the drill perpendicular to the wall to avoid wandering and remove debris as needed.
Tip: If the bit binds, back out and clear debris rather than forcing it. - 4
Create the final hole
Switch to the final bit size and smoothly drill to the required depth. Maintain steady pressure and let the bit do the work rather than pushing aggressively.
Tip: Stop periodically to check hole depth and align with your anchor size. - 5
Deburr and install anchor
Remove burrs with a deburring tool or file. Insert the appropriate anchor or screw for metal studs and ensure secure seating.
Tip: Use a pilot hole that matches the anchor to prevent stud damage.
Got Questions?
Can I drill directly into metal studs without a pilot hole?
Pilot holes reduce binding and heat buildup, making drilling into metal smoother. It's best practice to use a pilot hole for metal studs.
Yes—start with a pilot hole to prevent binding and heat buildup. It’s best practice for metal studs.
What drill bits work best for metal studs?
Cobalt or carbide-tipped bits are preferred for metal studs. They resist dulling and cut cleanly in steel when used with proper technique.
Cobalt or carbide-tipped bits work best for metal studs. They stay sharp and cut cleanly with proper technique.
Are metal studs as strong as wood studs?
Metal studs provide good strength and are typically lighter, but they behave differently under load and require appropriate fasteners. Confirm load requirements for your project.
Metal studs are strong and light, but load behavior differs from wood. Use appropriate fasteners and verify load needs.
What anchors should I use with metal studs for wall hangings?
Use anchors rated for metal studs, such as toggle bolts or self-drilling anchors designed for steel framing, especially for heavier loads.
Choose anchors rated for metal studs, like toggles or self-drilling anchors, especially for heavy items.
How can I locate metal studs behind drywall?
Use a stud finder with metal mode or wall scanning capability. Mark the exact center and avoid screws or boxes that indicate electrical runs.
Use a metal-mode stud finder to locate metal studs, and mark their centers clearly.
Watch Video
Top Takeaways
- Identify metal studs before drilling to avoid misplacement.
- Use cobalt or carbide bits designed for metal with a pilot hole.
- Choose anchors suitable for metal studs and load.
- Drill slowly and check behind the wall for safety.
- Deburr holes and secure fasteners properly for durability.