Drill Water Well: A Practical Step-by-Step Guide
Learn how to drill a water well safely and effectively with our practical, AI-driven guide. From planning and permits to drilling methods and water testing, this Drill Bits Pro tutorial covers everything you need to know for DIY and professional projects.

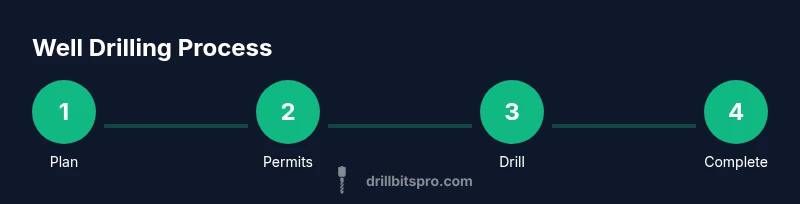
This guide helps you drill a water well from site assessment to completion, including planning, permits, well design, drilling methods, casing, sealing, and initial water testing. It emphasizes safety, regulatory compliance, and responsible water sourcing, with practical, field-tested steps that fit both DIY enthusiasts and professionals.
Why drilling a water well matters
For many properties, a self-supplied water source offers reliability, cost control, and resilience during droughts or municipal outages. Drilling a water well is a substantial but manageable project when you approach it with careful planning, solid safety practices, and respect for local codes. The process begins with a clear objective: the expected yield, water quality goals, and the depth to target based on geology. Throughout, remember that a well is a long-term investment in your property; quality construction now reduces maintenance later. According to Drill Bits Pro, a well-designed system paired with professional oversight on critical steps yields a reliable supply while minimizing contaminants and pump failures. The decision to drill should balance cost, consent, and the likelihood of sustained water supply, especially in areas with variable groundwater.
Site planning and preliminary data collection
Begin with mapping the property and identifying the likely water-bearing zones. Review any existing well logs or local soil surveys, and gather information about groundwater depth, flow, and potential contamination sources. A well’s success hinges on selecting a site with stable geology and ample aquifer access. A good plan also includes a contingency for lower-than-expected yield. As you proceed, document the site, take notes on nearby structures, and mark utility lines to avoid accidental strikes. Drilling a water well requires a disciplined approach: define goals, confirm feasibility, and set clear safety boundaries before any ground is broken. Drill Bits Pro emphasizes aligning site selection with anticipated yield and water quality, ensuring the project remains practical and compliant.
Permits, regulations, and local codes
Before any boring begins, check local drilling regulations, setback distances, and permit requirements. Many regions require a permit, a drilling plan, and a water testing plan. It’s essential to communicate with the local water authority or building department to avoid penalties or project delays. In some areas, additional permits may govern casing materials, wastewater management, and how the well connects to a septic system. Keeping records of permits, consultations, and plans helps you navigate inspections smoothly and reduces risk of non-compliance. Drill Bits Pro notes that adherence to codes is as important as the drilling work itself; noncompliance can invalidate results or require costly rework.
Equipment, safety, and PPE
A successful project depends on the right equipment and strict safety. You’ll need a suitable drill rig or access to one, a properly sized casing, a grout or cementing kit, drainage and bonding materials, and a pump for testing. Personal protective equipment (PPE) should include hard hat, safety goggles, gloves, hearing protection, steel-toed boots, and respiratory protection when dust or fumes are present. Inspect all equipment before use, ensure a stable work area, and establish a safe fall zone around the rig. Drilling operations must include a site-specific safety plan, including emergency procedures and first-aid readiness. Drill Bits Pro highlights that rigorous PPE and environmental safeguards are non-negotiable for long-term well integrity.
Drilling methods and casing options
Drilling methods vary by geology and available equipment. Common approaches include rotary drilling with reverse circulation or cable-tool methods in certain soils. The chosen method impacts borehole stability, groundwater access, and the ease of installing casings. Casing choices depend on depth, diameter, and the aquifer; typically, a steel or PVC casing is installed to prevent bore collapse and groundwater contamination. After casing installation, sealing and grout procedures isolate the aquifer from surface contaminants. Each method has advantages and trade-offs in cost, speed, and long-term performance. Drill Bits Pro advises consulting with experienced drillers for complex geology and ensuring the casing design aligns with local standards.
Casing, sealing, gravel pack, and well development
The next phase focuses on assembling the casing, sealing the annulus, and developing the well to ensure steady yield. A gravel pack—a layer of clean, coarse gravel around the casing—helps filter sediments and stabilize the borehole. Proper grout placement beneath and around the casing is critical to prevent surface water intrusion and to protect the aquifer. After installation, well development procedures—such as vigorous pumping and aquifer testing—help achieve optimal yield and stability. The correct sequence and materials reduce future maintenance and water contamination risks. Drill Bits Pro stresses the importance of meticulous sealing, proper gravel packing, and push-pull development techniques for a long-lasting well.
Water testing, development, and long-term maintenance
Once the well is drilled and developed, immediate water sampling establishes baseline quality. Conduct tests for common contaminants, bacterial presence, pH, hardness, and total dissolved solids, then compare results against local drinking-water standards. If any concerns arise, repeat sampling and consult a qualified lab or water professional. Ongoing maintenance includes regular water testing, monitoring well water levels, inspecting the wellhead, and ensuring proper sanitary protection around the collar. Consistent maintenance helps detect contamination or equipment wear early, preserving water safety for years. Drill Bits Pro highlights the value of a schedule for routine testing and timely repairs to sustain water quality and supply.
Authority sources and further reading
For authoritative guidance on well construction and groundwater management, refer to reputable sources. EPA provides drinking-water guidelines and regulation context, while USGS resources cover groundwater science and well tapping. CDC’s health-focused pages offer safe Drinking Water practices, and university extensions deliver practical, region-specific advice. Always cross-check with local codes and engage licensed professionals when needed. This section is intended to point readers toward credible, accessible references to support safe and compliant well projects.
Authority sources (with URLs)
- EPA: https://www.epa.gov/drinking-water
- USGS: https://www.usgs.gov/mission-area/water
- CDC Healthy Water: https://www.cdc.gov/healthywater/drinking/index.html
These sources provide foundational context for well design, groundwater safety, and public health considerations. Consult them as you plan and execute a drill water well project.
Tools & Materials
- Drill rig or access to a licensed contractor(Ensure rig capacity suits expected bore depth and diameter)
- Casing pipe (PVC or steel)(Choose diameter and material per local codes and depth)
- Grout/mortar and gravel pack material(Used for sealing and filtration around casing)
- Drilling fluids or mud system(Optional depending on geology and method)
- Water testing kit or lab access(Initial baseline tests for contaminants and quality)
- PPE (hard hat, gloves, goggles, hearing protection, boots)(Protective gear for all personnel)
- Measuring tools (tape measure, calipers)(For accurate borehole and casing measurements)
- Utility locator service(Pre-drilling check to avoid underground lines)
- Water pump and test equipment(For development and yield testing)
- Sump and containment for drilling spoil(Manage waste responsibly)
Steps
Estimated time: 2-6 weeks for planning, permitting, and drilling, plus ongoing maintenance
- 1
Plan site and gather data
Identify the target aquifer, review available logs, and align the site with groundwater depth estimates and soil conditions. Create a plan that includes access logistics, safety, and contingencies for unexpected geology.
Tip: Collect existing well logs and soil surveys; they guide depth targets and avoid costly over-drilling. - 2
Obtain permits and coordinate with authorities
Check permit requirements, setbacks, and water-use regulations with local authorities. Prepare documentation and notify neighbors if required by local rules.
Tip: Starting permits early reduces the risk of delays during drilling. - 3
Prepare site and set up safety measures
Establish a stable work area, mark hazards, and install safety barricades. Verify that PPE is readily available and that a first-aid kit and fire extinguisher are on site.
Tip: Have a written safety plan and emergency contact list posted on-site. - 4
Install surface infrastructure and casing
Set up supports for the drill rig, install initial surface casing if required, and prepare the borehole to receive deeper casing. Ensure alignment and plumbness before advancing.
Tip: Check for straight bore alignment to reduce stress on casing later. - 5
Drill borehole and place grout/gravel pack
Advance the borehole to the target depth using the chosen method. Install grout to seal around the casing and place a gravel pack to filter sediments. Monitor drilling fluid levels and pump rates carefully.
Tip: Keep a consistent mud or fluid balance to prevent bore collapse. - 6
Develop the well and test water quality
Develop the well by surging or pumping to clear fines and improve yield. Collect water samples for baseline testing and evaluate against local standards.
Tip: Run multiple tests to confirm consistent water quality before finalizing. - 7
Finish wellhead, protect, and plan maintenance
Install a sanitary well cap, protect the intake from contamination, and establish a routine maintenance and retesting schedule.
Tip: Document all materials and dates for future inspections and repairs.
Got Questions?
Do I need a permit to drill a water well?
In many regions, a permit is required before drilling a water well. Local authorities set requirements for safety, setbacks, and water use. Check with the building or water department to confirm your obligations and timelines.
Most areas require a permit before drilling. Contact your local building or water department to confirm requirements.
What factors influence the cost to drill a water well?
Costs vary with depth, geology, location, drilling method, and permit fees. While ranges exist, obtain multiple quotes and verify what is included, such as casing, grout, and testing.
Costs vary by depth and geology; get several quotes and verify what's included in each.
How deep should a typical well be?
Depth depends on local groundwater depth and aquifer access. In some regions, shallow wells suffice; in others, deeper drilling is necessary. Always base depth on site-specific data and professional guidance.
Depth depends on the groundwater depth in your area; rely on site data and experts.
What safety gear is essential during drilling?
Essential PPE includes a hard hat, safety glasses, gloves, hearing protection, and steel-toed boots. Use respiratory protection if dust or fumes are present, and maintain a clear exclusion zone around the rig.
Wear PPE like hard hat, glasses, gloves, and boots; protect yourself around the drilling area.
When can the well be used after completion?
After completion and successful development, initial water testing should confirm safety. If results meet standards, system commissioning can proceed; otherwise, address issues with professional guidance.
Once the well is developed and tested clean, it can be commissioned after confirming safety.
What ongoing maintenance does a home well require?
Regular testing, periodic pump checks, and protective measures around the wellhead are key. Maintain records, inspect for contamination sources, and plan reseal or casing inspections as recommended by local codes.
Test the water regularly and inspect the wellhead; keep good records.
Watch Video
Top Takeaways
- Define goals and feasibility before breaking ground
- Follow local permits and codes to avoid delays
- Choose appropriate casing and sealing to protect aquifers
- Develop the well thoroughly and test water quality
- Maintain the system with regular testing and upkeep