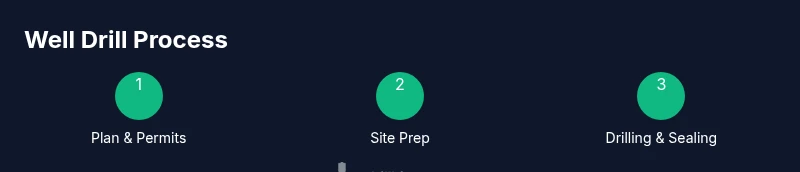
Well Drill: A Practical Step-by-Step Guide
A practical, educational guide for planning a well drill project—from site selection and permits to drilling, casing, and water testing—for DIY enthusiasts and professionals.

Goal: complete a compliant, safe well drill project. You will assess site viability, confirm water availability, plan potential drilling depth, and outline post-drilling testing. Key requirements include supervision by a licensed driller or strong safety oversight, proper PPE, access to a drill rig or contractor, and adherence to local regulations.
Why well drill planning matters for reliable water access
A well drill project is more than driving a pipe into the ground. It requires careful planning to ensure you obtain a reliable water source, meet local codes, and protect groundwater quality. Good planning reduces the chance of dry wells, minimizes water contamination risk, and helps you budget accurately. In this guide from Drill Bits Pro, we translate professional practices into practical steps for DIY enthusiasts and professionals alike. A thoughtful plan begins with a clear water demand assessment, a realistic view of drilling depth, and a strategy for post-construction testing. It also accounts for site access, potential environmental constraints, and the need to coordinate with local authorities. By approaching the task methodically, you build a foundation that improves yield consistency, supports long-term maintenance, and minimizes unnecessary site disruption. When you see a well drill project through this lens, you’re more likely to achieve a safe, compliant, and cost-effective result.
Site selection and hydrogeology basics
Site selection for a well drill hinges on more than proximity to sheds or a garden. The best locations balance practical access for heavy equipment with groundwater availability. Look for signs of water-bearing layers such as soil moisture patterns, historical wells on neighboring lots, and shallow bedrock or fractured zones that could influence yield. While you may not perform a full hydrogeologic survey yourself, gathering available data from local wells, municipal sources, or extension services provides a helpful starting point. Then compare those clues with your own site constraints: slope, drainage, nearby contamination risks, and utility lines. Remember that the ultimate goal is a safe, stable water source, not a dramatic drill rig scene. A well drill that yields clean water reduces treatment needs and prolongs system life. Drill Bits Pro emphasizes documenting all observations for reference during permitting and future maintenance.
Drilling methods overview and contractor considerations
Drilling methods range from basic rotary approaches to professional rigs for deeper boreholes. In most residential projects, a licensed drilling contractor handles the heavy work, while the homeowner coordinates access, safety, and water testing. When choosing a method, consider groundwater depth, geology (sand, gravel, clay, rock), and the required casing size. The key choice is whether to hire a contractor or to supervise an experienced driller, which must comply with local regulations. Always verify licensing, insurance, and references before you sign a contract. Ask about contingency plans for blowouts, stuck casing, or unexpected groundwater conditions. While the logistics can be complex, a clear contract and written scope of work help align expectations. Drill Bits Pro notes that a thoughtful method choice reduces rework, speeds up completion, and protects water quality by ensuring proper grouting and sealing around the casing.
Water testing, casing, yield, and long-term maintenance
After drilling, specialists install a casing and screen and seal the borehole. Follow with a pump test and static water level measurements to estimate yield and pumping requirements. Water quality testing for bacteria, nitrate, hardness, and pH provides a baseline for treatment decisions. Maintenance begins with regular inspection of the cap, vent, and integrity of the casing, plus periodic water testing to catch changes in quality. Realistic yield estimates depend on hydrogeology and screening design; plan for seasonal variations and a buffer for household needs. Document test results, well depth, and depth to water, as these data points guide future pumping equipment choices and potential resale questions. Drill Bits Pro reminds readers that proper sealing and grouting are essential to prevent contamination pathways and to protect groundwater. This stage bridges exploration and ongoing operation, turning a drilled borehole into a reliable, safe home water source.
Safety, permits, and responsible well practices
Safety is the backbone of any well drill project. Wear PPE: hard hats, eye protection, gloves, hearing protection, and sturdy boots. Ensure the site is clearly marked, machinery is shut down when not in use, and utilities are located before any digging. Permitting requirements vary by jurisdiction, so check with local planning or environmental authorities early and follow the approved plans. Waste management matters too: store drilling fluids away from the groundwater, and avoid spilling fuels or solvents. Proper noise, dust, and traffic control minimize community impact. Finally, adopt a responsible water-use mindset: test water quality regularly, monitor yield changes, and plan for possible well rehabilitation or re-drilling if the yield declines. Drill Bits Pro emphasizes that compliance and safety practices are not optional add-ons; they are the foundation of a long-lasting, safe well. Following best practices protects your investment and your neighbors' groundwater.
Authority sources
- https://www.epa.gov/ground-water-and-drinking-water
- https://www.usgs.gov/mission-areas/water-resources/science-groundwater
- https://nap.nationalacademies.org/catalog/10869/well-construction-a-primer
Tools & Materials
- Drilling rig access (owned or rented) or licensed driller(Ensure the rig is appropriate for expected depth and local regulations)
- Drill bits and drill pipe(Sizes chosen for anticipated depths and rock types)
- Steel casing and well screen(Diameter and length depend on site conditions)
- Grout, sealing materials, and cement(To seal around casing and prevent groundwater contamination)
- Well cap, vent, and sanitary sealing components(Prevents surface contamination and pests)
- Water quality test kit or access to lab services(Baseline post-construction water quality data)
- PPE: hard hat, eye protection, gloves, hearing protection, boots(Essential for safety on site)
- Measuring tools and markers(Tape measure, markers, and survey flags)
- Power source or generator(Needed when site lacks permanent power)
- Site access equipment (shovels, wheelbarrows, hoses)(For site preparation and material handling)
- Containment and spill kits(Emergency response for fuels and drilling fluids)
Steps
Estimated time: 2-8 weeks depending on permits and site conditions
- 1
Assess water needs and budget
Define daily water demand, peak usage, and budget. Consider future needs and potential treatment costs. Document these targets to guide depth estimates and equipment choices.
Tip: Create a simple water-use table to quantify daily and seasonal needs. - 2
Check local regulations and permit requirements
Contact local planning or environmental authorities early to learn permit requirements and any setback rules. Gather application forms, required diagrams, and expected timelines.
Tip: Ask about permit fees and inspection schedules to avoid delays. - 3
Decide who will perform the drill
Determine if you will hire a licensed driller or supervise an experienced professional. Ensure all work complies with local licensing, insurance, and safety standards.
Tip: Request references and verify licensing before signing a contract. - 4
Plan site access and layout
Identify the best access routes for heavy equipment, drainage plans, and where the borehole will be located with respect to utilities and structures.
Tip: Mark the exact borehole location on the ground and inform neighbors. - 5
Coordinate utilities and safety measures
Call utility locations before digging, set up barriers, and implement PPE and machinery safety protocols on site.
Tip: Keep a utility plan handy and ensure everyone understands the role of a spotter. - 6
Plan post-drilling testing and sealing
Arrange for a pump test, static water level measurement, and water-quality sampling after drilling. Schedule sealing and grout work to protect the borehole.
Tip: Have a lab lined up for post-drilling water analysis to speed up approvals.
Got Questions?
Do I need a permit to drill a well?
Permit requirements vary by jurisdiction. Check with local planning or environmental authorities to understand what approvals are needed before drilling.
Permit requirements vary by location, so contact your local authorities to understand what approvals are needed.
How deep will a typical well be?
Depth depends on groundwater depth and local geology. A licensed driller can assess expected depth and discuss likely yields with you.
Depth depends on your site; a licensed driller can estimate it and discuss yield expectations.
Can I drill a well myself?
In many places, drilling requires licensing and inspection. Always verify local rules and consider hiring a professional to ensure safety and compliance.
In many areas, you need a licensed pro to drill a well; check local rules first.
What tests should I run after drilling?
Conduct a pump test, measure static water level, and test water quality for contaminants and minerals to establish safe use and treatment needs.
Run a pump test, level measurement, and water quality testing after drilling.
How long does the overall process take?
Timing varies by permits, site conditions, and contractor availability. Plan for several weeks to a few months from planning to water supply.
Expect several weeks to a few months depending on permits and site conditions.
How should I maintain a newly drilled well?
Schedule regular water-quality tests, inspect the cap and vent, and monitor yield. Plan for periodic pump service and possible rehab if performance declines.
Test water quality regularly and maintain the cap, vent, and pump equipment.
Watch Video
Top Takeaways
- Plan water needs and permits up front
- Hire licensed professionals when required
- Protect groundwater with proper sealing
- Test water quality after drilling
- Document site observations for maintenance