How to Drill for a Water Well: A Practical Guide
Learn how to drill for a water well with a step-by-step plan, safety tips, equipment guidance, and water-quality checks. This Drill Bits Pro guide covers planning, drilling, casing, development, pumping, and long-term maintenance.

By the end of this guide you will know how to drill for a water well, from site assessment and permits to borehole construction, casing, development, pumping installation, and initial water testing. This practical, step-by-step approach emphasizes safety, correct equipment, and best practices so you can establish a reliable water source.
How to approach the process of drilling for a water well
The phrase how to drill for a water well sums up a practical, field-ready project that blends planning, geology, safety, and fluid dynamics. In this guide, you’ll learn a repeatable method that works for DIYers and pros alike. According to Drill Bits Pro, success hinges on a clear plan, accurate site information, and selecting equipment appropriate for your geology. With this approach, you’ll establish a dependable groundwater source while respecting local regulations and protecting the aquifer for future users. The goal is a clean, steady yield and durable well integrity that stands up to seasonal changes and long-term use. This is more than a drill; it’s a responsible, repeatable system you can trust year after year.
Why a structured plan matters
A deliberate, documented plan reduces surprises and keeps your costs predictable. You’ll define depth targets, identify potential contaminants, and choose a drilling method suited to your geology. A written plan also helps when communicating with inspectors or neighbors, clarifying the scope and safeguards involved. Throughout the project, revisiting the plan ensures you stay within local codes and environmental guidelines, and it gives you a concrete record for future maintenance.
The big picture: phases of building a water well
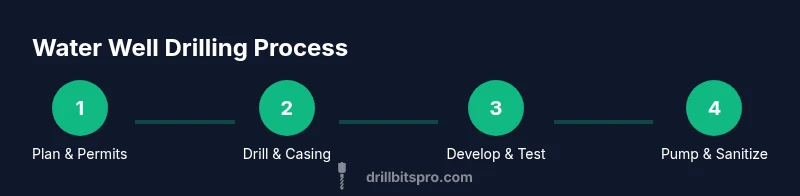
Think of the project in four phases: planning and permits, drilling and casing, development and screening, and pumping and maintenance. Each phase has critical decisions and safety checks. By following a clear phase structure, you minimize wasted time and avoid unsafe work practices. This phased approach also makes it easier to delegate tasks, log progress, and verify that water quality meets basic standards before use.
Tools & Materials
- Drill rig or rental setup(Choose a rig appropriate for your geology and depth goals; ensure power supply and mobility)
- Drill bits / casing bits (sized for borehole depth and formation)(Select compatible with the drilling method and expected formations)
- Casing pipe (PVC or steel) and couplings(Match inner diameter to borehole size; plan for future pumping depth)
- Grout or bentonite sealing materials(Use for annular sealing and long-term isolation of the aquifer)
- Well screen and filter pack (if applicable)(Optional based on hydrogeology and screen design)
- Drilling fluid or water supply(Maintain borehole stability and cooling; ensure safe disposal)
- Water pump and surface piping(Select pump type by desired yield and head; plan for electrical/valve control)
- Personal protective equipment (PPE)(Helmet, goggles, gloves, dust mask, hearing protection, steel-toed boots)
Steps
Estimated time: 3-7 days
- 1
Plan and obtain permits
Define site boundaries, draw access routes, and confirm utility locations. Check with local authorities for drilling permits, water-rights requirements, and any environmental or septic constraints. Document your plan and keep copies for inspections.
Tip: Consult a local regulator early to avoid delays; having a plan sketch helps with permit reviews. - 2
Assess site and hydrogeology
Survey the site for water-bearing formations and nearby wells. Record elevation, soils, rock types, and potential contamination sources. This assessment informs borehole depth targets and drilling strategy.
Tip: Use published geological maps and neighboring well data when available to refine expectations. - 3
Assemble equipment and safety gear
Gather all required tools, casings, and safety gear before starting. Perform a quick equipment check to ensure fittings, hoses, and power connections are secure. Establish a safe work area with signage and barriers as needed.
Tip: Pre-check all connections and test run the rig with water to verify operation before contact with borehole. - 4
Drill borehole to planned depth
Commence drilling to the target depth using the selected method. Monitor drilling rate, fluid output, and cuttings to detect changes in formation. Stop if groundwater shows signs of instability or if cave-ins are imminent.
Tip: Keep a depth log and note any changes in cuttings color or consistency that signal a formation boundary. - 5
Install casing and grout seal
Insert the casing string as you continue drilling to the required depth. Seal the annulus with grout or bentonite to prevent surface water intrusion and isolate the aquifer. Confirm vertical alignment and snug fittings.
Tip: Cure grout as recommended by the material supplier and avoid rapid drying, which can cause cracks. - 6
Develop the well and test yield
Develop the well to clear fines and improve yield; perform a yield test with a controlled drawdown. Record static and pumping water levels, recharge rate, and observed turbidity. This step verifies whether the well meets your target production.
Tip: Patience matters—allow time for stabilization between test measurements for reliable results.
Got Questions?
What permits are required to drill a water well?
Permit requirements vary by location, but most projects require a drilling or well permit and proof of site compliance. Check with your local building or water authority for the exact forms and fees. Having permits in place helps ensure ongoing water rights and regulatory compliance.
Permits vary by location; check with your local authority for the exact forms and fees, and keep copies for inspection.
How deep should a typical residential well be?
Depth depends on geology and water-bearing zones. Most residential wells range from 100 to several hundred feet, depending on aquifer quality and the yield you need. Local soils and rock formations will largely determine the target depth.
Depth depends on geology and required yield; talk to a local expert to set a realistic target.
What factors affect drilling success and yield?
Hydrogeology, depth to water, aquifer connectivity, and filter materials influence yield. Poor sealing or improper development can reduce yield and water quality. Accurate planning and proper casing are essential for long-term performance.
Hydrogeology and proper sealing determine yield and water quality; plan carefully and develop the well properly.
Is professional drilling required or can a DIYer do it?
While some experienced DIYers can perform basic drilling, many jurisdictions require licensed professionals for safety and regulatory compliance. If allowed, ensure you have training, proper equipment, and a clear plan before starting.
Check local rules; many places require a licensed pro, especially for safety and permits.
How is water quality tested after installation?
Initial testing typically includes bacteria, nitrate, and common mineral analyses. Results determine if treatment is needed and whether further well development is required. Use a certified lab for reliable results.
Test for bacteria, nitrates, and minerals with a certified lab to ensure safety.
What ongoing maintenance does a water well require?
Regular inspection, annual water testing, and pump maintenance extend well life. Check for changes in water taste, color, or pressure, and service the pump and electrical components as needed.
Maintain and test regularly; service the pump and inspect the casing annually.
Watch Video
Top Takeaways
- Plan early and document permits
- Assess geology to guide depth and method
- Use correct casing and sealing for aquifer protection
- Develop and test for reliable yield
- Sanitize and confirm water quality before use