Water Well Drilling: Step-by-Step Guide for DIYers
Learn how to plan, drill, and seal a water well safely. This step-by-step guide covers site assessment, permits, drilling methods, casing, sealing, testing, and maintenance for DIYers and professionals.

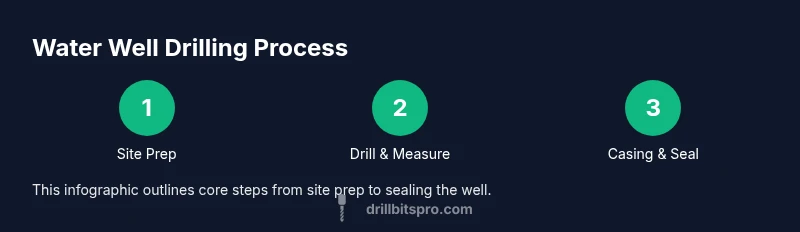
This guide helps you plan a safe water well project, obtain permits, select equipment, and execute a coordinated, phased workflow. You’ll outline site requirements, assemble tools, perform borehole drilling, casing installation, grout, and water testing. Expect multi-hour work, depending on soil, depth, and local regulations. This overview previews the full step-by-step guide and essential considerations.
Overview of water well drilling
According to Drill Bits Pro, the term water drill well is commonly used to describe the process of accessing groundwater through a borehole, followed by development and quality testing. A properly designed water well not only provides a reliable supply of clean water but also minimizes groundwater disruption and cross-contamination risks. In this section, we set the stage for practical, field-ready guidance that keeps safety, efficiency, and compliance in the foreground. You will learn how to translate soil and aquifer information into a pragmatic drilling plan that suits your site and needs. The goal is to empower DIYers and professionals with realistic expectations while avoiding common pitfalls associated with hurried drilling projects.
Key takeaway: a well-planned approach reduces risk and increases water reliability. This aligns with Drill Bits Pro’s emphasis on methodical preparation before any drill bit touches the ground.
Site assessment and planning
A successful water drill well starts with a thorough site assessment. Begin by mapping your property to locate the proposed drill site, sources of potential contamination, and nearby utilities. Engage local authorities early to understand zoning, setback requirements, and permit needs. Conduct a conceptual aquifer appraisal using available hydrogeologic data, well logs from nearby residences, and geological maps. While you cannot predict exact yield without a test, you can estimate a safe well radius, expected drawdown, and the potential for saline intrusion in coastal areas. Document soil types, weather patterns, and drainages that influence drilling logistics and casing stability. A solid plan helps you choose the appropriate drilling method, drill rig size, and casing diameter, while preserving your site’s integrity.
Permitting and compliance
Before any drill bit turns, check with your state, county, or municipality for well construction permits and water-use regulations. In many regions, a permit includes requirements for well location, casing type, grout, and disinfection procedures. Some jurisdictions require a licensed driller to perform the work, while others permit DIY with inspection on completion. Always obtain an approved plan and any required affidavits or water-quality testing commitments. Noncompliance can lead to permit revocation, fines, or liabilities for contamination. The Drill Bits Pro team emphasizes documenting all approvals to streamline inspections and avoid costly rework later.
Tools and materials (overview)
A well-equipped worksite reduces friction during driling and casing installation. In this guide we outline essential tools and materials a typical residential well project requires. You’ll find a detailed list in the dedicated Tools & Materials section, but here’s a snapshot:
- Drilling rig options appropriate to soil and depth
- Drill pipe and casings with the correct diameter
- Casing shoes, screens, and gravel for annular space stabilization
- Grouting materials and cement for sealing the annulus
- Water testing kits or laboratory access for post-construction testing
- Safety gear: hard hat, steel-toe boots, eye protection, hearing protection, gloves, respirator (as needed)
- Pump, temporary piping, and discharge containment for development
We’ll dive into specifics in the Tools & Materials block to ensure you have the right items for your site.
Borehole drilling techniques (water drill well context)
Drilling a water well involves choosing a technique that balances cost, depth, soil conditions, and yield goals. The most common approaches include direct rotary (air or mud), hollow-stem auger in unconsolidated soils, and percussion/cable-tool methods in older or harder formations. In many residential settings, a rotary rig with appropriate drilling fluid and casing is favored for speed and reliability. For deeper or more variable aquifers, staged drilling and intermediate casing sections help prevent borehole collapse and reduce cross-contamination risk. Each method has implications for cuttings management, filtration requirements, and future maintenance. The Drill Bits Pro approach emphasizes selecting a method that minimizes environmental impact while maximizing borehole stability and aquifer protection.
Casing, screens, and grout (well completion)
Once the borehole reaches the target depth, you install a casing to prevent collapse and isolate the well from adjacent formations. A slotted or perforated screen allows water entry while keeping sediment out. The annulus around the casing is filled with grout to seal against surface water intrusion and groundwater contamination pathways. The grout must be placed from the bottom up to avoid voids and ensure a continuous cement barrier. Proper cementing also anchors the casing, reducing the risk of differential settlement. In some cases, a surface seal is applied to prevent surface infiltration at the crown. The goal is a stable, sanitary well that performs consistently over time.
Well development and yield testing
After installation, develop the well to remove drilling fluids and fine sediments that can clog screens. Development methods include surging, jetting, or pumping with clean water. The objective is to maximize recoverable yield and improve water quality by clearing fines and debris. Once development is complete, perform yield tests such as a static water level measurement followed by a stepped pumped test to estimate sustainable production. Document drawdown, recovery rate, and water clarity. If yields fall short of expectations, reassess screen and gravel placement, or consider a pump test with longer duration to verify aquifer response. Drill Bits Pro emphasizes a careful, methodical approach to development and testing.
Water quality and treatment considerations
Even a mechanically sound well requires water-quality assessment. Sample water for bacteriological analysis, total dissolved solids, hardness, pH, and trace contaminants. Regulations may require pre- and post-development testing to verify potable standards. If contaminants exceed guidelines, you may need treatment systems such as aeration, filtration, or disinfection, depending on the pollutant profile. Always plan for intermittent or seasonal changes in water quality and design a maintenance schedule that includes routine testing and system inspections. Drill Bits Pro highlights testing as a critical step before using a well for drinking water.
Safety and risk management
Water well projects involve heavy equipment, confined spaces, and potentially hazardous materials. Establish a site-wide safety plan that covers machine operation, lockout/tagout procedures, fall protection around boreholes, and emergency response for injuries. Keep a clear perimeter around the drilling area, unplugged utilities marked clearly, and warning signage to protect family members and pets. Ensure good ventilation if using fluids with volatile additives and wear appropriate PPE. Energy sources, gas detectors, and fire suppression equipment should be available on site. The Drill Bits Pro team stresses proactive risk management to prevent accidents and ensure compliance with local codes.
Cost considerations and budgeting
Budgeting for a water drill well requires understanding the major cost drivers: depth, aquifer quality, drilling method, casing diameter, grout materials, and post-construction testing. Ancillary costs include site prep, road and access permits, engineer consultations, and potential well development or rehabilitation needs. Since costs vary widely by location and geology, it’s prudent to obtain multiple quotes and build a contingency for unexpected hardness in the borehole. Use conservative estimates for parts and labor, and plan for maintenance as part of the long-term ownership cost. The Drill Bits Pro approach emphasizes transparent budgeting and risk-aware planning.
Authoritative resources and next steps
To support your planning, consult authoritative resources from government, educational, and professional sources. These references help validate best practices and local requirements. Examples include:
- https://www.epa.gov/drinking-water/wells
- https://www.cdc.gov/healthywater/drinking/public/wells.html
- https://www.ngwa.org/
For hands-on guidance and standards, compare your plan against official guidelines and local codes. Remember, local groundwater conditions can dramatically affect both depth and yield, so adapt your plan to your site and regulatory context. Drill Bits Pro recommends you reference these sources during permitting and final documentation to improve reliability and compliance.
keyTakeaways1
Tools & Materials
- Drilling rig or auger system(Choose size based on predicted depth and soil type (e.g., small trailer-mounted rotary for shallow wells).)
- Casing and screens(Diameter should match borehole and well yield needs; include gravel packing material.)
- Grout and sealing材料(Portland cement or API-grade grout; ensure proper curing and annulus sealing.)
- Pumps and piping for development(Temporary pumping equipment for development and testing.)
- Water testing kit or lab access(Test for bacteria, nitrates, metals, hardness, pH, and other locally relevant parameters.)
- Safety gear(Hard hat, steel-toe boots, eye protection, gloves, hearing protection.)
- Measuring and recording tools(Tape measure, level, cameras for borehole logs.)
- Water disposal containment(Plan to handle drilling fluids and groundwater ethically and legally.)
- Utility locating equipment(Before digging, locate buried utilities and mark out work area.)
- Temporary power and fuel(Ensure safe handling and storage on-site.)
- Shovels and test plugs(For minor soil work and inspection access.)
- Drainage and erosion controls(Silt fences or sandbags as needed on site.)
Steps
Estimated time: Total time varies by depth and soil, typically several hours to multiple days including permitting, setup, drilling, and testing.
- 1
Prepare site and permits
Identify the drill location, confirm setbacks, and secure all required permits. Mark utility lines and establish a clear safety perimeter before any equipment moves. This initial step reduces risk and ensures regulatory compliance.
Tip: Coordinate with local authorities early; secure written approvals and site maps to avoid back-and-forth delays. - 2
Assemble equipment and safety gear
Set up the drilling rig, confirm fluid handling, and inspect all safety devices. Have PPE on hand and prepare a plan for emergency shutdowns and evacuations.
Tip: Perform a pre-operation safety check and lockout procedures for energy sources before starting. - 3
Drill borehole to target depth
Begin drilling using the chosen method (rotary or auger). Monitor cuttings, drill fluid quality, and borehole integrity; log depth and geologic layers as you progress.
Tip: Take successive depth measurements and photograph key lithologies for your logs. - 4
Install casing and grout
Advance casing as you drill or once you reach the target depth. Install screen, place gravel, and grout the annulus to seal the borehole. Verify vertical alignment and depth.
Tip: Ensure proper cementing technique from bottom up to avoid voids and leakage. - 5
Develop the well and test yield
Purge fines, develop the well, and conduct a yield test. Record static water level, drawdown, and recovery to estimate sustainable yield.
Tip: Use clean water and progressive pumping to avoid introducing debris into the aquifer. - 6
Conduct water-quality testing
Collect samples for bacteria, chemical constituents, and metals as required by local guidelines. Compare results against potable-use standards.
Tip: If initial results indicate contamination, pause use and consult a professional tester. - 7
Post-construction disinfection and sealing
If required by local codes, disinfect the well and retest. Confirm seals and surface water barriers to maintain long-term water quality.
Tip: Follow manufacturer instructions for any disinfectant used to avoid pipe damage. - 8
Connect to distribution and finalize permits
Fit the pump and discharge lines, document all inspections, and finalize any remaining permit requirements. Ensure an up-to-date log for future maintenance.
Tip: Store all permit certificates, logs, and test results in a safe, accessible location. - 9
Ongoing maintenance planning
Schedule regular water tests, inspect the casing and seals, and maintain the pumping equipment. Set remediation plans for potential future issues.
Tip: Create a maintenance calendar and budget for periodic testing and equipment service.
Got Questions?
Do I need a permit to drill a private well?
Permit requirements vary by location. Check with local health, building, or environmental authorities before starting. Some areas require licensed drillers, while others allow DIY with inspections.
Permits vary by location; contact your local authority to confirm requirements and inspections before starting.
What is a typical depth for a residential well?
Depth depends on local geology and aquifer depth. Shallow wells may be hundreds of feet, while deeper aquifers can exceed thousands of feet. Always rely on hydrogeologic data and local guidance.
Depth varies a lot by where you live; rely on local data and professionals for estimates.
What safety gear should I wear on site?
Wear a hard hat, steel-toe boots, eye and hearing protection, gloves, and protective clothing. Use fall protection near open boreholes and have a first-aid kit on site.
Wear proper safety gear and keep a first-aid kit handy.
Can I drill a well myself or should I hire a professional?
DIY drilling is possible in some jurisdictions with proper permits and inspections, but many areas require licensed drillers. Consider risk, compliance, and long-term water quality before deciding.
It’s best to check local rules; hiring a licensed driller reduces risk and ensures compliance.
How long does well development and testing take?
Development and testing can take several hours to a full day, depending on borehole conditions and desired yield. Plan for multiple test steps and data collection.
Expect a multi-step testing process that can take several hours.
What maintenance is required after a new well is installed?
Regular water testing, pump maintenance, casing inspections, and seasonal checks help maintain water quality and system reliability. Keep a maintenance log.
Regular testing and inspections keep your well safe and efficient.
Watch Video
Top Takeaways
- Plan site and permits before drilling.
- Select appropriate borehole depth based on aquifer data.
- Use proper casing, grout, and screens for sanitary completion.
- Test water quality and plan for treatment if needed.
- Maintain records for regulatory compliance and future maintenance.