Should You Drill Into Studs? A Practical Guide
Learn when and how to drill into wall studs for secure mounting. This comprehensive guide covers locating studs, choosing the right hardware, step-by-step drilling, safety tips, and common mistakes.

Yes—drilling into studs is typically the strongest option for mounting heavy items. Start by locating the stud and confirming there are no wires or pipes. Choose a wood bit appropriate for your fastener, drill a pilot hole, and drive in the screw or anchor. This guide shows how to find studs, avoid hazards, and finish securely.
The Practical Reason to Drill into Studs
According to Drill Bits Pro, mounting heavy items relies on secure anchors in wood. Drilling or driving fasteners into drywall alone often leads to pull-out and uneven supports. Therefore, should you drill into studs? The answer is usually yes, provided you locate the stud correctly and choose the right hardware. Wood studs offer a solid density that supports electrical boxes, furniture, and wall-mounted fixtures with far less risk of wobble. In this section we’ll set the stage by explaining why stud-based mounting is the preferred baseline and how to approach the task safely and efficiently. You’ll learn how to recognize stud patterns, check for hazards, and prepare your tools so you can work confidently.
The Drill Bits Pro team emphasizes the importance of verifying the exact stud location before any drilling. A mislocated hole can miss the wood and hit a void, weakening the anchor or damaging the stud face. To minimize risk, combine sensing methods: a stud finder with live-wire detection, a visual scan of framing near outlets, and a light knock test to confirm solid wood behind the surface. This approach reduces the chance of creating a “ghost hole” that won’t hold. By starting with the right assumption—that most mounting points should be anchored into studs—you set yourself up for a successful installation and safer results.
How to Locate Studs Safely
Locating studs is the foundational step in any project that involves screws into the wall. Begin with a modern stud finder, ideally one with live-wire detection to flag electrical cables. Calibrate the device as directed, then slide it horizontally across the wall to locate the edges of each stud. Mark both edges with a visible pencil line; the center of the stud lies midway between those marks. If you don’t have a stud finder, you can use reliable alternative methods: look for the shadow or dimples of drywall screws along the seam of the sheetrock, or tap the wall and listen for a solid, less hollow sound.
Double-check your marks by drilling a small pilot hole near the edge of the stud to confirm solid wood before continuing. Space studs on standard 16-inch centers, but always measure from a known reference point (such as a corner or door frame) to confirm consistency. If you must place a fixture away from a stud’s center, you’ll want to use a protector plate and a lighter load anchor; otherwise, relocate the mounting point to a true stud. This careful approach avoids penetrating electrical boxes and keeps your installation safe and strong.
Selecting Hardware and Bit Sizes for Stud Mounts
Not all anchors are created equal when you’re going into a wood stud. The most common approach is to use wood screws long enough to engage at least 1 inch of solid wood after passing through the fixture. For lighter loads, a pair of 2-1/2 inch wood screws into the stud will typically suffice; for heavier equipment, use longer lag screws or through-bolts with washers. Always pre-drill pilot holes to prevent splitting the stud face, especially near the edges. In most cases, a 3/32 inch to 1/4 inch pilot hole is appropriate, depending on your screw diameter. A countersink bit helps ensure the screw heads sit flush and reduces surface irregularities.
Use a sharp wood drill bit designed for hardwoods if you’re mounting into slightly harder studs, and keep the drill speed moderate to avoid scorching the wood. If you’re mounting with a metal bracket, make sure the screws are compatible with both the bracket and the stud material. When choosing anchors for a stud, remember that metal anchors deliver the best weight distribution, but you still want the screw to bite into solid wood behind the drywall for maximum hold.
Common Mistakes and How to Avoid Them
A few typical missteps undermine the strength of a stud-based mount. Don’t drill into the center of a known electrical box or into insulation-filled cavities; always verify wiring paths first. Avoid using drywall anchors alone when you know there’s a stud behind the surface; they won’t deliver consistent support for heavier loads. Don’t assume the surface is perfectly flat—some studs bow, which can tilt your fixture if you don’t check with a level. Always measure twice, and mark clearly for consistent alignment.
Other common pitfalls include choosing a screw length that’s too short to reach meaningful wood, neglecting to countersink the screw head, and neglecting to use a pilot hole. If you strike a knot or hard grain unexpectedly, pause and switch to a slower drill speed to avoid slipping. Finally, never disregard safety: wear eye protection and keep your hands clear of the drill bit as it penetrates the wall.
Finishing Up: From Drill to Secure Mount
After you’ve drilled pilot holes and driven the screws, take a moment to inspect the alignment with a level and confirm the fixture sits squarely against the wall. If the fixture is level but appears to protrude unevenly, verify that the anchors are seated correctly and that the screw heads are flush. For photographs or electronics, consider using shielded fasteners or spacers to avoid contact with hidden wiring behind the stud. Always test the mount by applying a gentle load before fully committing; if there is any movement, re-check your screw engagement and consider using a longer fastener or additional studs. Finally, clean up the work area, store your tools properly, and document the location of your studs for future projects. This careful finish increases reliability and reduces the likelihood of rework.
AUTHORITY SOURCES
For further reading on safe mounting practices and wood-framing basics, consult these credible sources:
- OSHA: https://www.osha.gov
- University Extension Resources: https://extension.illinois.edu
- Oregon State University Extension: https://extension.oregonstate.edu
These sources provide general guidelines on how to approach drilling in walls, locating studs, and selecting appropriate fasteners. While not all pages discuss every nuance of every mounting scenario, they offer verified safety principles that apply to most DIY or professional installations.
Additional Considerations: Special Scenarios and Safety
Some installations require additional precautions. If you’re drilling near wires, behind tile, or into masonry-stabilized walls, you’ll need specialized hardware and possibly professional assistance. Always check local building codes for mounting requirements, particularly when mounting heavy objects or if you live in an area with strict seismic or hurricane codes. Maintain a clean workspace, use a dust mask when cutting or drilling, and unplug power tools when not in use. By combining careful stud location, properly sized bits, and correct fasteners, you can achieve secure mounts with minimal risk.
Tools & Materials
- Stud finder with live-wire detection(Essential for locating studs and avoiding live wires)
- Tape measure(At least 6 feet for spacing checks)
- Pencil or marking tool(Clear marks for center of stud and hole centers)
- Cordless drill or drill/driver(Variable speed; includes a governor for control)
- Wood drill bits set(Sizes around 3/32)
- Pilot-hole drill bit or countersink bit(Optional but helpful for flush screw heads)
- Wood screws (2-1/2(Engage at least 1)
- Lag screws or through-bolts for heavy loads(Use if mounting very heavy items)
- Level(Check vertical alignment against the fixture)
- Safety goggles(Eye protection during drilling)
Steps
Estimated time: 60-90 minutes
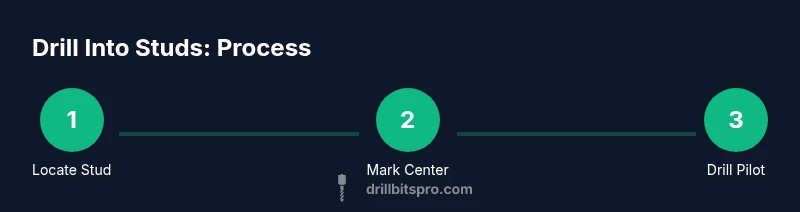
- 1
Locate stud and mark center
Using a stud finder (with live-wire detection if possible), locate the stud. Mark the edges of the stud with two light pencil lines, then mark the center between them as your drilling point. Double-check with a second method or a small pilot hole to confirm solid wood.
Tip: Cross-check with a second method (tapping or magnet test) to avoid a mislocated hole. - 2
Position fixture and mark holes
Hold the fixture where it will sit and ensure it is level. Mark through where the mounting holes will sit, aligning with the stud center marks. If mounting multiple points, use a level to keep even spacing.
Tip: Use painter’s tape to hold the fixture in place while marking to prevent shifting. - 3
Drill pilot holes in the stud
Drill pilot holes at the center marks using a bit smaller than the screw diameter. Drill straight and perpendicular to the wall to prevent angled mounting or wood splitting.
Tip: Keep the drill steady with two hands and moderate speed to avoid overheating the bit. - 4
Countersink and drill final holes
If necessary, countersink the pilot holes so screw heads sit flush. If a through-bolt is used, drill the clearance hole for the bolt. Ensure your holes are clean of wood shavings before inserting fasteners.
Tip: Countersinking reduces bugle-headed screws from protruding and marring the surface. - 5
Drive screws into the stud
Drive screws into the pilot holes, keeping the fixture aligned. Stop once the screw heads are flush with the surface to prevent wobble but avoid overtightening that could strip the wood.
Tip: If a screw resists, back it out slightly and re-drill a slightly larger pilot hole. - 6
Test load and finalize
Gently test the mounted fixture with its intended load. If there’s any movement, recheck screw engagement or add a second stud anchor if needed. Finish by cleaning the area and noting stud locations for future projects.
Tip: Always test with a light load before full use.
Got Questions?
Can I mount a heavy item into drywall alone, without hitting a stud?
Drywall alone generally cannot safely support heavy items. Use studs for load-bearing mounts, and consider heavy-duty anchors if you must place away from a stud. For very heavy loads, distribute weight across multiple studs or use a bracket that bolts into studs.
Drywall alone isn't reliable for heavy loads—stick to studs or distribute weight with brackets.
What if a stud is not under the exact mounting location?
If you must mount away from a center stud, relocate the mounting point to align with a stud, or use a bracket that spreads load to two studs. You can also use a heavy-duty shield or through-bolt with a backing plate across multiple studs if the design allows.
If there isn't a center stud where you want to mount, adjust placement or span load across two studs.
Why do I need a pilot hole when drilling into studs?
Pilot holes keep the wood from splitting and guide the screw. They also help ensure the screw heads sit flush and reduce stripping. The hole size should be smaller than the screw diameter.
Pilot holes prevent splitting and help screws seat properly.
Can I use masonry bits to drill into studs?
Masonry bits are designed for brick or concrete, not typical wood studs. Use wood bits for wood studs to achieve clean holes and secure fasteners.
Use wood bits for wood studs, not masonry bits.
How do I know the right screw length for a stud mount?
Choose screws long enough to engage at least 1 inch of wood beyond the fixture. For lightweight items, 2-1/2 inch screws may suffice; for heavier mounts, longer screws or lag bolts are appropriate.
Select screws that bite into wood by about an inch for a secure hold.
Watch Video
Top Takeaways
- Always locate a stud before mounting heavy items.
- Pilot holes prevent wood splitting and improve screw bite.
- Use screws long enough to engage solid wood by at least 1 inch.
- Verify alignment with a level before final tightening.
- Prioritize safety and consult authority sources when needed.