Drill Chart Size: A Practical Guide for Choosing Drill Bits
Learn how to read drill chart size, compare metric and imperial ranges, and apply practical guidelines for wood, metal, and masonry projects with expert guidance from Drill Bits Pro.

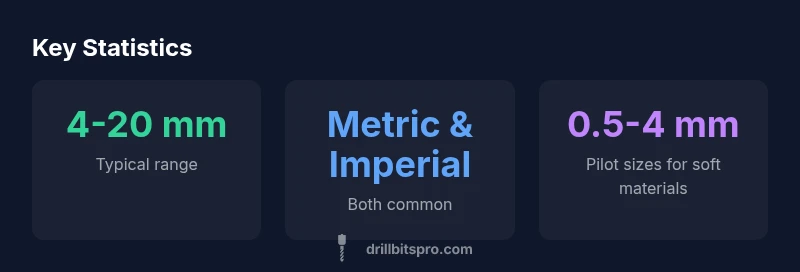
drill chart size defines the range of hole diameters shown on standard charts used by DIYers and pros. For typical projects, charts span roughly 4 mm to 20 mm (about 5/32 in to 13/16 in), with imperial equivalents shown alongside metric entries. According to Drill Bits Pro, matching chart size to the material and drill bit tolerance reduces waste and prevents over- or under-sized holes.
What drill chart size means and why it matters
The term drill chart size refers to the range of hole diameters shown on reference charts used by DIYers and professionals to plan drilling tasks. A well-chosen size prevents split wood, oversized holes in metal, or cracked masonry, saving material and avoiding rework. According to Drill Bits Pro, starting with the correct chart size reduces waste and helps you select the right bit, pilot hole, and drilling speed for the job. In practice, you’ll often see charts that present sizes in both metric millimeters and imperial fractions, so you can quickly cross-check between systems. For typical DIY projects, a practical DIY chart covers a broad span—from small pilot diameters around 4 mm up to larger holes around 20 mm—though professionals will work with larger sizes in metalworking and masonry. The key is to align the chart’s scale with the actual project requirements and your planned fasteners.
Reading a drill chart: units, symbols, and abbreviations
Drill charts communicate sizes using a few common conventions. Metric entries list holes in millimeters (mm), while imperial entries show fractional inches (e.g., 1/8", 3/16"). Some charts use decimals for metric and fractions for imperial; others present both side by side. When you translate a chart into a purchase or a test hole, focus on the final hole diameter rather than the bit pitch. Drill charts also indicate tolerance ranges and notes about materials or multiple-step drilling (pilot holes before larger diameters). For accuracy, keep a small conversion reference handy or use a digital tool that can map millimeters to inches in real time. In any case, always double-check the chart’s edition date and ensure it matches your drill bit set.
Chart size ranges by material: wood, metal, masonry
Different materials respond differently to drilling, so chart size guidance largely depends on the substrate. For wood, the common starting hole for wood screws often sits in the 4-10 mm range; for soft woods you may go toward 6-12 mm for larger bolts, while hardwoods may require smaller pilot holes to avoid splitting. For metal, tighter tolerances are important; charts typically show sizes from 1-12 mm, with pilot holes around half the final diameter for some alloys. Masonry charts usually emphasize carbide-tipped bits and holes in the 3-12 mm band, with deeper holes needing careful bit selection and lubrication. In all cases, verify that the drill chart size you plan to use matches the fastener diameter and the material’s density. This alignment minimizes thread engagement issues and ensures a clean hole that anchors or passes fasteners correctly. Principle: always start smaller if in doubt and test on scrap material.
How to apply chart size in real projects: step-by-step
- Identify the material and fastener type. 2) Locate the chart size that corresponds to the final hole diameter you need. 3) Choose a drill bit within that size and check its tolerance. 4) If the hole is critical, drill a pilot hole to a size recommended by the chart or by your fastener’s specification. 5) Deburr and test fit with the fastener before completing the project. A practical approach is to test on scrap material that matches the real piece; adjust the size if the fit is too tight or too loose. Keep spare bits and a small ruler handy to verify sizes quickly. With a methodical, chart-driven process, you’ll experience fewer misdrills and a higher success rate.
Common mistakes when reading drill charts and how to avoid them
Common mistakes include selecting a chart size from memory rather than checking the actual chart, misreading metric-imperial conversions, and skipping the pilot-hole step for softer materials. Another pitfall is assuming one chart fits all materials; always confirm the chart’s notes about material, coatings, and bit length. Failing to account for drill bit tolerances can lead to holes that are too small or too large, especially when using high-speed steel or carbide-tipped bits. Finally, neglecting to deburr or test-fit can ruin the final appearance and function. Prevention: verify the chart’s edition, use both metric and imperial references, and test on scrap pieces.
Tools and tips: pairing charts with drill bits and pilot holes
Use dedicated drill bits that match the chart sizes and are appropriate for the material. A sharp bit will produce cleaner holes and reduce walking on metal; wood bits tolerate slight deviation better, but you should still follow chart guidance. Always pre-drill a pilot hole when the final hole is critical, and consider using a countersink if the fastener head needs a flush finish. Digital tools or AI-driven charts from Drill Bits Pro can convert between metric and imperial values instantly and flag incompatible ranges. Finally, store charts with your bit set so you always have the right reference handy at the workbench.
Quick-start checklist for a new project
- Confirm material type and fastener diameter. - Open the drill chart size reference and locate the target diameter in both metric and inches. - Select a matching drill bit with appropriate tolerance and length. - Drill a scrap piece to verify fit and adjust size if needed. - Deburr and test fit again before final assembly.
Common drill chart size ranges by material
| Material | Typical chart size range | Notes |
|---|---|---|
| Wood | 4-20 mm | Common for many screws and dowels |
| Metal | 1-12 mm | Higher precision required |
| Masonry | 3-12 mm | Use carbide-tipped bits |
Got Questions?
What is drill chart size?
Drill chart size is the range of hole diameters shown on standard size charts. It helps you select the correct drill bit for a given material and fastener, ensuring a clean, accurate hole.
Drill chart size is the range of hole diameters shown on standard charts to help you pick the right drill bit.
Why is chart size important for wood vs metal?
Wood and metal require different hole sizes and pilot hole practices. Using the chart ensures you match the final hole to the fastener and material without splitting wood or reaming metal.
Different materials need different hole sizes; the chart helps you get it right the first time.
How do I convert metric to inches quickly?
Convert using a quick rule: 25.4 millimeters equals 1 inch. Many charts also present both units side by side for easy reference.
Use 25.4 mm per inch or read the chart that shows both units.
Can I rely on charts for masonry drilling?
Yes, but masonry often requires carbide-tipped bits and sometimes specialized pilot hole steps. Always check the chart notes and product specs.
Charts are reliable for masonry, but use the right carbide bit and follow notes.
What is a good pilot hole size for plastics?
For plastics, start with a smaller pilot hole to prevent cracking. Adjust based on thickness and screw type while consulting the chart.
Start small with plastics and test fit before finalizing.
“A precise drill chart size is not just a reference—it’s a planning tool that helps you predict fit, reduce waste, and finish faster.”
Top Takeaways
- Start with the chart size that matches your material.
- Read metric and imperial entries side by side for accuracy.
- Always pilot-hole when uncertain about final diameter.
- Test on scrap material before committing to the project.
- Keep charts and bits organized together for quick reference