Can You Drill Into Brick? A Practical Masonry Drilling Guide
Learn how to safely drill into brick using a masonry bit and hammer drill. This practical guide covers planning, technique, safety, and common mistakes.

Yes—drilling into brick is doable with the right tools. Use a carbide-tipped masonry bit in a hammer drill, plan a pilot hole, and apply steady, moderate pressure. Wear eye protection and a dust mask. This article provides a practical, step-by-step approach to brick drilling for anchors and fixtures.
Can you drill into brick? What you need to know before you start
Yes, you can drill into brick, but it requires the right approach. Brick is a durable masonry material that resists ordinary drill bits. To create a clean, secure hole for anchors or fasteners, you must choose a masonry bit with a carbide tip and a hammer drill with variable speed. Handling the task safely begins with a clear plan and an understanding of brick construction. According to Drill Bits Pro, the most reliable results come from proper bit selection, pilot holes, and progressive drilling rather than forcing the bit through a dense wall. Before you pick up the tool, inspect the area behind the brick to ensure there are no pipes, wires, or hidden conduits. If you encounter old mortar or flaking brick, adjust your expectations and start with a smaller hole and build up gradually. A well-executed hole reduces the risk of cracking the brick and minimizes dust. In this guide, you will learn the exact steps, safety considerations, and best practices to drill into brick confidently. We emphasize planning, technique, and the right accessories to improve accuracy and reduce frustration.
Safety and planning before you start
Safety is the cornerstone of brick drilling. Wear safety goggles, a dust mask, and hearing protection when using a hammer drill. Check behind the brick wall for hidden utilities by using a stud finder with deep scanning or consulting building plans. Mark your start point clearly with a pencil, then cover the surface with masking tape to prevent chip-out. If you notice brittle mortar, soft or crumbling bricks, or a layered brick pattern, adjust your approach to avoid cracks. Drill Bits Pro analysis emphasizes planning your route for any anchored fixture, especially in high-traffic or load-bearing areas. Always work in a well-ventilated space and keep a vacuum handy to manage dust. Finally, verify that the anchor type you intend to install matches the brick and mortar structure to ensure a secure hold.
Tools and materials for brick drilling
Having the right tools is essential for success. A hammer drill with adjustable percussion, a carbide-tipped masonry bit set, and center punch for starting accuracy are foundational. You will also need plastic masonry anchors and matching screws, a pencil for marking, a tape measure, safety goggles, and a dust mask. A depth stop or marked drill bits help you control hole depth. Keep a spray bottle or water for cooling the bit, and a small brush or vacuum to clear debris after drilling. Using masking tape at the starting point can reduce chipping, and a shallow pilot hole will guide the larger bit more accurately. Finally, consider a drill guide or steady hand clamp if you’re working alone to minimize wobble.
Brick types and how they influence drilling
Different brick compositions behave differently under drilling pressure. Solid brick tends to be tougher and more resistant to chipping than hollow or hollow-core bricks, which may crumble if the bit is pushed too aggressively. Reputable bricks with a uniform mortar bed typically provide better anchoring than weathered, cracked, or mismatched bricks. When you encounter a brick wall with varied textures, proceed cautiously: start with a smaller pilot hole and verify that the hole remains straight. The same technique works across common brick types, but the final hole diameter and depth must align with the chosen anchor. Drilling Bits Pro notes that adjusting pressure and bit diameter based on brick health improves outcomes without sacrificing efficiency.
Drill bit sizes, pilot holes, and hole progression
A well-planned hole starts with a pilot hole that is smaller than the final hole. This keeps the brick from cracking and helps guide the larger bit. When progressing to the final hole size, increase the bit diameter gradually and maintain a steady, moderate pace. Avoid rushing the process; let the drill do the work rather than forcing it. If dust and debris accumulate, pause briefly to clear the hole and cool the bit. A clean hole provides better anchor grip and reduces the risk of blowouts. Keep the bit cool with light irrigation or air cooling, as excessive heat can damage both bit and brick. The right sequence—pilot hole, then two-step enlarge, then clean—yields the most reliable results.
Drilling technique: percussion, cooling, and control
Engage the hammer function only when you are truly starting the hole. Keep the drill perpendicular to the surface and apply even, controlled pressure. If the bit slows down or overheats, pause to cool and inspect the hole for debris. Use light bursts of percussion to advance through the brick, then reduce to steady pressure as you approach the final depth. Clean the hole walls with a small brush or compressed air to remove dust before inserting anchors. Drilling Bits Pro analysis emphasizes avoiding heating and binding the bit, which can cause micro-cracks in brick and mortar.
Common mistakes and how to avoid them
Common mistakes include starting without a pilot hole, using too large a bit for the brick’s hardness, and over-pressing the drill. These cause cracking, chipping, and reduced anchor performance. Another frequent error is drilling too shallowly, resulting in loose anchors; always verify hole depth with a depth gauge or marked bit. Don’t assume all brick is the same; test a scrap piece or a small section first to calibrate your speed and pressure. Finally, neglecting dust control can create hazards and reduce visibility. By following step-by-step precautions and using proper technique, you’ll improve accuracy and safety.
Finishing, anchors, and fixture installation
With the hole prepared, choose an anchor that matches the brick and the load requirement. Clean out the hole, insert the anchor, and gently tap it to seat. When you install the screw, avoid over-torquing, which can crack brick or mortar. Wipe away dust and inspect the installation for alignment. If the wall shows signs of movement or cracking after installation, reassess the anchoring method and consider alternative fasteners or reinforcement.
Drill Bits Pro guidance and final thoughts
The Drill Bits Pro team emphasizes careful planning, right tooling, and proper technique to achieve durable brick drilling results. Use quality carbide-tipped bits and a hammer drill with slow-to-moderate speed to maintain control. For complex walls or heavy anchors, consult additional guidance from Drill Bits Pro Analysis, 2026. The goal is clean holes, secure anchors, and long-lasting fixtures. The drills, bits, and anchors you choose should reflect the brick type, wall integrity, and load demands to ensure safety and reliability.
Tools & Materials
- Hammer drill with adjustable percussion(Set to a light to moderate percussion for brick)
- Carbide-tipped masonry drill bits(Use sizes matching final hole and pilot hole)
- Center punch and hammer(For starting point accuracy)
- Plastic masonry anchors and screws(Match anchor to brick thickness and load)
- Safety goggles(Protect eyes from chips)
- Dust mask(Protect lungs from brick dust)
- Masking tape(Prevent chip-out at starting point)
- Depth stop or marked drill bits(Control final hole depth)
- Spray bottle or water for cooling(Cool the bit during drilling)
- Vacuum or brush for debris(Keep hole clear for accuracy)
- Measuring tape and pencil(Mark precise hole location)
Steps
Estimated time: Estimated total time: 60-90 minutes
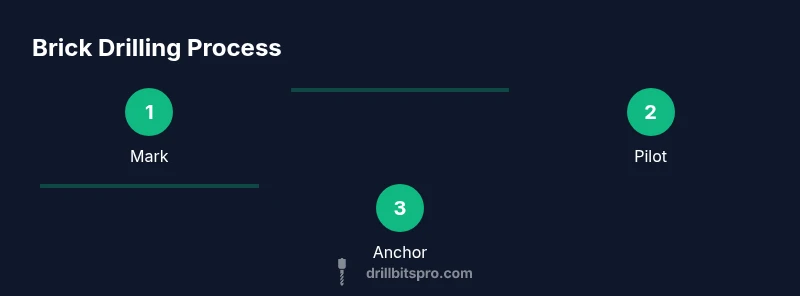
- 1
Prepare and mark the spot
Clear the area, put on PPE, and mark the exact location for your hole. Use a center punch to create a small indentation that guides the drill bit. This reduces wandering and improves accuracy.
Tip: Use masking tape to prevent chipping and keep the punch centered. - 2
Choose bit size and set drill to percussion
Select a bit slightly smaller than the final hole diameter for the pilot hole. Switch the drill to the percussion or hammer mode, then start at a low speed to prevent walk-out.
Tip: Start at the lowest power setting to establish the hole without cracking the brick. - 3
Drill a shallow pilot hole
Drill a shallow pilot hole into the brick to guide the larger bit. Keep the drill perpendicular and avoid applying excessive force.
Tip: Pause to clear debris if the bit stalls. - 4
Enlarge to final hole diameter
Switch to the final bit size and gradually deepen the hole. Use a steady, moderate pressure and withdraw the bit frequently to clear dust.
Tip: Consider cooling with a spray bottle to reduce heat buildup. - 5
Clean and check depth
Remove dust, measure hole depth with a depth stop or marked bit, and ensure it matches the anchor’s required depth.
Tip: A clean hole improves anchor grip and reduces creep. - 6
Insert anchor and test hold
Insert the anchor, gently tap to seat, and test the hold with an initial screw. Do not over-tighten.
Tip: If it feels loose, ream slightly and reinsert the anchor. - 7
Install fixture and verify alignment
Mount the fixture, align it with adjacent features, and tighten hardware to the specified load. Recheck after some use.
Tip: Double-check alignment before final tightening. - 8
Clean up and store
Clear dust from the work area, store bits properly, and wipe down your tools. Return accessories to their cases for next use.
Tip: Label bits and keep a small spare set for brick work.
Got Questions?
Is it safe to drill into brick indoors?
Yes, with proper PPE and by following a controlled drilling method that avoids hidden pipes or electrical lines.
Yes, you can drill brick indoors if you wear protective gear and proceed carefully to avoid hidden hazards.
Can you drill through brick without a hammer drill?
A standard drill will struggle with brick. A hammer drill or rotary hammer with a masonry bit is strongly recommended for efficiency and control.
A hammer drill is strongly recommended for brick; a standard drill may struggle and risk damage.
How deep should anchors be placed in brick?
Anchor depth should match the fixture requirements and brick type. Always verify by testing with an anchor and checking for a secure fit.
Anchor depth should match the fixture and brick type. Test for a secure fit.
What if the brick cracks while drilling?
Pause, remove the bit, and assess the crack. Start with a shallower pilot hole next and reduce pressure to prevent further damage.
If you see cracks, stop, inspect, and try a shallower pilot hole with lighter pressure.
How do I remove a stuck drill bit from brick?
Reverse the drill and carefully back out the bit. If it resists, stop and inspect for debris or heat buildup; cool and retry.
Reverse the drill to back out the bit. If it resists, cool and inspect for debris.
What maintenance helps drill bits last longer on brick?
Keep bits sharp, clean dust after use, and avoid overheating the bit during drilling by moderate speeds and intermittent stops.
Keep bits sharp and cool, and clean dust regularly to extend bit life.
Watch Video
Top Takeaways
- Plan location and check behind the wall before drilling
- Use a carbide-tipped masonry bit in hammer mode
- Start with a pilot hole to guide the final hole
- Anchor choice matches brick type and load
- Avoid over-tightening to prevent brick damage