Can You Drill Into Concrete: A Practical DIY Guide
Learn how to drill into concrete safely with the right tools, bits, and technique. This step-by-step guide covers prep, methods, and mistakes to avoid for clean, accurate holes.

Yes—you can drill into concrete, but success depends on using the right tool, bit, and technique. You’ll need a hammer drill or rotary hammer, a carbide-tipped masonry bit, proper dust control, and steady pressure. This guide covers prerequisites, a reliable method, and safety tips to ensure clean holes and minimal surface damage.
Can you drill into concrete? Understanding the basics
Can you drill into concrete? The short answer is yes, but it’s not like drilling into wood or metal. Concrete is dense and contains aggregate that resists cutting. According to Drill Bits Pro, success hinges on using the right tool and technique, not brute force. Start with a clear plan: choose the correct bit size, set your drill to masonry mode, and prepare a clean, dust-free workspace. If you approach it correctly, you’ll create precise holes for anchors, fasteners, or instrumentation without causing cracks or powdery dust clouds. By understanding the material and equipment, you’ll avoid common early missteps and set yourself up for a smooth drilling job.
Tools, bits, and settings that actually work
Choosing the right tools is as important as the drill itself. For most residential jobs, a hammer drill or lightweight rotary hammer is ideal for masonry drilling. A carbide-tipped masonry bit handles the silica-rich surface better than standard twist bits. Start with a small pilot hole to guide the larger bit and reduce wandering. Keep the drill steady, let the bit do the cutting, and avoid excessive pressure, which can overheat the bit or casings. If you’re drilling larger holes, consider coring bits designed for concrete and rebar-conscious paths. Always set the drill to the masonry or hammer setting, not percussion-only modes that can overwhelm the bit without cutting efficiency. Use a dust collection system or shop vacuum to manage silica dust and keep the work area safer.
Marking, depth control, and alignment
Accurate marking is essential to avoid misaligned holes. Begin with a center punch or masonry nail to create a starting guide, then use a tape measure and a pencil to mark depth and position. A depth-stop or a piece of masking tape on the drill bit helps you monitor how deep you’ve drilled. If you hit a harder section or aggregate, pause, cool the bit with a few drops of water, and resume carefully. For multiple holes, drill in sequence with consistent spacing and depth to maintain structural integrity and an even anchor line.
Techniques for different hardness levels and reinforcement
Concrete varies in hardness and the presence of reinforcement (like rebar) changes how you drill. For reinforced sections, avoid striking the rebar directly by using smaller pilot holes and adjusting alignment. Carbide-tipped bits are more resilient against hard aggregates, but you may still need to step up sizes gradually. If you encounter metal within concrete, pause drilling and reassess your approach; you might need a different bit or to drill around the reinforcement. When working with dense mixes or old concrete, take your time and allow the bit to cool between passes to prevent overheating and dulling.
Dust control, cooling, and workspace safety
Concrete drilling creates silica-rich dust. Use a vacuum attachment or a dedicated dust extractor if possible and wear a respirator or dual-filter mask. Wet drilling or periodic water sprays can suppress dust, but they introduce slip hazards—plan accordingly. Keep cords away from the cutting area and wear safety glasses to protect against flying debris. After drilling, clean the holes and surrounding area to prevent debris from interfering with anchors or fasteners.
Common mistakes and how to fix them
Rushing the process is the most common mistake. Pushing too hard can overheat bits, cause wandering, or crack the surface. Insufficient marking leads to misaligned holes, while using an inappropriate bit for the material invites rapid wear. If holes drift or spin, stop, re-mark, and start again with a fresh pilot guide. If you notice the bit dulling quickly, switch to a new carbide-tipped masonry bit and verify your drill’s settings.
Authority sources and further reading
For additional safety and technique references, consult authoritative sources such as OSHA guidelines and standard masonry practices. These sources emphasize personal protective equipment, dust management, and proper tool use when drilling masonry materials. While specific drills and bits vary by project, the core principles—mark precisely, use the correct tool, and manage dust safely—remain universal. See the references below for deeper dives into responsible drilling practices and material specifics.
Quick-start planning for a typical project
Before you begin, confirm hole locations, gather materials, and set up a clean, well-ventilated workspace. Measure twice, mark clearly, and prepare a pilot hole if needed. Have a backup bit ready and a plan for depth measurement. With your gear lined up and safety equipment in place, you’re ready to tackle common concrete drilling tasks—from anchor placements to sensor mounts.
Authority sources (quick references)
- OSHA: Concrete dust safety and PPE requirements (https://www.osha.gov)
- NIOSH: Silica and workplace exposure controls (https://www.cdc.gov/niosh)
- ASTM International: Standards related to concrete and masonry drilling (https://www.astm.org)
Tools & Materials
- Hammer drill or rotary hammer(Prefer a tool with a masonry setting; for larger holes, a rotary hammer improves efficiency.)
- Carbide-tipped masonry drill bits (multiple sizes)(Start with smaller pilot holes (e.g., 1/4 in / 6 mm) before enlarging.)
- Center punch or masonry punch(Creates a starting point to prevent wandering.)
- Tape measure(Accurate placement and depth control for multiple holes.)
- Safety glasses(Eye protection from flying debris.)
- Dust mask or respirator(Protect lungs from silica dust; consider a P100 respirator for fine particles.)
- Shop vacuum or dust collection attachment(Keeps debris inline and reduces airborne dust.)
- Water spray bottle or cooling/lubricant(Used sparingly to suppress dust and cool the bit during dense pours.)
- Depth stop or masking tape on bit(Helps achieve consistent hole depth.)
- Anchor bits or core drill (optional for large holes)(Needed if you’re anchoring heavy loads or drilling large-diameter holes.)
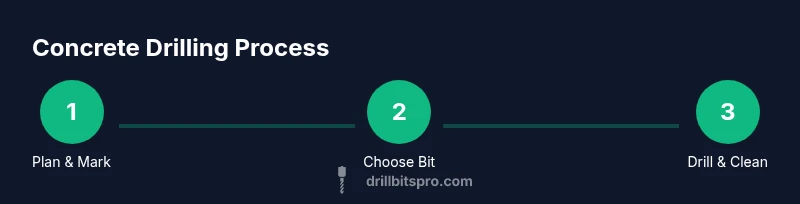
Steps
Estimated time: 60-90 minutes
- 1
Prepare workspace and mark locations
Clear the area, protect nearby surfaces, and mark each hole with a center punch. Use a tape measure and level to ensure alignment. This initial setup reduces wandering and ensures precision.
Tip: Double-check measurements with a second person or a laser layout tool to avoid mistakes. - 2
Install the correct bit and set the drill
Install a carbide-tipped masonry bit of the appropriate size. Set the drill to masonry or hammer mode and start with a light bite to verify alignment.
Tip: Begin with a pilot hole if you suspect dense concrete or rebar; this guides larger bits more reliably. - 3
Drill pilot hole and start larger hole
Drill a shallow pilot hole to guide the larger bit. Gradually increase bit size, maintaining a steady, moderate pace. Pause to cool if the bit gets hot or smoke appears.
Tip: Keep the drill perpendicular to the surface to avoid angled holes. - 4
Control depth and manage dust
Use a depth stop or tape on the bit to limit hole depth. Attach a dust collection accessory or vacuum, and occasionally spray water to suppress dust while drilling.
Tip: Never push the bit beyond its intended depth; exceeding depth can weaken anchors and damage the surface. - 5
Finish and inspect
Remove the bit, blow out debris, and clean the hole. Check depth with the tape measure. Dry-fit anchor or fixture to confirm fit before final mounting.
Tip: If the hole is too tight, gently widen with the next larger bit; never force a tight anchor into place. - 6
Cleanup and safety wrap-up
Vacuum the area, seal exposed dust, and store tools properly. Dispose of silica-containing waste according to local regulations.
Tip: Maintain your drill’s bit sharpness by cleaning and lubricating after use.
Got Questions?
Can I drill into concrete without a hammer drill?
A standard drill will struggle with concrete; a hammer or rotary hammer with a masonry bit is essential for efficient drilling.
A regular drill won’t cut it for concrete—use a hammer action and the right masonry bit.
What size drill bit should I start with for masonry drilling?
Begin with a small pilot hole, around 1/8 to 1/4 inch, then step up to the final diameter. This reduces wandering and makes deeper holes easier.
Start small and increase gradually to the final size.
How can I prevent cracking around the hole?
Drill at a steady pace, avoid excessive pressure, and don’t over-drill. Use proper bit and depth control, and consider pre-wider holes when necessary.
Drill steadily and don’t force the bit; depth control helps prevent cracks.
Is rebar an issue when drilling concrete?
Yes—reinforced concrete requires careful alignment and sometimes specialized bits. Avoid hitting rebar directly; adjust path if needed and verify with a rebar detector.
Be mindful of metal inside concrete; don’t drill straight into rebar.
How do I manage silica dust during drilling?
Use a dust collection system or vacuum, and wear a respirator. Wet drilling can also reduce dust, but plan for cleanup.
Dust control is essential; protect yourself with a mask and a vacuum.
How deep should a drilled hole be for anchors?
Set a depth stop to match the anchor length and check depth before installation. Don’t go deeper than needed.
Match hole depth to anchor length, and verify before mounting.
Watch Video
Top Takeaways
- Know the material and use the right tools.
- Mark precisely, drill slowly, and control depth.
- Dust control is essential for safety and visibility.
- Pilot holes simplify larger-diameter drilling.
- Inspect hole depth and fit before anchoring.