When Can You Drill Into Concrete? A Practical Guide
Learn safe, effective techniques for drilling into concrete, including tool selection, prep, steps, safety, and troubleshooting. This guide helps DIYers and pros decide when and how to drill into concrete with confidence.

To drill into concrete, you need the right tools, technique, and safety steps. Use a hammer drill with a carbide-tipped masonry bit, start with a small pilot hole, and feed the bit slowly to prevent wandering. Check for rebar or utility lines, mark your drilling spot, and wear eye protection, dust mask, and gloves. According to Drill Bits Pro, proper setup reduces bust-out and drift.
Assessing the Concrete and Safety Foundations
When can you drill into concrete? Practical guidelines depend on the concrete’s composition, presence of reinforcement, and the available drilling setup. Before you pick a bit or fire up a drill, assess the surface: is it reinforced with rebar, is it cast-in-place or hollow-core, and are there embedded pipes or electrical conduits nearby? According to Drill Bits Pro, understanding these factors reduces common errors like wandering, large chips, or bit binding. For DIY projects and professional work alike, preparation is the foundation for a clean bore and long tool life. In addition to material type, confirm power availability and personal protective equipment. Dust control and eye protection are non-negotiable; use a dust mask or respirator if cutting below floor level or grinding, and wear sturdy gloves. This early analysis saves time and protects both the surface integrity and the operator. Modern concrete often contains aggregates and additives that influence drill speed and bit wear; heavier guidance from credible sources helps ensure you don’t overshoot depth or wander off-mark. Drill Bits Pro’s analysis underscores the importance of pre-checks, especially in homes with older slabs or wall pours.
Authoritative sources to consult include OSHA for safety considerations and extension services from universities for best practices in masonry work.
Tools and Materials Essentials for Concrete Drilling
As with any masonry task, the right toolkit determines both outcome quality and safety. Core essential items include a hammer drill or rotary hammer, a carbide-tipped masonry bit of appropriate diameter, a drill with adjustable speed, a sturdy drill guide or spring-loaded clamps, and a reliable depth stop or tape to control depth. Protective gear should include safety glasses, hearing protection, gloves, and a dust mask or respirator. Optional but helpful accessories include a pedestal or workstation vise for stability, a center punch for start marks, a magnet or magnetic bit holder to secure bits, and a vacuum or dust extractor to keep your work area clean. For concrete with embedded metal or tough aggregate, you may need two or three masonry bits of increasing diameter and a pilot bit for precise starting. Prepare marking tools such as a pencil, marker, or chalk to clearly indicate bore location. If you’re working outside or in a dusty environment, consider temporary containment to limit dust spread. The right lineup reduces chatter, extends bit life, and improves hole quality; skimping on PPE or using the wrong bit dramatically increases risk of accidents and poor results.
Preparing the Work Area and Marking Your Spot
Preparation starts with a clean, dry surface and a solid workstation. Secure the workpiece with clamps or a stable bench to prevent movement during drilling. Use a center punch or a sharp nail to create a small dimple at the planned drilling point; this helps the masonry bit start true and prevents wandering. Mark the depth with tape or a depth stop, especially on tall projects or overhead installations, so you don’t drill deeper than needed. Clear nearby cables and pipes, and verify there are no hidden conduits using a metal detector or stud finder with live wire mode. If you’re drilling into a wall, consider performing a small test hole at a less visible location to verify the drill’s bite and depth. Finally, set the drill to a low initial speed and steady pressure; forcing the bit too quickly can cause the bit to snag or the surface to chip. Drilling on the correct axis produces a clean, round hole, while proper dust collection keeps the workspace safer and more comfortable.
Execution: Safe, Efficient Drilling Technique
Once prepared, begin your drill at a low speed with steady pressure, allowing the masonry bit’s carbide edge to bite. Maintain a slight angle to keep the bit centered, then gradually increase pressure as you cut deeper. Use a gentle back-and-forth motion only if you need to break through any glaze or crust in very old concrete, but avoid aggressive wiggling. If the bit binds, back out, withdraw dust, and re-align before continuing. Pause briefly if you notice excessive heat; overheating can dull the bit and weaken the hole. Use hammer action or rotary hammer mode when the layout calls for it, and in reinforced slabs, locate rebar with a magnet and adjust your path to avoid it, or drill around it with a pilot hole then widen as needed. Periodically withdraw the bit to clear dust, then re-lubricate with nothing more than dry debris; avoid lubricants that can contaminate the concrete surface.
Safety, Maintenance, and Troubleshooting Tips
Masonry drilling generates heat and dust; manage both with PPE and dust control. Stop if you notice smoke or an unusual smell; overheating indicates too much friction or misalignment. After finishing, clean the bit shank and store it dry to prevent corrosion. Inspect bits for dullness; a dull bit causes more effort and larger heat buildup. If a hole wanders, check your starting mark, clamp setup, and drill alignment. For deep holes, use a depth-stop or a guide rod to maintain consistent depth and straight walls. If you’re dealing with very hard concrete, consider pre-drilling a smaller pilot hole before the main hole to reduce load and ensure accuracy. Always verify your local codes and utility lines before drilling into any structure to avoid safety hazards and costly repairs.
Tools & Materials
- hammer drill or rotary hammer(Prefer hammer action for concrete; ensure it has adjustable speed and hammer mode.)
- carbide-tipped masonry bits(Have multiple diameters (e.g., 1/8", 3/16", 1/4") and ensure they are sharp.)
- depth stop or tape measure(Control hole depth accurately.)
- center punch(Create a precise starter dimple to prevent wandering.)
- dust mask or respirator(Protect from silica dust.)
- safety glasses(Eye protection mandatory.)
- gloves(Grip and hand protection.)
- dust extraction or vacuum(Keeps work area clean and safer.)
- magnetic bit holder(Keeps bits secure during drilling.)
- tape or marker for depth/spot marking(Clear marking helps accuracy.)
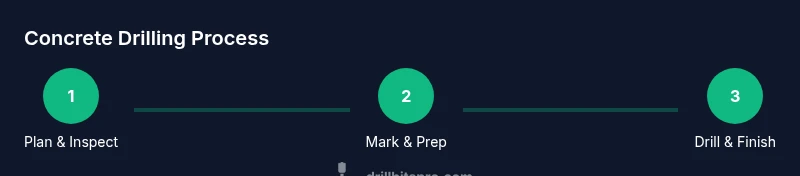
Steps
Estimated time: 30-45 minutes
- 1
Inspect area and gear up
Review the drilling site for utilities and reinforcement. Put on PPE and set up a clean, stable workspace before touching the tool. Confirm the drill is in hammer mode and the bit is sharp.
Tip: Double-check for hidden conduits with a metal detector. - 2
Mark the spot and depth
Use center punch to start a small dimple at the intended hole. Apply depth tape to the drill bit and mark the desired depth clearly to prevent over-drilling.
Tip: Tighten clamps to minimize movement during drilling. - 3
Start with a pilot hole
Begin at a slow speed with light pressure to create a pilot hole. This reduces wandering and guides the larger bit.
Tip: Keep the drill perpendicular to the surface for a clean hole. - 4
Drill the main hole
Switch to your final bit size and increase speed gradually while maintaining steady pressure. If the bit binds, back out and re-align instead of forcing through.
Tip: Pause if you see excessive heat to prevent bit dulling. - 5
Finishing and verification
Withdraw the bit, clean the hole, and verify depth with the tape. Clean up dust and inspect the edge for cracks or chips. Store tools properly.
Tip: Use a vacuum to remove debris from the bore walls.
Got Questions?
What drill bit is best for concrete?
Carbide-tipped masonry bits paired with a hammer drill are typically best for concrete. Start with a small pilot hole to guide the larger bit and reduce wandering. Choose the bit diameter based on your fastener or anchor size.
For concrete, choose carbide masonry bits with a hammer drill and start with a pilot hole for accuracy.
Can I drill into reinforced concrete?
Yes, but you must locate rebar and plan the path to avoid it. If you hit rebar, back out, reposition, and drill around it or use a pilot hole to create a clearance for anchors.
You can drill reinforced concrete, but avoid hitting rebar by locating it first and planning around it.
Do I need a pilot hole for every hole?
A pilot hole improves accuracy and reduces bit wear, especially on hard concrete. Start small and gradually expand to the final diameter.
Starting with a small pilot hole helps precision and protects the bit.
Can I use a cordless drill for concrete?
Cordless hammer drills can work for small-diameter holes, but a corded model or a dedicated rotary hammer delivers more consistent torque for larger or deeper holes.
A cordless drill can do light work, but for tougher jobs a corded hammer drill is more reliable.
What should I do if the bit binds or overheats?
Back out the bit to clear dust, re-align, and resume at a slower speed. Overheating indicates excessive friction or misalignment; pause to let the bit cool.
If the bit binds, back out and re-align; if it overheats, let it cool and reduce speed.
Watch Video
Top Takeaways
- Plan the hole and check for rebar or utilities
- Use the right masonry bits and a hammer drill
- Start with a pilot hole for accuracy
- Maintain steady speed and pressure for clean holes
- Prioritize PPE and dust control for safety