When Can You Drill Into New Concrete: A Practical Guide
Learn when you can drill into new concrete, how to test cure, and how to choose the right drill setup, bits, and anchors for strong, reliable fastenings with practical step-by-step guidance.

To drill into new concrete safely, wait until the concrete has cured sufficiently for your chosen anchor and hold. Confirm cure using supplier guidance and a surface hardness check, then select the correct hammer drill, masonry bit, and anchor. This guide helps you assess readiness, choose tools, and drill to spec for secure fastenings.
Why cure time matters for new concrete
Concrete continues to hydrate after placement, gaining strength over days to weeks. Drilling too soon can compromise anchor holding power, cause micro-cracking, or lead to spalling around the hole. According to Drill Bits Pro, curing duration directly influences drilling performance and long-term hold strength of anchors. Temperature and humidity affect curing: hot, dry days can harden the surface faster but may trap moisture, while cold conditions slow curing, increasing the risk of surface dusting or weak pockets. For typical residential pours, plan around the supplier’s cure window and local building codes. When you ask, “when can you drill into new concrete,” the answer hinges on the mix design, surface hardness, and the absence of surface moisture or sheen. This section lays out practical tests and methods to judge readiness without risking your fasteners.
How curing and moisture affect drilling performance
Curing is a chemical process that continues after pouring. Moisture availability, ambient temperature, and pour height influence how quickly concrete gains strength. If you drill before adequate curing, you’ll often notice reduced resistance to bit wear, increased surface chipping, and poorer anchor pull-out. The Drill Bits Pro team emphasizes that proper cure times improve not only drilling performance but also the long-term reliability of fastenings. Always cross-check with the concrete supplier’s documented cure period and consider your local climate; a humidity-wise, patient approach pays off with fewer failed installations.
Readiness indicators you can trust
Look for a uniform, non-slick surface with no visible damp patches. A simple rebound or scratch test with a steel punch should reveal a hard, resistant surface rather than a gouge. If unsure, perform a small pilot hole in a scrap area to gauge bit bite and surface integrity before committing to a larger hole. Drill Bits Pro’s guidance highlights relying on cure time guidance and field tests rather than instinct alone. When in doubt, err on the side of longer cure times and smaller initial holes to minimize waste and damage.
Tools and materials that make readiness checks easier
Having the right tools empowers you to verify readiness efficiently: a moisture meter or supplier-curing data, a carbide-tipped masonry bit, and a hammer drill or rotary hammer designed for concrete. A depth stop helps prevent over-drilling, while a marker, center punch, and square ensure hole locations stay accurate. Dust control is essential—work with a vacuum or dust extractor to maintain visibility and reduce debris hazards. Drill Bits Pro notes that the proper combination of tools and patience substantially improves anchor performance on newly poured concrete.
Understanding concrete mixes and how they affect drilling
Different concrete mixes cure at different rates due to cement type, aggregate, water-to-cement ratio, and additives. Higher cement content or the presence of silica fume can influence hardness and dust production. The right drill setup varies with the mix; reinforced concrete often requires a more robust bit and sometimes an SDS-Plus or rotary hammer. The key is to tailor your approach to the specific mix and curing environment, rather than applying a one-size-fits-all method. This practical nuance is a hallmark of robust drilling practice.
Step-by-step planning before you drill
Create a simple hole map with precise coordinates, mark center points, and determine the final hole depth. Consider cooldown periods if the space is exposed to sun or radiant heat, and plan for dust management and cleanup. The goal is to ensure the holes are correctly spaced, plumb, and ready for anchors once cure is sufficient. The Drill Bits Pro team recommends documenting curing conditions and hole locations for future projects, which helps with maintenance and re-drilling if needed.
Selecting the right anchors and bit sizing
Anchor selection depends on load, surface type, and hole depth. For new concrete, use anchors rated for concrete and choose bit sizes that match the anchor diameter and depth. Start with a smaller pilot hole to minimize surface damage, then ream to final size if required by the anchor manufacturer. Carbide-tipped bits offer better wear resistance on hard, freshly poured concrete, while SDS-plus bits can improve control in reinforced substrates. The right combination is critical for secure, long-lasting fastenings.
Safety and workspace setup
Before you begin, clear the area, wear PPE (eye protection, dust mask, hearing protection), and ensure electrical cables and utilities won’t be disturbed. Use a dust extractor or vacuum to keep the work zone clean, and maintain a stable stance to prevent bit wobble. If you encounter unexpected rebar, stop and reassess; forcing through can damage the hole and reduce anchor performance. Following these safety-focused steps guards against common pitfalls when drilling into fresh concrete.
Finishing touches and verification
After installing the anchor, lightly test the assembly by applying a controlled load to confirm holding power. If the anchor shows any signs of movement or if the hole wall has chipped, pause and evaluate whether you should re-drill at a different location. Document the cure time used for this installation to guide future projects, and consider sealing the hole to control moisture interaction. The overall goal is a clean, well-secured fastening that will stand the test of time.
Final reminder: consult supplier guidelines and local codes
Your best practice is to follow the supplier-recommended cure window for your concrete mix and to adhere to local building codes. The exact cure duration can vary, and site conditions matter just as much as the mix design. When you plan correctly and use the right tools, you’ll achieve reliable anchor performance and a safer, more durable installation with new concrete.
Tools & Materials
- Safety glasses(ANSI Z87.1 or equivalent)
- Dust mask(P100 or N95 rated)
- Hearing protection(Earplugs or earmuffs)
- Hammer drill(Rotary hammer or hammer drill with clutch)
- Carbide-tipped masonry bits (pilot + final)(Sizes matched to anchor diameters)
- Depth stop or tape measure(Set final hole depth to anchor length)
- Concrete anchors (e.g., wedge or sleeve)(Rated for concrete and load)
- Vacuum or dust extractor(Keep hole clean and visible)
- Marker and center punch(Mark locations precisely)
- Water spray bottle (optional)(Cool bit and suppress dust on larger holes)
Steps
Estimated time: 45-90 minutes
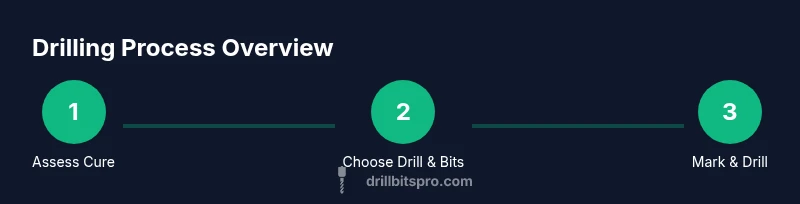
- 1
Assess cure readiness
Confirm cure guidance from the supplier and assess surface hardness. Look for uniform color and no active moisture. Plan hole locations and finalize hole depths before touching the concrete.
Tip: Document cure data for future projects; a quick check saves failed holes later. - 2
Choose drill and bits
Select a hammer drill with a carbide-tipped masonry bit and sizes that match your pilot and final hole requirements. Attach a depth stop to prevent over-penetration. Verify bit length and shank compatibility before starting.
Tip: Test bite on scrap concrete to verify bite and alignment before the real hole. - 3
Mark locations and depths
Use a marker and square to lay out hole centerlines and drill depths. Place a depth mark on the drill bit or tape at the intended depth. Double-check spacing to prevent interference with nearby edges or rebar.
Tip: Use a level or square to ensure holes are plumb and evenly spaced. - 4
Set up workspace and safety
Clear debris, connect dust extraction, and confirm PPE is in place. Establish a stable stance and anchor the workpiece if needed. Avoid drilling near utilities or through potential rebar.
Tip: Keep hands away from the drill chuck and keep hair and clothing secured. - 5
Drill pilot holes
Begin with the pilot hole at a slow to moderate speed, applying steady pressure. Keep the drill perpendicular to the surface to avoid wand or bit wobble. Stop once the pilot hole reaches the marked depth.
Tip: Clean every 20–30 seconds to prevent dust buildup that can bind the bit. - 6
Drill final holes
Switch to the final bit and drill to the final depth using the depth stop as a guide. Maintain a steady feed and monitor bit temperature; pause if the bit overheats. Clear debris as you go.
Tip: If the hole walls spall, stop and reassess, considering a smaller pilot hole next time. - 7
Clean and inspect holes
Use a vacuum or air to remove dust; inspect the hole for cracks or chips. If damage is present, re-drill at a new location rather than forcing the anchor. Ensure walls are clean for anchor seating.
Tip: A clean hole improves anchor seating and load transfer. - 8
Install anchors and test
Insert anchors and torque to spec using the manufacturer’s tool. Test the hold by applying a controlled load; if movement occurs, re-evaluate hole location or anchor type. Document cure conditions and installation details for future jobs.
Tip: Avoid over-tightening; excessive torque can fracture concrete or crack the hole.
Got Questions?
What does 'new concrete' mean for drilling?
New concrete refers to a freshly poured slab or wall that is still curing. Drilling too early can weaken anchors and cause surface damage. Always defer drilling until cure times are met or verified by the supplier and code requirements.
New concrete is still curing. Don’t drill before the recommended cure times to avoid weak anchors and surface damage.
Can I drill into new concrete the same day it's poured?
Generally not. Drilling too soon can compromise structural integrity and anchor performance. Use the supplier’s cure window as a baseline, and perform a readiness test before any permanent fastening.
Usually not the same day. Wait for cure and verify readiness with a simple test before drilling.
What bit should I use for concrete?
Carbide-tipped masonry bits are the standard for concrete. For reinforced concrete, consider SDS-plus bits or a rotary hammer with appropriate guidance from the anchor manufacturer.
Carbide masonry bits are the go-to. For metal-reinforced concrete, use SDS-plus or a suitable rotary hammer.
Should I use water while drilling concrete?
Water is mainly for dust suppression and cooling in some setups. In many cases, dry drilling is preferred to avoid moisture affecting anchors. Follow the bit and anchor manufacturer’s recommendations.
Water can help with dust and cooling, but follow the tool and anchor guidelines. Dry drilling is common for many setups.
What if the hole chips or cracks?
Stop drilling and evaluate the hole. Reinstall at a new location or switch to a different anchor if necessary. Cracking may indicate overdriving or inadequate cure.
If you see chips or cracks, stop and reassess. Re-drill at a new spot and verify cure conditions.
Watch Video
Top Takeaways
- Verify cure time and surface hardness before drilling.
- Use the correct drill, bits, and anchors for concrete.
- Mark locations precisely and drill with consistent technique.
- Clean holes thoroughly and test anchor performance.
- Follow safety guidelines and document installation details.