How to Remove a Broken Drill Bit: Step-by-Step Guide
Safe, step-by-step guidance to remove a broken drill bit from wood, metal, or masonry, with the right tools and safety tips from Drill Bits Pro, and mistakes to avoid.

Learn how to remove a broken drill bit safely and effectively. This quick guide covers how to identify the material, choose the right extraction method, and use proper tools to avoid damage. You’ll learn steps for wood, metal, and masonry, plus essential safety practices like unplugging power, securing the workpiece, and using lubrication to ease extraction.
Why removing a broken drill bit matters
A broken drill bit is more than a frustrating snag; it can damage your workpiece, dull the chuck, and create safety hazards. When a bit snaps off inside a hole, you may be left with a loose fragment that can wander or rotate under power, causing gouges or kickback. Prompt removal minimizes material damage, reduces downtime, and preserves your tool investment. According to Drill Bits Pro, addressing a broken bit early helps protect both the drill motor and the surrounding material. The correct approach depends on where the bit is stuck and what material you were drilling (wood, metal, or masonry). In wood, fragments may be easier to loosen, but embedded shards can still splinter and ruin the surface. In metal, fractured bits can shear inside the hole and require careful extraction to avoid widening the bore. For masonry, safety becomes even more important due to dust and potential for cracking. The key is to stay calm, work methodically, and have a plan before you apply force.
Tools & Materials
- Locking pliers (vise-grips)(Set to grip around broken bit without slipping)
- Drill bit extractor set(Choose varied sizes for standard shanks (roughly 1/16" to 1/4"))
- Center punch(To create indentation if needed to guide extractor)
- Lubricant or penetrating oil(Apply to loosen corrosion or rust before extraction)
- Hammer (optional)(Light tapping may help seat the extractor; use cautiously)
- Safety glasses(Protect eyes from flying debris)
- Work gloves(Protect hands and improve grip)
- Clamps or vise(Secure the workpiece during extraction)
- Flashlight(Good lighting to inspect the break)
- Shop towel or rag(Wipe away debris and oil)
Steps
Estimated time: 30-60 minutes
- 1
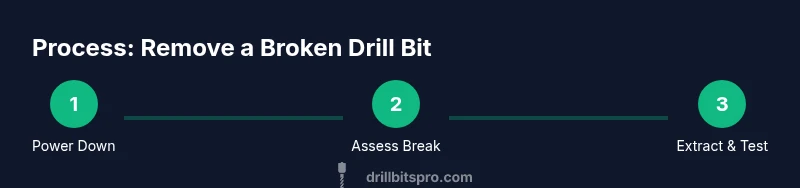
Power down and secure the workpiece
Unplug the drill (or remove battery) to eliminate accidental starts. Clear the work area and clamp the workpiece securely to prevent movement while you work. This keeps the bit from shifting and reduces the risk of injury during extraction.
Tip: Double-check that the tool cannot be energized by touching the trigger or switch. - 2
Assess the break and establish access
Use a flashlight to inspect how the bit is broken and where it is lodged. Note whether any portion protrudes or if the fragment is completely embedded. A clear view helps choose the right extraction method and minimizes collateral damage.
Tip: Take a quick photo for reference before you start prying or twisting. - 3
Choose the appropriate extraction method
Based on material and break position, select the method: pliers for exposed fragments, an extractor bit for embedded bits, or a careful center-punch-guided approach for masonry. The goal is a controlled bite without enlarging the hole.
Tip: Size matters—start with the smallest extractor that fits the shank. - 4
Grip the fragment with locking pliers
Carefully clamp onto the exposed portion of the broken bit. Apply gentle anti-rotation pressure to prevent the fragment from spinning or digging further. This step often provides the leverage needed to back the bit out.
Tip: Use leather gloves to improve grip and protect fingers. - 5
Apply the drill-bit extractor and rotate
Insert the extractor into the chuck or onto the bit and turn counterclockwise with steady pressure. Back the broken piece out slowly, stopping immediately if you feel binding or increased resistance.
Tip: Don’t rush—slow, steady turns reduce the risk of enlarging the hole. - 6
If extraction fails, try a secondary method
If the bit won’t budge, attempt a small relief hole beside the break or switch to a new extractor size. A center punch can help bite for the next attempt. Avoid prying with metal tools that could damage the hole.
Tip: Avoid aggressive hammering; it can widen the bore or chip surrounding material. - 7
Inspect, clean, and replace
Once removed, clean the area and inspect the bore for damage. If the hole is compromised, or the bit was severely dull, replace with a fresh bit and test on a scrap piece before resuming work.
Tip: Sharpen or replace dull bits to prevent future breaks.
Got Questions?
What should I do first when a drill bit breaks?
Always unplug the drill and secure the workpiece before attempting removal. Then assess how the bit broke and plan the method you’ll use. This reduces the risk of injury and surface damage.
First unplug the drill and secure the workpiece, then assess the break and plan your method.
Can a broken bit be removed from metal without damaging the hole?
Yes, with a proper extractor and careful technique you can back the fragment out without enlarging the bore. Avoid forcing the bit or twisting aggressively.
Yes, with a proper extractor and careful technique you can back it out without enlarging the bore.
What if the bit is stuck in masonry?
Use a masonry-rated extractor and consider a small relief hole to help bite. Wear a dust mask and work slowly to avoid cracking surrounding material.
For masonry, use a masonry extractor and work slowly to avoid damage.
Is it safe to drill around the bit to loosen it?
Drilling around the bit can loosen it but risks enlarging the hole or causing further breakage. Proceed only if you understand the risks and have a plan.
Drilling around the bit can loosen it, but be careful of enlarging the bore.
When should I call for professional help?
If multiple attempts fail, or you suspect damage to the chuck or bore, or if the piece is deeply embedded and critical, seek professional assistance to avoid costly damage.
If it won’t budge after several tries, consider professional help.
Watch Video
Top Takeaways
- Unplug and secure before starting to avoid accidents
- Use the right extractor for the material and bit size
- Work slowly and avoid forceful twisting to protect the bore
- If stuck, switch methods gracefully rather than forcing a removal
- Maintain a quality bit and extractor set to reduce future breaks