What to Do When Drill Bit Breaks in Word: A Practical Guide
A practical, step-by-step guide to safely handle a broken drill bit. Learn removal, chuck inspection, replacement, and prevention with expert guidance from Drill Bits Pro.

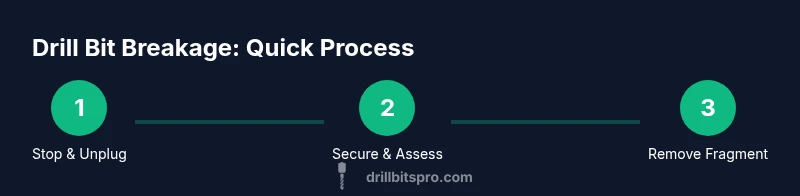
Stop drilling immediately, unplug the drill, and assess the break. If the shank protrudes, back it out with locking pliers or needle-nose pliers; if flush, secure the work and carefully push the fragment free with a thin punch or magnet. Inspect the chuck, remove debris, and replace the bit with a fresh one. Wear safety glasses during the process.
Why drill bit breakage happens
Drill bits fail for a variety of reasons, and understanding why helps you prevent breakage in the future. Common causes include using the wrong bit for the material, drilling at too high a speed or with too much feed pressure, dull cutting edges, and binding caused by misalignment or wobble. In some cases, workholding problems or debris buildup in the chuck also contribute to breakage. According to Drill Bits Pro, recognizing these patterns helps DIY enthusiasts and professionals choose the right bit type, maintain sharp edges, and adjust drilling parameters to reduce stress on the tool. By tracking your materials, equipment, and technique, you can significantly lower the odds of another break.
For example, wood usually tolerates a sharp twist bit, but hardwoods or laminated sheets increase demand on the cutting edge. Metal drilling requires compatible high-speed steel or carbide-tipped bits and appropriate lubrication. When you encounter a break in word or hard surfaces, adapt your approach rather than forcing the process. This mindset—paired with proper gear—reduces the risk of damage to the workpiece and the drill itself.
note":null},
Immediate safety and prep steps
Before you react to a broken bit, take the right safety and setup steps. First, stop the drill and unplug it from the power source to prevent any accidental activation. Remove jewelry, loose clothing, and secure long hair to avoid entanglement. Set up a clean, well-lit workspace with a stable surface and clamps to hold the workpiece steady. Eye protection is essential because metal fragments can eject unpredictably. If your shop has a dust mask or face shield, use it when grinding or cutting around the broken fragment. This preparatory phase minimizes the risk of injury and makes subsequent steps smoother. Drill Bits Pro Team emphasizes safety as a foundation of any repair task, especially when removing embedded fragments or inspecting the chuck.
},{
Understanding the material and drill type matters
Knowing the material you’re drilling and the appropriate drill type makes all the difference in breakage prevention and resolution. Wood benefits from sharp, pointed bits and slower feed rates to prevent splintering, while metal requires bits with strong carbide tips and proper lubrication to reduce heat buildup. When a break occurs, assess not only the bit but also the workpiece: dense materials can grip the bit more aggressively, hiding small fragments that can cause a second break if not addressed. In addition, ensure the chuck type and bit shank match; a loose chuck can contribute to misalignment and increased stress during drilling. Drill Bits Pro analysis shows that aligning tool selection with material properties is one of the most reliable predictors of successful drilling and long bit life.
},
Extraction strategies: protruding vs flush bits
The method you choose to remove a broken bit depends on whether the fragment protrudes from the surface or is embedded within the hole. Protruding fragments are usually removable with pliers or needle-nose forceps; grip firmly and twist back and forth to loosen, then pull straight out while the drill is unplugged. For flush or deeply embedded bits, you may need to access the fragment from the other side or use a thin punch to nudge it free. In some cases, a small magnet or vacuum can help retrieve tiny shards. Always move slowly and avoid bending or breaking the fragment further. If the piece remains stubborn, consider drilling a larger pilot hole nearby to relieve the binding and provide space for fragment removal. The goal is to minimize damage to the workpiece and maintain chuck integrity.
},{
Chuck checks and post-break inspection
After removing the fragment, inspect the chuck for burrs, rust, or damage that could impede future bit seating. Spin the chuck gently by hand (with the power disconnected) to listen for irregularities or wobble. Clean any debris from the chuck jaws, bore, and bit shank interface; a clean contact surface improves grip and reduces the chance of future breakage. If the chuck is visibly damaged or the jaws don’t close evenly, replace or service it before continuing. Finally, inspect the workpiece for remnants of the broken bit and clean any nicks or burrs that could affect fit and finish. Proper chuck maintenance is a small investment that pays off in smoother drilling.
},{
Prevention: best practices to minimize breakage
Prevention is better than cure. Adopt a few core practices to reduce breakage risk in the long run. Use the correct drill bit for the material, and keep bits sharp through regular replacement or sharpening. Secure your workpiece with clamps or a vise to prevent movement, especially on long or delicate holes. Start with a center punch or pilot hole to guide the bit and minimize wandering, particularly on hard materials. Set the drill to an appropriate speed and practice a steady, controlled feed pressure—let the bit do the cutting rather than forcing it. If drilling deep holes, consider using a drill guide or a drill press for improved accuracy. Penetrating oil or light lubrication can help reduce heat, particularly with metal drilling. Finally, store bits properly and replace worn bits promptly to maintain performance. Drilling with proper technique reduces breakage frequency by creating favorable cutting conditions and minimizing stress on the bit and chuck. Drills that are properly matched to the task last longer and perform better. — The Drill Bits Pro Team
note":null}],
toolsMaterialsVersion
0.0
stepByStepVersion
0.0
tipsListVersion
0.0
keyTakeawaysVersion
0.0
videoEmbedVersion
0.0
faqSectionVersion
0.0
mainTopicQueryVersion
0.0
mainTopicQuery”:
Tools & Materials
- Locking pliers (vise-grips)(Grip protruding fragments securely; choose slim-nose styles for tight spaces)
- Needle-nose pliers(For precise grip inside the chuck area)
- Thin punch or drift punch(Used to coax embedded fragments out from the shank)
- Safety glasses or face shield(Eye protection from flying shards)
- Replacement drill bits (correct size/type)(To continue work after removal; match shank and material)
- Penetrating oil or light lubricant(Helps loosen jammed bits in the chuck)
- Flashlight or headlamp(Illuminates tight spaces for visibility)
- Clamps or helping hands(Secure the workpiece to prevent movement)
- Magnet or magnetic pickup tool(Retrieve small fragments from tight spots)
Steps
Estimated time: 15-30 minutes
- 1
Stop and unplug the drill
Immediately halt drilling, unplug the power cord or remove the battery. This prevents accidental re-starts while you assess the break. Confirm you are safe to handle the tool and fragment before proceeding.
Tip: Take a deep breath and plan your approach before touching the broken fragment. - 2
Secure the workpiece
Clamp the workpiece firmly to prevent movement while you work the fragment free. A stable setup reduces the risk of slips and spin injuries, especially when you’re attempting extraction with pliers or punches.
Tip: Use two clamps if needed to prevent any wobble during removal. - 3
Assess the break and plan removal
Look to see whether the fragment protrudes or is embedded. Decide whether you can back it out with pliers or you must loosen it with a punch or magnet. Clear the area of chips and ensure good lighting.
Tip: Lighting is critical—shadows can hide fragments that will jam further. - 4
Remove the broken bit (protruding)
If the fragment sticks out, grip with locking pliers or needle-nose pliers and rotate counterclockwise to back it out. If the chuck is locked, you may toggle the drill in reverse if your tool supports it.
Tip: Keep hands away from the bit centerline to avoid pinching fingers. - 5
Extract embedded fragments
For embedded pieces, gently tap with a thin punch from the side or use a small magnet to attract the fragment. Avoid hammering or prying aggressively that could damage the chuck or workpiece.
Tip: Work slowly and retreat if you feel resistance increases. - 6
Inspect chuck and replace bit
Inspect the chuck for burrs and debris, then clean thoroughly. Install a fresh bit of the correct size and type, then test on a scrap piece to ensure proper grip and cutting action.
Tip: Verify the bit seats fully and seats square to the work surface.
Got Questions?
What should I do first when a drill bit breaks?
Stop immediately, unplug the drill, and assess the break. Determine whether the fragment protrudes or is embedded, then plan extraction with the right tool. Safety comes first to prevent injury.
Stop, unplug the drill, and assess the break. Plan your extraction with the right tool, keeping safety at the forefront.
Can I remove a broken bit without removing the chuck?
In many cases you can back out a protruding fragment with pliers or a punch without disturbing the chuck. If the fragment is deeply embedded, you may need to access it from behind the workpiece or use a magnet to lift small shards. If in doubt, consult a professional.
Often you can remove a protruding bit with pliers; if it’s embedded, you may need additional access.
How can I prevent drill bit breakage in the future?
Choose the right bit for the material, keep bits sharp, clamp the workpiece, use pilot holes, and avoid excessive feed pressure. Regular chuck maintenance also reduces risk of slippage.
Use the right bit, keep it sharp, clamp your work, and drill steadily with proper pilot holes.
What if the chuck is damaged after a break?
If you notice wobble, burrs, or poor bite after a break, inspect the chuck for damage and consider servicing or replacing it before continuing. Continuing with a damaged chuck can ruin bits and workpieces.
If the chuck seems damaged, service or replace it before continuing drilling.
Should I use a drill press for better control?
A drill press offers more consistent speed, less drift, and reduced risk of bit breakage for accurate holes. For heavy-duty or precise work, consider using a drill press with proper fixturing.
A drill press gives you better control and can reduce breakage in many jobs.
Watch Video
Top Takeaways
- Unplug and secure the setup before touching a broken bit
- Differentiate protruding vs embedded fragments to choose removal method
- Inspect the chuck for damage and replace the bit with the correct size
- Prevent breakage with sharp bits, correcte speeds, and proper clamping