Tap and Drill Chart: A Practical Guide for Precise Threads
Master tap-and-drill charts to pick hole sizes for threads, reducing rework and improving threading quality across metal, plastic, and wood projects for both DIYers and professionals.

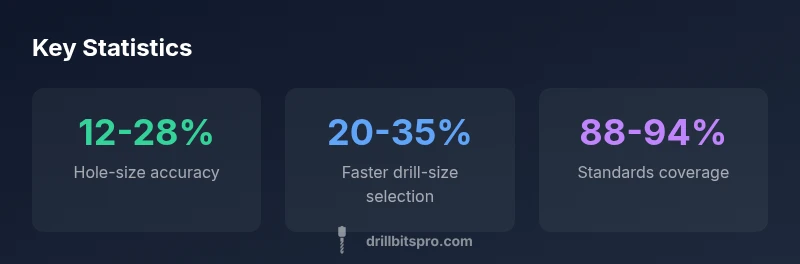
Tap and drill charts are reference guides that pair thread taps with corresponding drill bit sizes to produce correctly threaded holes. They show the relationship between tap size, recommended drill diameter, and thread pitch, so you can drill the right hole first time. Using the chart reduces guesswork, minimizes scrap, and speeds up fastener installation for both DIY projects and professional work.
What is a tap and drill chart?
A tap-and-drill chart is a practical reference that links the size and pitch of a screw thread to the correct drill diameter needed to create the tapped hole. For professionals and DIY enthusiasts, this chart is a compact decision aid: it tells you, for example, that a 1/4-20 UNC thread typically requires a specific hole size prior to tapping to achieve clean threading and proper fastener engagement. The chart spans metric and imperial standards, so you can work confidently with steel, aluminum, brass, plastics, and wood. In daily shop practice, this tool reduces trial-and-error attempts and enhances consistency across batches of parts, which is especially valuable in production environments.
In practice, you should treat the chart as a living resource: update it when you encounter non-standard threads or new materials, and tailor it to your work context (hand tools, power tools, or CNC).
Core relationships: tap size, drill size, and pitch
The central idea behind a tap-and-drill chart is the interdependence of three variables: the tap size (the outside diameter and thread form), the drill size (hole diameter before tapping), and the thread pitch (the distance between threads). Changing any one parameter affects the fit of the final threaded hole. A larger pitch or coarser thread typically requires a larger hole, while a finer pitch may need a slightly smaller hole to achieve the same engagement. When working with metric threads, use the corresponding metric drill sizes; for imperial threads, use the appropriate imperial drill sizes. Always confirm compatibility with the material’s machinability and the fastener’s tolerance stack.
To minimize mistakes, always cross-check the chart with the specific fastener standard you’re using (e.g., ISO metric, UNC/UNF, or fine-thread variants).
Reading a chart: step-by-step
- Identify the thread standard and size you intend to use. 2) Note the pitch and whether it’s a through-hole or blind-hole tapping. 3) Locate the chart reference for the combination. 4) Read the recommended hole diameter and verify units (mm vs inches). 5) Drill the pilot hole, deburr, and then tap with the chosen tap. 6) Inspect the thread fit and ream if necessary. 7) Record the outcome for future reference. A quick test on scrap material validates your setup before committing to critical work.
Keep a small notebook or digital sheet with your most-used thread sizes for rapid reference on the shop floor.
Practical examples: metric vs imperial taps
Metric threads (e.g., M6 x 1.0) and imperial threads (e.g., 1/4-20 UNC) follow distinct standards, so your chart must clearly separate these sections. When you mix systems, it’s easy to pick the wrong drill size. For DIY tasks, you’ll often rely on common sizes that show up in hardware stores, while professional shops may encounter a broader spectrum, including fine-pitch taps for high-load applications. Always annotate your chart with the material type and method of production to avoid cross-contamination of data.
Material-specific considerations: steel, aluminum, plastics
Different materials respond differently to tapping. Steel generally tolerates coarser or standard-pitch taps with adequate lubrication, but aluminum can gall if polarity and speed aren’t controlled. Plastics, on the other hand, can cold-flow under load, so a slightly larger hole or a self-lubricating tap may be preferable. Use material-specific notes in your chart and perform a test hole on scrap stock before final production. Include notes about lubrication type, tapping speed, and recommended thread engagement length.
Common mistakes and how to avoid them
- Skipping the pilot size check: Always verify the chart’s recommended hole size with a test hole. - Mixing thread standards: Never assume metric sizes map directly to imperial ones. - Ignoring material behavior: Different materials require different cutting speeds and lubrication. - Overlooking deburring: Burrs can prevent clean tapping; deburring ensures better thread formation. - Not updating the chart: Add new findings, thread forms, or materials as you gain experience.
How to validate hole quality and tapping success
After tapping, verify thread engagement by threading a screw or bolt with a light torque. Check for cross-threading, binding, or rough surfaces. Use a thread gauge to confirm the pitch and depth, and measure the hole diameter with a caliper to ensure it matches the chart’s specification. If issues appear, rework on scrap stock to refine the process before production continues. Record the results to improve your chart.
Setting up a tap-and-drill chart library in a workshop
Create a central, clearly organized library—digital or physical—sorted by thread standard, material, and typical thickness. Include quick-reference notes on lubrication, safety, and environmental considerations. For teams, provide a shared sheet or app that allows engineers and machinists to contribute updates. Regularly audit the chart against new fastener standards and supplier recommendations. Keep samples of test holes for future calibration.
Quick-reference snippet: sample chart excerpt
- Thread: M8 x 1.25 | Drill: 6.8 mm | Notes: Common metric coarse thread; ensure lubrication. - Thread: 1/4-20 UNC | Drill: 0.234 in | Notes: Imperial standard; test a scrap piece first. - Thread: M6 x 1.0 | Drill: 5.0 mm | Notes: Typical for light-duty assemblies.
This sample illustrates how you’ll present a concise portion of a larger chart. Extend it with material-specific data and your most-used thread sizes for faster work on the shop floor.
Sample tap-and-drill chart guidance for common thread types
| Thread Type | Pitch | Drill Size (in) | Drill Size (mm) | Notes |
|---|---|---|---|---|
| 1/4-20 UNC | 20 | varies | varies | Use chart for clean threads |
| M6 x 1.0 | 1.0 | varies | varies | Metric standard |
Got Questions?
What is a tap and drill chart and why do I need one?
A tap-and-drill chart maps thread sizes to the correct pre-tap hole diameter, ensuring proper thread engagement. It reduces guesswork, speeds up setup, and improves consistency across projects.
A tap-and-drill chart tells you the right hole size for a given thread, cutting guesswork and improving thread quality.
How do I read a chart?
Identify the thread size and pitch, locate the matching row on the chart, and note the recommended drill size and any notes about material or lubrication. Then drill, tap, and verify fit with a test piece.
Find your thread, read the drill size, and test on scrap to confirm.
Can I use metric taps with imperial drills?
No—metric and imperial systems use different thread standards and hole sizes. Always match the chart to the correct system and verify units before drilling.
Don’t mix metric and imperial; keep to the chart’s system.
What happens if I drill the wrong size?
Using a drill that’s too small or too large can lead to loose threads, stripped holes, or binding bolts. Always validate with scrap stock and adjust accordingly.
Wrong size can ruin threads—test first and adjust.
Are tap-and-drill charts universal?
Charts are typically standardized within thread systems, but manufacturer-specific guidelines may differ slightly. Always consult the spec for non-standard parts.
Most charts are standard, but check specs for non-standard parts.
How often should I update my chart library?
Review and update at least quarterly or when you encounter new thread forms, materials, or fasteners. Keep notes of any updates and test results.
Update it regularly as you encounter new threads.
“A correctly chosen drill size, guided by a tap-and-drill chart, ensures clean threads, better fit, and longer fastener life. For amateurs and pros alike, using the chart reduces guesswork and scrap.”
Top Takeaways
- Always verify your chart matches the thread standard you intend.
- Use the chart to select initial hole size before tapping.
- Test on scrap material to confirm fit.
- Maintain an up-to-date chart library in your workshop.
- Cross-check with manufacturer recommendations for non-standard threads.