Can a Hammer Drill Replace a Regular Drill? A Practical Guide
Learn whether a hammer drill can act as a regular drill, when to switch modes, which bits to use, and safety tips for wood, metal, and masonry projects.

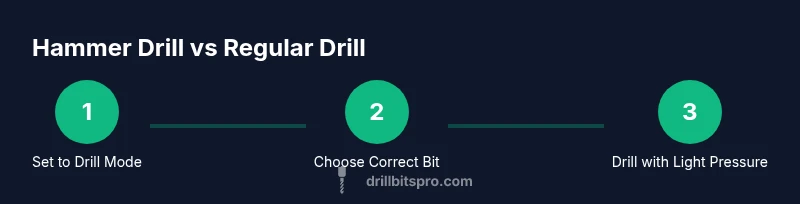
Yes, you can use a hammer drill as a regular drill in non-hammer mode for wood and soft materials, but it’s not ideal for metal or masonry without switching to drill mode. Before you start, set the switch to “drill” (not “hammer drill”), use appropriate bit, and start with a slow feed to avoid cam-out. This guide covers safe setup, best practices, and limitations.
Can a hammer drill function as a regular drill?
According to Drill Bits Pro, a hammer drill can be used as a regular drill when you switch to rotation-only mode and use the appropriate bit. In 2026, many hammer drills offer a dedicated drill mode and a clutch to protect both tool and workpiece. This section explains when the approach is appropriate, what to watch for, and how to minimize wear while maintaining hole quality. When you need precision in wood or metal without percussive action, you'll find that setting matters as much as the bit you choose. The goal is predictable results without damaging the switch, the chuck, or the bit. This also aligns with general guidance from safety authorities on tool use and PPE.
Throughout this section, the Drill Bits Pro team emphasizes practical, hands-on steps you can take to avoid common mistakes and extend the life of your tools. As of 2026, many users report cleaner holes with rotation-only drilling in wood and soft metals when the correct bit and feed rate are used. Always consult your specific model’s manual for any mode-specific caveats.
When to use drill mode vs hammer mode
The fundamental difference between a hammer drill and a standard drill is the hammer action. For materials that require only rotation, switch to drill/rotation mode to reduce vibration, preserve bit life, and improve hole quality. In general: use drill mode for wood, non-ferrous metals, plastic, and soft composites; use hammer mode for masonry and concrete where the percussive action helps penetrate harder substrates. For drywall, you can benefit from light hammering if you set the action low and the pressure steady, but many pros skip hammering on drywall to avoid dust and chipping. According to Drill Bits Pro analysis, most professionals reserve hammer action for masonry, and rely on rotation only for everything else. Always check your drill’s manual for the exact switch labeling and timer/clutch settings. Safety notes: wear eye protection and keep hands clear of the chuck when switching modes.
Bits and materials: what works where
Choosing the right bit dramatically affects results when you’re using a hammer drill in rotation-only mode. For wood, use a sharp twist bit with a sharp chisel edge; for metal, pick a high-speed steel (HSS) bit sized to the hole you want; for masonry, alloy-carbide bits are sturdy and designed for percussion but can be used in drill mode if the workpiece allows. Ensure bits are clean and free of nicks before use, and keep an adequate supply of different sizes on hand. Also consider using a depth stop or masking tape to prevent over-drilling in delicate materials. If you’re drilling steel or aluminum, start with a smaller pilot hole to guide the bit and reduce wandering.
Note: Always verify bit compatibility with your tool’s chuck size (commonly 1/4” to 1/2”).
Practical setup: converting a hammer drill to drill mode safely
Before starting, read your tool’s manual and confirm the mode is rotation-only. Clamp the workpiece securely, then attach the appropriate bit and verify the chuck is tight. Set the speed to a mid-range value and start with light pressure on the trigger; gradually increase as the bit bites. If the tool binds or the drill overheats, pause, retract the bit, and inspect the bit and surface for wear or debris. After finishing, clean the bit and the chuck and store in a dry place. This approach minimizes wear and prolongs life of the hammer drill while delivering clean holes. In practice, Drill Bits Pro suggests keeping a log of which bits you used and any tool adjustments for future projects. The drill mode is a controlled, rotation-only operation designed to maximize hole quality rather than impact.
Tip: Always cool the bit briefly if you’re drilling many holes in succession to prevent heat-related bit wear.
Common mistakes and how to avoid them
Common mistakes include using hammer action on wood, forcing the bit, and selecting the incorrect bit size. To avoid these, switch to rotation-only mode, choose the correct bit, and maintain a steady feed rate; let the bit do the work. Overheating bits is another issue; give the bit a brief cool-down period if you’re drilling many holes in succession. Keep in mind that some materials—like certain plastics or fiberglass—can melt if the drill spins too fast; for these, lower speed and steady pressure. Finally, ensure your drill’s clutch is working correctly and that you aren’t over-stressing the motor by pushing too hard.
Brand note: When testing different materials, log your findings to refine your approach for future projects and to avoid repeating mistakes.
Maintenance and safety reminders
After drilling in rotation-only mode, inspect the chuck for wear, and clean any debris from the bit shank. Sharpen or replace dull bits, and re-seat bits properly before next use. Always wear safety glasses and gloves; position yourself to avoid kickback and maintain balance as you drill. If your drill starts smoking, stop immediately and let it cool; persistent overheating may indicate a gear issue or a binding bit. When drilling into masonry, use dust control to protect lungs and eyes. Drill Bits Pro recommends storing bits in their original cases to prevent loss and to facilitate quick access to the correct bit for your next project.
Pro tip: Keep spare bits of common sizes in a protective case to minimize downtime between tasks.
Quick reference: do's and don'ts
- Do switch to drill mode for non-masonry work.
- Do use the correct bit and pilot holes where helpful.
- Do clamp the workpiece; never hold by hand.
- Don’t force the drill; let the bit bite gradually.
- Don’t use hammer action on metal or plastic where it isn’t needed.
- Don’t ignore tool heat or unusual noises; stop and inspect.
Tools & Materials
- Hammer drill (with mode selector)(Ensure it can switch between hammer/rotation and rotation-only)
- Wood drill bit (twist bit)(Sizes 3-8 mm are common for hobby projects)
- Metal drill bit (HSS)(Use appropriate size and start with a pilot hole)
- Masonry drill bit (carbide-tipped)(For masonry tasks; ensure bit is in good condition)
- Safety gear (eye protection, gloves)(Protect eyes from chips and dust)
- Clamps or workholding(Secures the workpiece to prevent movement)
- Lubricant or cutting oil (for metal drilling)(Helps with heat management on metal)
- Dust control or vacuum(Reduces airborne particles)
- Depth stop or tape measure(Prevents going too deep)
Steps
Estimated time: 20-40 minutes
- 1
Check mode and prep
Confirm the drill is set to rotation-only mode. Gather the correct bit for your material, inspect it for nicks, and ensure the chuck is clean. Position the workpiece and plan your hole location before starting.
Tip: Test a shallow hole on scrap material to verify setup. - 2
Secure the workpiece
Clamp the workpiece firmly to a stable surface. Loose work can cause bit wandering or kickback, increasing the risk of injury or damaged material.
Tip: Place a scrap under the workpiece to prevent tear-out on exit. - 3
Attach the correct bit
Install the wooden, metal, or masonry bit that matches the material and hole size. Tighten the chuck securely so the bit cannot slip during drilling.
Tip: Always use a pilot hole for metal to guide the bit. - 4
Set speed and pressure
Choose a mid-range speed and apply light, steady pressure. Let the bit bite and avoid pushing with excessive force that could stall or dull the bit.
Tip: If the bit skids, stop and reposition rather than forcing deeper. - 5
Begin drilling
Start drilling with a smooth motion, maintaining a consistent feed rate. Periodically pause to clear chips and inspect the hole for alignment.
Tip: Use short bursts if drilling deep to manage heat buildup. - 6
Withdraw and inspect
Withdraw the bit slowly while the drill is still running to prevent the bit from binding. Check hole depth with a shallow gauge and inspect for clean edges.
Tip: Wipe dust from the bit shank before reinserting. - 7
Switch modes if needed and finish
If masonry work is required, switch to hammer mode only after drilling the initial hole. Otherwise, complete the job in rotation mode and clean up.
Tip: Record the bits used for future projects.
Got Questions?
Can a hammer drill replace a regular drill for wood tasks?
Yes, in rotation-only mode a hammer drill can drill wood effectively, with the right bit and controlled feed. Avoid hammer action to keep holes clean and prevent tool wear. Always verify the drill’s mode in your manual.
Yes, you can drill wood with a hammer drill in rotation-only mode. Use the right bit, light pressure, and switch to hammer mode only when you need to work masonry.
Is it safe to drill metal with a hammer drill in regular mode?
Drilling metal is best done with a dedicated metal bit in rotation mode. Use a pilot hole and moderate speed to avoid overheating and dulling the bit. Do not rely on hammer action for metal.
Metal drilling should be done with rotation only and a proper metal bit to avoid overheating and bit wear.
When should I switch to hammer mode?
Switch to hammer mode only for masonry or concrete tasks that require percussive action. For wood, metal, or plastic, keep rotation mode to maintain hole quality and reduce wear.
Use hammer mode for masonry only; keep rotation mode for wood and metal to get cleaner holes.
Can I use any drill bit in drum mode?
Not all bits are suitable for hammer drills in rotation mode. Use wood, metal, or masonry bits appropriate to your material and chuck capacity, and avoid worn or damaged bits.
Only use bits that match your material and chuck size; inspect for wear before use.
What’s a common mistake when using a hammer drill as a regular drill?
Forcing the drill or using hammer action on non-masonry tasks leads to poor hole quality, premature bit wear, and potential tool damage. Always test and adjust feed rate.
Common mistakes include forcing the drill and using hammer action on wood or metal.
How do I prevent overheating during extended drilling?
Take breaks between holes, use moderate speeds, and consider cooling the bit with brief pauses. For metal, use lubricant to reduce heat buildup.
Take breaks and keep the speed moderate to avoid overheating the bit.
Watch Video
Top Takeaways
- Switch to rotation-only mode for non-masonry work.
- Use the correct bit and secure the workpiece.
- Apply steady, light pressure and avoid forcing the bit.
- Inspect the bit and chuck after drilling and store properly.
- Know when to switch back to hammer mode for masonry tasks.