Drill or Hammer Strade: A Practical Side-by-Side Guide
Compare drill and hammer options for common DIY tasks. Get practical guidance on when to choose each tool, safety tips, and cost considerations from Drill Bits Pro.

For most precision work, a drill is the safer first choice, but the hammer mode shines for impact-driven tasks. The drill or hammer strade decision hinges on material, hole size, and tolerance. This side-by-side guide weighs use cases, maintenance, and safety to help you decide. This article provides a practical framework, common pitfalls, and tips for choosing the right approach before you start.
What drill or hammer strade means in practice
In everyday DIY, the choice between drill and hammer modes is not just about torque; it's about how the tool interacts with the material. The phrase drill or hammer strade captures a crossroad many homeowners encounter when starting a hole, driving a fastener, or tackling masonry. According to Drill Bits Pro, the goal is to minimize damage while achieving a clean result. Understanding the capabilities of a standard drill and a hammer drill helps you predict outcomes before you pick a bit. A drill operates with rotational force and moderate torque, ideal for pilot holes and delicate work. A hammer drill delivers percussive blows that break up hard substrates, enabling faster results in masonry, tile, or concrete. In many projects, you may switch modes or use specialized bits to optimize performance. This section lays the groundwork for the broader comparison that follows.
When to use a drill vs a hammer for common tasks
For wood: a drill with sharp wood bits produces clean pilot holes and allows countersinking. For metal: a drill with cobalt or high-speed steel bits is preferred for controlled holes. For masonry: a hammer drill or a drill with a masonry bit can be used, depending on the required impact. For tile or brick, hammer action helps start holes more reliably, but too much impact can crack the surface. The drill or hammer strade decision depends on material, hole size, and tolerance, so plan bit choices and mode changes before you start. This context helps you map tasks to modes, reducing mistakes and wasted time.
In addition, the balance between speed and precision is often the deciding factor in the field. If you need a clean, precise hole in a soft substrate, the drill is the better tool. If you’re breaking through hard material or driving fasteners, the hammer mode may save you hours on a single job. Remember that modern combo tools can switch between modes, reducing the need to own multiple machines. This flexibility is particularly valuable for DIYers managing mixed tasks around the home.
Key differentiators: speed, precision, control, and cost
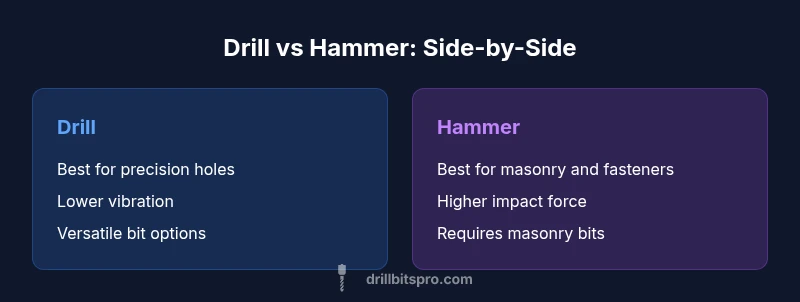
The most visible differences between drill and hammer modes come down to speed, precision, control, and cost. Speed matters when you’re threading through masonry or stone; the hammer action can dramatically increase breakthrough speed, while the drill mode preserves material integrity and reduces the risk of cracking. Precision is another critical factor: a well-maintained drill with sharp bits offers clean edges and accurate depth control, which is essential for pilot holes and delicate work. Control and ergonomics depend on the tool’s build, chuck design, vibration, and clutch settings; modern models provide adjustable torque and spindles that help prevent overdriving or cam-out. Cost considerations include upfront price, accessories, and ongoing maintenance. A drill is usually cheaper and lighter, while a dedicated hammer drill or a multi-function tool with a hammer setting adds cost but unlocks masonry capabilities. A balanced approach—having a capable drill and a dedicated hammer option when needed—often yields the best results for frequent DIY projects.
Material-specific guidance: wood, metal, masonry
Woodwork benefits from a sharp, properly sized wood bit and careful pilot holes to prevent splitting. Metal work requires bits designed for hard materials (e.g., high-speed steel or cobalt) and appropriate lubrication to avoid overheating. Masonry demands a masonry bit and typically hammer action to advance efficiently; however, excessive impact can damage surface coatings or causes chips if not controlled. For tile or brick, start with a small pilot hole and use light, even pressure to avoid cracks. The drill or hammer strade framework should be guided by material hardness, bit type, and desired hole quality. A practical tip is to test on a scrap piece first and to stop when you reach the required depth to avoid over-penetration. This material-specific guide helps you decide when to switch modes and which bits to select for optimal results.
Safety and ergonomics considerations
Safety should govern every drilling decision. Wear eye protection, gloves, and a dust mask where appropriate. Use clamps to secure workpieces and maintain a stable stance to minimize kickback. Vibration can cause fatigue, so take breaks and vary hands if you’re on a long project. Regularly inspect bits for wear and replace them when edges become dull. Keep the drill chuck tight and ensure the switch modes are locked before starting. When using hammer mode, start slowly to assess bite and adjust pressure to prevent over-penetration or surface damage. A well-balanced tool with a comfortable grip reduces strain and improves control, which is especially important when alternating between drill and hammer modes on mixed-material projects.
How to choose between a drill and a hammer for long-term projects
A practical decision starts with a task list. If most jobs involve drilling holes with clean edges, investing in a high-quality drill with a sharp selection of bits is sensible. If masonry work is frequent, a hammer drill or even a dedicated porter for heavy-duty tasks pays for itself through faster progress and fewer retries. Consider your budget, storage space, and preference for a single versatile tool versus multiple specialized tools. Finally, test several models if you can, paying attention to balance, vibration, and the ease of switching modes. This long-term lens aligns the drill or hammer strade choice with your workflow and project mix, ensuring you stay productive over time.
Comparison
| Feature | Drill | Hammer |
|---|---|---|
| Best use | Precision holes in wood/metal | Driving fasteners and masonry; breaking through tough substrates |
| Hole size range | Small to medium holes with proper bits | N/A—no holes; used for impact and chiseling |
| Vibration & fatigue | Lower vibration; steadier edge quality | Higher impact vibration; more fatigue on long sessions |
| Speed vs. impact | Rotational speed controls depth and accuracy | Impact action increases breakthrough speed and compaction removal |
| Bits/accessories needed | Drill bits, pilot bits, countersinks | Hammer bits, masonry bits, chisels |
| Cost/maintenance | Typically lower upfront cost; common maintenance | Often higher with specialist bits and more wear |
| Best for | Precision drilling and delicate materials | Masonry, fasteners, concrete prep |
What's Good
- Drill offers precise holes with broad bit compatibility
- Hammer mode accelerates masonry work and heavy-duty driving
- Combining modes with a single tool increases versatility
- Many models include adjustable torque to minimize overdriving
Negatives
- Hammer mode can cause surface damage on soft materials
- Drill-only work may be slow on hard substrates without hammer action
- Dedicated hammer drills require additional storage and maintenance
Drill for precision and control; hammer for speed and masonry when needed.
For mixed tasks, start with a drill for clean pilot holes and delicate work. Switch to hammer mode for masonry or heavy-duty fastening to accelerate progress. A two-tool approach or a versatile combo can deliver the best overall results.
Got Questions?
What does drill or hammer strade mean in practice?
In practice, it’s the decision point between using a drill for precision holes and a hammer for impact-driven tasks. The choice hinges on material, hole size, and required tolerance. This approach helps minimize damage while achieving reliable results.
It’s about choosing precision drilling versus impact driving based on the job—test a scrap piece first to pick the right mode.
When should I use a drill vs. a hammer for masonry?
For small holes or pilot holes in masonry, a masonry bit with a drill setting often suffices. For larger or deeper holes, hammer action speeds up progress but requires careful control to avoid cracking the surface.
Use a drill with a masonry bit for accuracy; switch to hammer mode if you need faster breakthrough.
Can I use one tool for all tasks?
A versatile drill/driver with a hammer setting can handle many tasks, but dedicated masonry tools are still preferable for frequent heavy-duty work. Rely on mode-specific efficiency when you face tough substrates.
One tool can do a lot, but for heavy masonry, a dedicated hammer drill works best.
What safety gear should I wear when using these tools?
Always wear safety glasses, gloves, and a dust mask when drilling or hammering. Secure your workpiece, keep the workspace clean, and inspect bits and chucks for wear before use.
Protect your eyes and hands, and secure the workpiece before you start.
Are there cost differences between drills and hammers?
Basic drills are usually less expensive upfront than dedicated hammer drills, but added costs come from specialized masonry bits and accessories. Over time, the right setup can save you time and effort.
Expect a price gap for the hammer drills and masonry bits, but the time saved can be worth it.
How do I evaluate a tool’s balance and comfort?
Hold and test the tool for weight distribution and grip comfort. A well-balanced tool reduces fatigue during long sessions and improves control when switching modes.
Choose a tool that feels balanced and comfortable to hold for extended use.
Top Takeaways
- Assess material first to choose between drill and hammer modes
- Prioritize precision holes with a drill for soft substrates
- Reserve hammer action for masonry and rapid fastening
- Use adjustable torque settings to prevent overdriving
- Test tools on scrap material before real work