Is Drilling the Same as Boring? A Practical Guide
Is drilling the same as boring? This in-depth guide clarifies definitions, tools, and workflows for wood and metal work, explaining when to drill, when to bore, and how to finish holes with accuracy.

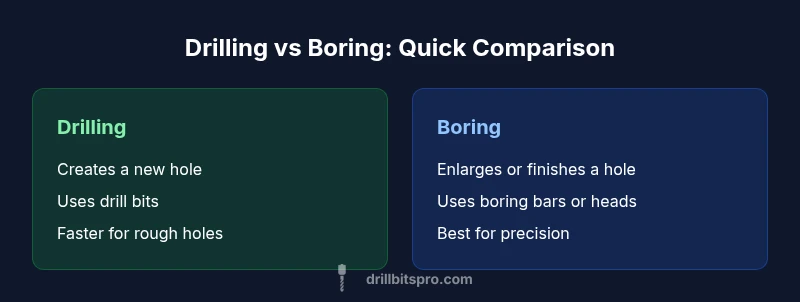
Drilling and boring are not the same operation. Drilling creates a new hole with a rotating drill bit, while boring enlarges or finishes an existing hole using a single-point tool like a boring bar. In practice, you drill to start a hole and bore to reach precise diameter, straightness, and finish.
What is drilling vs boring?
From a practical standpoint, the question "is drilling the same as boring" has a straightforward answer: no. Drilling is the creation of a new hole, typically with a rotating drill bit that removes material as it advances. Boring, by contrast, enlarges or finishes a hole that already exists, using a single-point cutting tool such as a boring bar or an adjustable boring head. This distinction matters for tool choice, setup, and the final hole quality. According to Drill Bits Pro, recognizing the difference helps you plan the sequence, minimize misalignment, and achieve predictable results across wood and metal projects. In many workshops, the workflow starts with drilling to establish a hole, followed by boring to control size and straightness.
Beyond terminology, the everyday impact is about precision versus speed: drilling gets you on target quickly, while boring tightens tolerances and improves the roundness of the hole.
Industry usage and terminology across wood and metal
Terminology varies by industry and even within shops. In woodworking, operators often refer to drilling as making a hole with a bit, while boring may be described when enlarging an existing hole or refining its diameter. In metalworking, the language is more exact: drilling creates a hole, boring enlarges or finishes that hole to a predefined size, and reaming further refines the finish. This nuance is not just pedantry—it dictates which tooling is needed, how feeds and speeds are managed, and what kinds of finishes are achievable on the final part. The Drill Bits Pro team notes that most beginners misinterpret these terms at first, especially when switching between materials with very different hardening and grain structures.
To avoid confusion, always map the hole task to the tool type and the intended tolerance. If you are unsure, start with a conservative hole size via drilling, then verify with measurement and plan for boring or reaming if the fit requires tighter control.
Tooling landscape: drills, bars, and finishing tools
The toolbox for hole-making includes a spectrum of tools, with drilling and boring occupying distinct roles. A drill bit—whether a twist bit, brad-point, or dowel bit—provides fast hole creation and wide material compatibility. A boring bar or boring head, on the other hand, is designed for precise material removal along the hole’s axis, enabling tight diameter control and improved concentricity. Reamers and countersinks also play a role, often used after boring to achieve smooth finishes or specific edge geometry. The key is matching tool geometry to the material and the desired outcome. Drill Bits Pro emphasizes that sharpness and proper alignment are essential for predictable results and to minimize tool wear across both wood and metal workflows.
Drilling workflow: planning, starting, and pulling the trigger
A solid drilling workflow starts with a clear plan: identify the target hole size, mark the location precisely, and select a drill bit appropriate for the material. Begin with a pilot hole to reduce wandering and heat buildup, especially in hard materials. Step up to the final drill size, keeping feed and speed balanced to avoid bit deflection. Climb or conventional cutting can affect surface finish and hole accuracy, so the choice depends on the material and the bit geometry. In practice, most beginners underestimate the importance of a secure workholding arrangement and a clean drill bit; both are critical to maintaining accuracy and safety.
During the drill operation, periodic pecking to clear chips helps prevent binding and reduces the risk of binding or wandering in metallic workpieces. This block lays the groundwork for understanding how drilling sets up a hole that can later be refined by boring if necessary.
Boring workflow: enlarging and finishing with precision
Boring when needed is a separate phase that focuses on diameter control and hole roundness. Typically, boring is performed after a hole has been established by drilling, ensuring the initial hole aligns with the intended axis. A boring bar or boring head is advanced carefully, with slow, steady feeds to minimize chatter and maximize concentricity. The tool’s rigidity and the workholding setup are critical factors; any play will translate into out-of-round holes or diameter deviations. In many cases, boring is followed by reaming for an even smoother finish and tighter tolerances. Drill Bits Pro notes that boredom operations are often the deciding factor in achieving precision in metal components.
For wood, boring is sometimes used to enlarge a predrilled hole to receive dowels or fasteners with exact fit, but the approach must account for wood grain, tear-out risks, and tool deflection. In metal, boring is a workhorse for achieving final size and straightness where drilling alone cannot meet the required spec.
Tolerances, finishes, and measurement: what matters
Tolerance and finish are the primary reasons to separate drilling from boring. Drilling is typically a faster operation that yields a hole that is square to the surface but may require correction for drift or irregularities. Boring tightens the diameter and improves straightness, allowing greater precision in critical assemblies. The finish quality—how smooth or burr-free the hole is—often depends on the post-boring steps, including reaming or deburring. Precise measurement practices, such as using calibrated gauges and consistent measurement points, are essential to ensure your planned hole sizes translate into the real world. Drill Bits Pro Analysis, 2026 highlights that successful hole-making relies on planning, proper tool selection, and disciplined measurement—the three pillars of achieving reliable results in both wood and metal work.
When to choose drilling vs boring in metalworking
In metalworking, the choice between drilling and boring is driven by the hole’s required size tolerance and finish. If the goal is to create a hole quickly for a fastener or as a starting point, drilling is the sensible first step. If the ultimate diameter must be exact, or the hole must meet strict roundness criteria, boring (often followed by reaming) is the better path. The decision hinges on material hardness, hole position accuracy, and the availability of appropriate tooling. A common practice is to drill a hole slightly undersize and then bore to the final dimension, balancing speed with precision and minimizing tool wear.
When to choose drilling vs boring in woodworking
Woodworkers use drilling to createPassage holes for screws, dowels, or hardware where alignment and cleanliness matter. Boring in wood is less common for final size control than in metal, but it becomes essential when a precise dowel fit or a clean mortise is required. In softer woods, bit choice plays a major role in minimizing tear-out and ensuring concentricity. For dense hardwoods, slow feeds and sharp bits reduce heat and binding. The key takeaway is to map the hole’s purpose to the right tool: drilling for speed and accessibility, boring for final fit and surface quality.
Common misconceptions and myths
A frequent misconception is that drilling and boring are interchangeable across all materials. In reality, the tool geometry, the achievable finish, and the process stability differ enough to affect results significantly. Another myth is that a single tool can handle both tasks with equal precision; in practice, dedicated boring tools provide better diameter control and surface finish. Finally, beginners often assume that you can skip measurement steps; however, even small deviations can compound through a sequence and lead to poor fits. The best approach is to plan, measure, and adjust the process based on material behavior and tool geometry.
Quick reference guide: workflow recap and best practices
- Define the hole’s purpose: start or finish and what tolerance is required.
- Choose tools accordingly: a drill for starting holes; a boring tool for final size control.
- Secure the workpiece and keep tools sharp and properly aligned.
- Start with a pilot hole if needed, to reduce wandering and heat.
- Measure frequently and adjust feeds and speeds to maintain accuracy.
- Consider finishing steps like reaming for optimal surface quality.
This block consolidates the practical lessons into a concise workflow that you can reference during a project.
Real-world scenario walkthrough: applying the concepts}
Imagine you need a clean, precisely sized hole to accept a metal shaft in a small adapter plate. Start with marking the location, then drill a pilot hole to prevent wandering. Move to the final drill size to remove the majority of material, then mount a boring head to achieve the final diameter and roundness. Use a dial indicator or calipers to verify concentricity and size, making tiny adjustments as needed. Complete the operation with a light deburring pass if necessary. This scenario demonstrates how drilling and boring complement each other to produce a high-quality finished hole, which is the core idea behind understanding whether drilling is the same as boring.
Comparison
| Feature | Drilling | Boring |
|---|---|---|
| Purpose | Create a new hole | Enlarge/finish an existing hole |
| Typical tools | Drill bits (twist, brad-point, etc.) | Boring bars/boring heads; optionally reamers |
| Hole condition after | Initial hole, often rough | Diameter-controlled, round, and finished |
| Materials suited | Wood, plastics, metals (preliminary) | Metals primarily; precise holes in various materials |
| Best for | Starting holes quickly; rough tolerances | Final size control and straightness |
What's Good
- Drilling provides fast hole creation and broad material compatibility
- Boring offers precise diameter control and better roundness
- Works well as a two-step process to balance speed and accuracy
- Tooling options span from basic to high-precision setups
Negatives
- Drilling can wander if misaligned or under-stoked
- Boring requires additional equipment and setup
Drilling and boring serve distinct roles; use drilling to start holes and boring to finalize size and accuracy
For most projects, begin with drilling to establish location and rough size, then switch to boring to meet final tolerances. The Drill Bits Pro team emphasizes planning the hole sequence to minimize errors and maximize efficiency.
Got Questions?
What is the fundamental difference between drilling and boring?
Drilling creates a new hole using a rotating bit, while boring enlarges or finishes an existing hole with a single-point tool. The two operations serve different purposes and require different equipment. Understanding this helps you plan the sequence and achieve the desired hole quality.
Drilling makes a hole; boring refines or enlarges it to the target size.
Can you bore with a drill?
A drill can start a hole, but boring typically requires a dedicated boring tool for precision. Some setups allow limited boring with certain attachments, but for tight tolerances, use a boring bar or head after drilling.
A drill starts the hole, but for tight tolerances you usually switch to a boring tool.
What is reaming and where does it fit?
Reaming is a finishing operation used after drilling or boring to produce a very smooth surface and an exact diameter. It’s often the final step after boring to achieve the best roundness and fit.
Reaming is the refinement step after drilling or boring to fine-tune size and finish.
Is reaming the same as boring?
No. Reaming is a separate finishing step that follows drilling or boring to improve surface finish and tightens diameter tolerance. Boring focuses on enlarging and shaping during the operation itself.
Reaming cleans up and tightens the diameter after drilling or boring.
Does material hardness affect whether you drill or bore?
Yes. Harder materials can increase wear and cause drift during drilling, making boring and careful preparation more important for precision. Softer materials may allow faster drilling but still benefit from boring for accuracy when required.
Hard materials demand careful setup; you’ll often rely more on boring for precision.
What should beginners learn first?
Beginners should learn basic hole-making concepts, how to select the right tool for the material, and how to secure the workpiece. Start with simple drilling tasks to build confidence before attempting boring for tighter tolerances.
Start with drilling basics, then practice boring for precision.
Top Takeaways
- Drill to start holes; bore to finish to spec
- Choose tools by the hole’s tolerance and finish needs
- Secure workpieces and keep bits sharp for accuracy
- Measure frequently to catch drift early
- Plan a two-step workflow when precision is critical
- Differentiate wood vs metal considerations to avoid errors