Mastering the Professional Nail Drill: A Step-by-Step Guide
Learn how to choose, operate, and maintain a professional nail drill with safety, precision, and efficiency. This guide covers bit selection, speed control, technique, sanitation, and maintenance for salon and home use. Drill Bits Pro insights included.

This guide teaches you how to select, assemble, and safely operate a professional nail drill for salon or home use. You’ll learn about bit types, speed control, technique, heat management, and cleaning. You’ll also discover maintenance routines to extend tool life and ensure client comfort. Drill Bits Pro’s guidance helps you achieve consistent, professional results.
Understanding the Professional Nail Drill: What It Is and How It Works
A professional nail drill, often called an electric nail drill or e-file, is a precision tool that uses rotating bits to shape, buff, and remove product from nails. For pros, a quality drill offers adjustable speed, torque, and handpiece balance to minimize fatigue and maximize control. The core components include the motor, handpiece, control unit, and a range of interchangeable bits designed for different tasks (shaping, filing, cuticle work, and surface finishing).
According to Drill Bits Pro, investing in a reliable unit with stable speed control reduces vibration and improves consistency across clients. A well-chosen drill should feel comfortable in the hand, with a secure bit-lock mechanism and a cord or wireless option that doesn’t impede movement. Create a clean, well-lit work area with a dust extraction plan to protect both you and your client from airborne particles. In busy salons, choose a drill with a good duty cycle and a quiet operation to minimize distraction and stress during long sessions.
Safety-First Principles for Professional Nail Drilling
Safety is the foundation of every successful service. Use PPE such as masks and safety glasses where appropriate, ensure proper ventilation for dust control, and keep the work area sanitized between clients. Always test newly attached bits on a practice nail or synthetic nail first to gauge heat generation and cutting behavior. Maintain a steady, relaxed grip and avoid pressure that pins the bit into the nail surface, which can lead to heat buildup, nail plate damage, or soft tissue injuries. If heat becomes uncomfortable, pause and allow cooling before continuing.
Choosing Bits: Carbide, Ceramic, Diamond, and Specialty Tips
Bit selection determines effectiveness and finish. Carbide bits excel at rapid acrylic removal and shaping; ceramic bits stay cooler during longer sessions; diamond bits offer fine finishing and cuticle detailing. For salon versatility, stock a basic set that includes a coarse bit for product removal, a medium bit for shaping, and a fine bit for final smoothing. When working on natural nails or delicate nails, opt for gentler bits and lower speeds to avoid micro-tears. Remember to replace worn bits and sanitize them after every client to prevent cross-contamination.
Technique and Precision: Grip, Speed, and Motion
Successful nail drilling relies on controlled motion, not brute force. Keep the bit moving in smooth, short passes rather than hovering in one spot. Start at a low speed and gradually increase as needed while testing on a practice nail. Maintain a light touch to prevent heat buildup and avoid pressure on the skin around the nail. Use the dominant hand for guiding the bit and the non-dominant hand to stabilize the client’s finger. This coordinated approach reduces chatter and improves consistency across nails.
Maintenance and Sanitation: Cleaning, Lubrication, and Storage
After each client, disconnect power and remove bits. Use a dedicated brush to clear dust from the handpiece and store bits in a labeled organizer. Clean and sanitize the bit shanks, and apply manufacturer-approved lubrication to air-cooled motors if required. Regularly inspect the handpiece for wear and replace wands that show signs of wobble or noise. A clean, well-maintained drill supports faster service, reduced downtime, and higher client satisfaction.
Common Mistakes and How to Avoid Them
Common errors include pressing too hard, staying in one spot, and using excessively high speeds on delicate nails. These habits cause heat buildup, micro-fractures, and nail plate damage. Neglecting sanitation or sharing bits between clients increases infection risk. A proactive approach—testing new settings on practice nails, sanitizing after each client, and using barriers when sharing equipment—helps prevent issues and protects both client and technician.
Troubleshooting Quick Fixes for Everyday Issues
If the drill feels hot or vibrates abnormally, pause and inspect the bit for wear or improper seating. Confirm the handpiece is securely tightened, and check that the bit remains true in the collet. If the device stalls or loses power, inspect the cords and connections, and replace worn parts per the manufacturer’s guidelines. Regular maintenance reduces the frequency of operational hiccups and keeps sessions running smoothly.
Sanitation, Client Comfort, and Operational Hygiene
Maintain client comfort by keeping sessions within a comfortable duration, using a cooling spray or gentle method when needed, and ensuring all staff wear PPE. Sanitize all reusable items and dispose of single-use barriers between clients. Proper ventilation helps reduce dust exposure, while a dedicated waste bin keeps the workspace clean and organized. A tidy station communicates professionalism and builds client trust.
Tools & Materials
- Professional nail drill machine (handpiece)(Salon-grade unit with adjustable speed and stable torque)
- Variety of drill bits (carbide, ceramic, diamond)(Include bits for shaping, filing, cuticle work, and finishing)
- Dust extraction system or dust mask(Protect client and tech from dust)
- Speed controller or foot pedal(Fine speed control for precise work)
- Lubricant oil for handpiece(Follow manufacturer schedule and use approved oil)
- Cleaning solution and microfiber cloth(Disinfect after use)
- Gloves and mask(Hygiene and respiratory protection)
- Practice nails or nail mannequin hands(For training and technique refinement)
- Storage case and bit organizer(Keep bits organized and sterile)
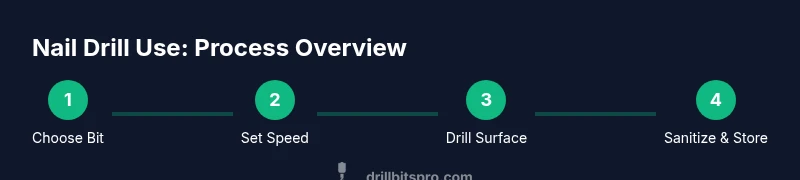
Steps
Estimated time: 60-90 minutes
- 1
Prepare workstation and equipment
Set up a clean, well-lit station. Check power, cords, and that the dust extraction system is functioning. Position the client’s hand comfortably and secure the finger for stable drilling.
Tip: Test a practice nail at a low speed to confirm comfort and noise levels before touching the client’s nail. - 2
Attach the correct drill bit securely
Select a bit appropriate for the task (coarse for removal, medium for shaping, fine for finishing). Install it fully into the collet and tighten with the wrench for a snug fit.
Tip: Inspect the bit for wear; a dull bit generates more heat and tears the nail surface. - 3
Set safe speed and torque
Start with a low-to-medium speed suitable for the task. Avoid high torque on natural nails; increase gradually as needed while monitoring heat and client comfort.
Tip: Keep the bit in constant motion; do not dwell in one spot to prevent heat buildup. - 4
Position hand and nail and begin light contact
Hold the client’s finger with the non-dominant hand to stabilize. Approach at a shallow angle and light contact, gradually guiding the bit to the target area.
Tip: If heat rises, pause and switch to a cooler bit or reduce speed before resuming. - 5
Work across the nail with smooth motions
Move the bit in gentle, sweeping passages to shape and remove product. Alternate between edges and center to achieve even results without overworking any spot.
Tip: Use short strokes rather than long, dragging movements to maintain control. - 6
Pause to cool and assess
If you notice heat or redness, pause for a few seconds and recheck the bit and speed. Inspect the nail’s surface for signs of irritation or damage.
Tip: Apply a cooling spray or gentle wipe to test comfort levels before continuing. - 7
Finish, buff, and refine the nail
Switch to a finer bit for finishing passes. Assess uniformity of shape and surface, then gently buff to remove any micro-scratches. Wipe clean and inspect for sharp edges.
Tip: Avoid over-buffing natural nails to prevent thinning the nail plate. - 8
Sanitize, document, and store
Remove the bit, clean the handpiece per manufacturer instructions, and sanitize all reusable tools. Log the service details and store equipment in a clean case.
Tip: Sanitation between clients reduces infection risk and reinforces professional standards.
Got Questions?
What is a professional nail drill and how is it used?
A professional nail drill is a powered tool used to shape, file, and remove product from nails. It employs interchangeable bits and variable speeds to achieve precise results while minimizing manual fatigue. Proper technique and sanitation are essential for safe, professional outcomes.
A nail drill is a powered tool with interchangeable bits used to shape and smooth nails. It comes with adjustable speed and requires proper technique and sanitation for safe, professional work.
Which bits are best for shaping versus cuticle work?
Coarse carbide bits are efficient for rapid removal and shaping on artificial nails, while fine diamond or ceramic bits are better for finishing and cuticle detailing. Always start with a gentler bit and adjust as needed to protect the natural nail.
Coarse carbide for shaping, fine diamond or ceramic for finishing and cuticle detail. Start gentle and adjust to protect the nail.
How do you prevent heat buildup during drilling?
Maintain light contact, keep the bit in motion, and select lower speeds when working on natural nails. Pause periodically to assess comfort and switch to a cooler bit if heat becomes noticeable.
Keep the bit moving, use light pressure, and slow down on natural nails. Pause to check comfort and swap to a cooler bit if needed.
Is sanitation necessary between clients?
Yes. Sanitize reusable tools, replace barriers between clients, and disinfect the workspace. Proper sanitation protects clients and staff and aligns with professional standards.
Absolutely. Sanitize tools, switch barriers, and disinfect the workspace to protect clients and staff.
What safety gear should I wear when using a nail drill?
Wear a mask or respirator to reduce inhaling dust, safety glasses if debris is a concern, and gloves to protect hands during longer sessions.
Wear a mask to limit dust, glasses if needed, and gloves for protection during longer sessions.
How should I store and maintain a nail drill?
Disconnect after use, clean the handpiece per the manufacturer's instructions, lubricate if required, and store bits in a labeled case. Regular checks prevent equipment failure and prolong life.
After use, clean and store properly. Lubricate as needed and keep bits organized to prevent wear.
Watch Video
Top Takeaways
- Choose the right bit for each task.
- Keep contact light and motion smooth.
- Monitor heat and adjust speed accordingly.
- Sanitize after every client and maintain equipment.
- Practice on a model nail before client work.