Core Drill: A Practical How-To Guide for Core Drilling
Master core drilling with confidence. This comprehensive guide covers selecting core drills and bits, setup, technique by material, safety, and maintenance for precise, durable holes.

This guide shows how to perform core drilling safely and accurately. You’ll select the right core drill and hollow-core bits, prepare the workpiece, and steadily feed to produce clean, straight cores. Key safety checks and setup tips help you avoid common errors. This quick answer also highlights basic tooling and alignment considerations you’ll encounter in the full guide.
What is a Core Drill and Why It Matters
A core drill is a specialized tool designed to remove a hollow cylinder of material, creating a precise hole while preserving the surrounding structure. Core drills excel when you need large diameter holes, clean surfaces, or when you must extract a material sample for testing. The hollow core minimizes material removal, reduces heat buildup, and often yields straighter bores than traditional bits. For DIY projects and professional tasks alike, understanding core drill geometry, core bit families, and proper clamping is foundational to success. According to Drill Bits Pro, selecting the right core drill and compatible bits is critical for hole quality and tool life. With the correct setup, you can bore complex cores with confidence and reuse the same drill across various materials. In this section we cover core drill basics, bit families, and how to read manufacturer data to pick the best combination for your job.
Choosing the Right Core Drill and Core Bits
Choosing a core drill starts with the job you face. For concrete and masonry, diamond core bits paired with a compatible hammer drill deliver the best results. For metal and certain composites, carbide tipped or solid carbide core bits offer durability and clean edges. Bit diameter should be chosen to match the final hole size, while bit length affects how deep you can drill in one pass. Shank compatibility with your drill is essential to avoid wobble or slippage. When in doubt, consult the manufacturer data sheets for RPM ranges, feed rates, and coolant recommendations. Based on Drill Bits Pro recommendations, begin with a slightly smaller diameter to guide alignment and reduce the chance of wandering. Align the drill so the bit edge meets the surface squarely for a controlled entry and consistent core removal.
Material Considerations: Metal, Concrete, Wood
Different materials demand different approaches. Concrete benefits from low to moderate speeds and continuous cooling with water or mist to suppress dust and heat. Metal cores require lubrication and slower feeds to prevent work hardening, while irrigation or coolant helps extend tool life. Wood cores favor sharp, clean-cutting edges and moderate feed to avoid tear-out. Always verify the material type, density, and any reinforcement that could deflect or bind the bit. In all cases, a secure, clamped workpiece and a stable drill setup reduce deviation and improve bore quality.
Safety First: PPE and Safe Work Practices
Core drilling can generate noise, dust, and sharp metal chips. Protect your eyes with safety goggles, ears with hearing protection, and skin with gloves. Use a dust mask or respirator when working with concrete or composites, and ensure adequate ventilation. Secure the workpiece with clamps or a vise, and keep bystanders clear of the work zone. Disconnect the drill from power before changing bits, and never stand directly in line with the drill path when starting. A clean workspace and well-maintained tools greatly reduce the risk of kickback or bit binding.
Setup and Calibration: Preventing Runout and Heat Build-Up
A precise bore begins with a solid setup. Secure the workpiece and mount the drill in a stand or guide to minimize runout. Check that the spindle is clean and the bit seats fully in the chuck. Use a pilot guide or center punch to mark the entry point, and consider a shallow pilot hole to guide the core bit. Ensure coolant or lubrication is ready if required by the material. Run a light test cut on scrap material to verify alignment before tackling the actual workpiece. These steps prevent wandering, reduce heat buildup, and extend core bit life.
Drilling Techniques by Material: Metal, Concrete, Wood
Metal: slow speeds, steady light pressure, and ample lubrication reduce heat and edge dulling. Concrete: maintain consistent feed, use water to suppress dust, and avoid rapid withdrawal that may cause bit grab. Wood: start with a sharp bit and let the cutting edge slice gradually; avoid binding by maintaining a gentle feed and backing out periodically to clear debris. In all cases, maintain perpendicular entry to the surface, pause to cool if you notice smoke or odor, and adjust feed based on material response.
Cooling, Lubrication, and Deburring
Cooling reduces temperature spikes that brittle or dull core bits can suffer from. Use water or specialized coolant when appropriate, applying a steady mist or gentle stream to the cutting surface. After drilling, deburr the core edge with a deburring tool or file to remove sharp fibers or burrs. Inspect the bore for wall fractures or material chatter, and clean the hole to remove dust and chips before testing fitment or insertion. Proper post-drilling care helps extend the life of core bits and maintains hole integrity.
Maintenance, Storage, and Longevity
Clean spent debris from the bit after each use and store bits dry in a protective case. Inspect the cutting edge for chips or dullness; sharpen or replace as needed rather than forcing a dull bit. Keep the chuck and spindle clean and lightly lubricated to prevent rust. Periodically check the drive system for play and ensure the drill’s alignment remains true. Regular maintenance and correct storage prolong tool life and keep holes consistent across projects.
Tools & Materials
- Core drill (bench or handheld)(Ensure it accepts hollow or compatibility with your core bits)
- Core bits (diamond or carbide)(Choose diameter to match final hole; length should exceed workpiece thickness)
- Clamps or vise(Prevent workpiece movement during drilling)
- Lubricant/c coolant(Use water or oil-based coolant where recommended)
- Measuring tools (calipers, micrometer)(Verify hole diameter and core length)
- Safety gear (goggles, gloves, ear protection)(Mandatory PPE for safe drilling)
- Pilot guide or center punch(Optional for precise entry alignment)
- Dust collection or shop vac(Helps maintain visibility when drilling concrete)
- Vacuum or brush for debris(Keep work area clean to prevent slips)
- Coolant tray or water source(For longer drilling passes or dense materials)
- Dial indicator (optional)(To check runout and alignment)
- Scraper or deburring tool(Cleanup after drilling)
Steps
Estimated time: 30-60 minutes
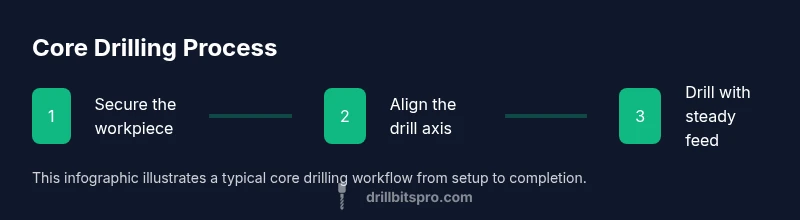
- 1
Secure the workpiece
Clamp the material firmly to a stable surface to prevent movement. Confirm the area around the hole is clear of obstructions. This keeps the drill path true and reduces the chance of bit binding.
Tip: Use at least two clamps and double-check alignment before starting. - 2
Select the right core drill and bit
Choose a core bit with the correct diameter for the final hole and ensure the bit is compatible with your drill model. Install the bit fully into the chuck and tighten securely.
Tip: Start with a slightly smaller pilot hole if your setup allows guiding accuracy. - 3
Align the drill axis
Position the drill so the bit edge contacts the surface squarely. Use a guide or stand if possible to reduce runout. Mark the entry point with a center punch for a precise start.
Tip: Verify perpendicular entry with a square before drilling. - 4
Begin with a pilot or shallow entry
Drill a light pilot hole or shallow entry to guide the core bit and reduce the risk of wandering. Stop if you notice bit wandering or heat buildup.
Tip: Keep the drill steady with both hands and avoid pushing aggressively. - 5
Drill with controlled feed and steady speed
Engage at a slow to moderate speed appropriate for the material. Apply steady, even pressure without forcing the bit. Pause to cool if you see smoke or odor.
Tip: Maintain straight-line drilling and frequent chip clearance. - 6
Deburr and inspect the core hole
Withdraw the bit and examine the bore for burrs and uniformity. Deburr if necessary and verify the hole diameter against spec sheets.
Tip: Use a deburring tool or sandpaper for smooth walls. - 7
Clean and store tools
Wipe down the bit and drill, remove chips, and store in a dry case to prevent corrosion. Note any wear or damage for future replacement.
Tip: Record maintenance notes for upcoming projects.
Got Questions?
What is a core drill?
A core drill creates large hollow holes by removing a cylinder of material. It is ideal for precision holes and sample extraction, and it uses hollow core bits designed for clean bore edges.
A core drill makes hollow holes by removing a cylinder of material and is best for precise, large holes.
When should I use a diamond core bit vs carbide tipped?
Diamond core bits are preferred for very hard materials like concrete or masonry. Carbide tipped bits work well on metal and certain composites where toughness and edge retention are important.
Diamond bits excel on concrete, while carbide tipped bits perform well on metal.
Can I core drill into metal?
Yes, with the right carbide tipped or solid carbide core bits and appropriate lubrication to manage heat and wear. Use slow speeds and light, steady pressure.
You can core drill metal with the right core bits and cooling.
What safety gear is essential for core drilling?
Eye protection, hearing protection, gloves, and a dust mask or respirator when cutting concrete or dust-prone materials are essential. Ensure ventilation and secure the workpiece.
Wear eye and ear protection, gloves, and a dust mask for core drilling.
How can I improve accuracy for deep holes?
Use a drill guide or stand, clamp firmly, check runout with a dial indicator, and start with a pilot hole to guide the core bit.
A guide, secure clamps, and a pilot hole improve deep-hole accuracy.
How often should I sharpen or replace core bits?
Inspect after each project; replace bits with dull edges or cracked segments. Regular maintenance extends tool life and ensures consistent bore quality.
Check bits after each use and replace when dull or damaged.
Is it necessary to cool during core drilling?
Coolant or water can be critical for dense or long drilling tasks to manage heat and prolong bit life. Use according to material recommendations.
Cooling helps manage heat and extends bit life when required.
Watch Video
Top Takeaways
- Plan hole diameter and depth before starting
- Clamp the workpiece securely to prevent movement
- Choose the correct core bit for the material
- Drill at appropriate speed with controlled feed
- Deburr and inspect the finished bore