Core Bit Drill Concrete: A Practical How-To Guide
Master core drilling in concrete with a core bit drill. Learn bit selection, setup, cooling, and safe techniques to achieve clean, accurate holes in concrete structures.

This guide helps you master core bit drilling into concrete using a core bit drill concrete setup. You'll learn how to choose the right core bit, prepare the work surface, and perform safe, precise holes with recommended speeds and lubrication. According to Drill Bits Pro, proper technique reduces chipping and maximizes tool life.
Understanding Core Bits and Concrete
Core bits are specially designed to remove a cylindrical plug of material, leaving a clean, round hole with minimal damage to the surrounding concrete. When you perform a core drill in concrete, the goal is to preserve the integrity of the surrounding matrix while creating a precise opening for conduits, anchors, or piping. The core bit drill concrete process relies on diamond-embedded carbide tips that can slice through hard aggregates, but the bit needs proper support, cooling, and stable feed to avoid wandering or chipping. In practice, the choice of core bit diameter and segment length affects both hole size and cut quality. Drill Bits Pro emphasizes selecting a bit that matches your target diameter and depth, while also considering the concrete mix and presence of reinforcement. A stable mounting, smooth feed, and adequate cooling are the triad of factors that determine a successful core drilling job.
Choosing the Right Core Bit Drill Concrete Setup
Selecting the right core bit and machine setup is essential for a clean hole. Start with the hole diameter you actually need and ensure the core bit is compatible with your drill or rotary hammer. In concrete, larger diameters cut more slowly and generate more heat, so advances require patience and constant cooling. For reinforced concrete, look for a bit with robust diamond segments and a longer cutting edge for better wear resistance. The feed rate should be slow and steady, not aggressive, to avoid wobble or binding. A proper setup also includes a stable mounting system or clamps to prevent movement during the cut. The core bit drill concrete task is easiest when you pair the right bit with a tool that has adequate torque and a controlled impact pattern. Drilling performance improves significantly when you match the bit type to the concrete hardness and reinforcement level.
Equipment and Safety Essentials
Before you start, organize PPE (eye protection, hearing protection, respirator), dust control gear, and a clean workspace. A dust mask or respirator is critical when cutting dry concrete to minimize silica exposure. Ensure that the drill is powered and the bit shank seats securely; a loose fit can damage the bit and ruin a hole. Ground fault protection and cord management are smart safety considerations for corded tools. Water cooling, when available, helps suppress dust and cools the cutting surface to prevent overheating. If you must drill in an area with electrical lines, confirm location with a professional locator. Drill Bits Pro stresses that the safest approach is to pause and recheck setup if any abnormal resistance or unusual noise occurs during the cut.
Surface Preparation and Centering
Accurate centering is the difference between a precise core hole and a skewed cut. Begin by marking the center point with a sharp pencil and a center punch for a tactile guide. A pilot drill or guide sleeve can help keep the larger core bit aligned as it engages the surface. Clean the surface at the center point to remove dust, adhesives, or debris that could deflect the bit. Secure the workpiece with clamps or a non-slip mat to prevent movement during drilling. If you’re drilling into a delicate substrate like a tiled surface, place a sacrificial board underneath to catch debris and reduce chipping around the entry.
Drilling Technique: Speed, Pressure, and Cooling
Core drilling requires a balanced approach. Start with a light touch at a slow RPM to allow the diamond segments to bite without overheating. Increase depth gradually while maintaining a steady feed and continuous coolant flow if available. Avoid sudden changes in pressure; a consistent, moderate rate yields a straighter, truer hole. Water cooling is particularly important for large-diameter cores and deeper holes, as it reduces dust and helps extend bit life. Listen for the hum of the drill and watch for smoke or a burning smell—these are signs you should pause and reassess.
Debris Management and Dust Control
Concrete drilling generates a lot of slurry and fine dust. A vacuum system or shop vac helps keep the work area clear and reduces airborne particles. Use a dust shroud and keep water flowing to suppress dust and slurry. Debris can interfere with bit seating on deeper holes, so periodically retract the bit to purge material from the hole. After each drilling pass, pause to check your depth gauge and ensure the hole remains concentric with the original centerline. Cleanliness is not a luxury here—it directly affects the quality of the final bore and subsequent anchoring.
Hole Sizing, Alignment, and Quality Checks
Accurate hole diameter and alignment are non-negotiable for a stable installation. Use calipers or a hole gauge to verify diameter, and a depth rod to confirm depth tolerance. Inspect the hole walls for straightness and concentricity; a wobbly hole can indicate misalignment or insufficient stabilization. Any deviation should prompt a re-check of the center point, guide, and bit seating. Record measurements for quality control and future reference, especially on critical installations.
Maintenance and Longevity of Core Bits
Diamond core bits wear with use, especially on hard aggregates or when cutting near reinforcement. After finishing a drilling task, clean the bit and inspect the segments for chipping or flaking. Store bits in a dry, dust-free environment and protect the cutting edge from impacts. Rotating between bits can extend life by balancing wear across cutting surfaces. Replacing worn segments promptly maintains efficiency and protects the drill’s motor from overload.
Troubleshooting Common Problems
If the hole wanders, revisit centering and pilot guidance. If cutting seems slow or hot, check coolant availability and feed pressure, and consider reducing depth or changing to a more aggressive diamond segment. Chips around the hole edges may indicate improper starting technique or insufficient stabilization. Look for binding at depth, unusual vibrations, or tool overheating, then pause to inspect the setup. Persistent issues may require using a different core bit geometry or consulting the manufacturer’s guidelines.
Real-World Scenarios and Tips
In field conditions, you may encounter variable concrete hardness, moisture, and reinforcement layouts. Having a small kit of core bits in several diameters lets you adapt to on-site needs. For narrow or shallow holes, a pre-drilled pilot hole can improve accuracy and reduce bit wear. Always test on a scrap block when possible before committing to a critical installation. This practical approach aligns with best practices recommended by industry experts and the Drill Bits Pro team.
Tools & Materials
- Core drill or rotary hammer with core bit attachment(Capable of handling chosen core bit diameter and depth)
- Core bits (various diameters)(Select based on requested hole size; ensure shank compatibility)
- Water source or spray bottle for cooling(Essential for cooling and dust suppression)
- Dust mask or respirator(NIOSH-approved; protects against silica dust)
- Safety goggles(Eye protection from chips and splash)
- Hearing protection(Ear muffs or plugs)
- Center punch and hammer(Center mark to prevent bit wandering)
- Clamps or non-slip mounting(Secure workpiece firmly)
- Vacuum or shop vac(Cleanup and dust control (optional but recommended))
- Measuring tape and marker(Mark center, depth, and margins)
- Lubricant or coolant(Water is the primary coolant; use specialty lubricants if specified by bit maker)
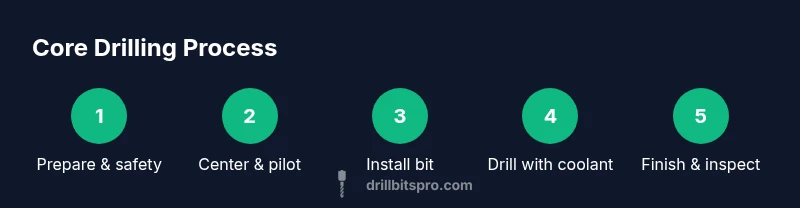
Steps
Estimated time: 60-90 minutes
- 1
Prepare the setup and safety checks
Inspect the drill, ensure PPE, and secure the work surface. Verify that the core bit and shank are compatible with the machine. Prepare water supply and dust control before starting.
Tip: Double-check the bit seating to avoid slips during initial contact. - 2
Mark the hole center with center punch
Use a center punch to create a precise mark at the intended hole center. This minimizes wandering during initial contact. Clean the mark to ensure accurate alignment.
Tip: If misalignment occurs, re-mark and re-check the surface before resuming. - 3
Install the core bit and align the pilot guide
Install the core bit into the drill chuck and verify alignment with the marked center. Use a pilot hole or guide sleeve to stabilize the bit as it begins.
Tip: Run at a low speed to seat the bit before full engagement. - 4
Begin drilling with light pressure and water cooling
Start with a gentle feed to let the diamond segments cut without overheating. Maintain a steady stream of water to cool and flush debris.
Tip: Keep the feed consistent; erratic pressure leads to wobble and rough walls. - 5
Increase depth gradually while monitoring heat
As the hole deepens, maintain cooling and reduce contact pressure after the first breakthrough. Pause if you observe smoke or an odor indicating overheating.
Tip: Take short pauses for deep holes to avoid bit life loss. - 6
Clean out the hole and deburr edges
Withdraw the bit occasionally to purge slurry; inspect the hole diameter. Deburr edges with a round file or sandpaper for a clean finish.
Tip: A wet-dry vacuum simplifies debris removal and improves visibility. - 7
Inspect diameter and depth, then finalize
Measure the hole to confirm diameter and depth tolerance. If needed, perform a light finish pass to ensure roundness and true depth.
Tip: Document hole specs for QA and future reference.
Got Questions?
What is core drilling concrete and when should I use it?
Core drilling creates precise circular holes in concrete for passes like piping, electrical, or anchors. Use it when accurate holes with smooth edges are required. Ensure the setup is stable and the bit is appropriate for the concrete mix.
Core drilling creates precise circular holes in concrete for pipes, wires, or anchors, with a stable setup and the right bit.
What sizes do core bits come in for concrete?
Core bits come in a range of diameters, typically from 1/2 inch up to several inches. Select diameter based on the required hole size and compatibility with the drill.
Core bits come in many sizes; pick the diameter you need and ensure the drill accepts it.
Can I drill reinforced concrete with a core bit?
Yes, but you must use an appropriate diamond core bit and a robust drill setup. Expect more wear and slower cutting when rebar is present. Follow manufacturer guidelines.
Reinforced concrete is drillable with the right diamond core bit and solid setup.
How do I avoid chipping and cracking around the hole?
Center and pilot the hole, use adequate drilling speed, keep the bit cool, and don’t apply excessive pressure. Starting with a pilot hole often reduces edge damage.
Pilot the hole, keep it cool, and don’t push hard; it reduces chipping.
Is water cooling required for core drilling?
Water cooling is highly recommended to reduce dust, carry away debris, and extend bit life. Use a steady stream or mist during drilling.
Water helps control dust and heat for longer bit life.
Watch Video
Top Takeaways
- Choose the correct core bit size first
- Maintain steady, cool drilling conditions
- Secure the workpiece to prevent movement
- Inspect and document hole specs after drilling