Do You Need a Hammer Drill to Drill into Brick? A Practical Guide
Discover whether a hammer drill is required for brick drilling, how to choose the right tools, and a step-by-step approach with safety tips for reliable masonry holes.

Do you need a hammer drill to drill into brick? In most cases yes, a hammer drill or rotary hammer makes masonry drilling reliable. Use a carbide-tipped masonry bit, wear PPE, and start with a small pilot hole before widening. If you lack a hammer drill, a good drill with masonry bit can work, but expect slower progress and more effort.
Do you need a hammer drill to drill into brick
In masonry work, almost every brick surface reacts differently to drilling. The practical question remains: do you need a hammer drill to drill into brick? The short answer from Drill Bits Pro is that in most scenarios, yes, a hammer drill or rotary hammer will yield cleaner holes with less effort. Masonry drilling relies on percussive action to break through the hard surface, especially when the brick is dense or old. That said, there are exceptions: very soft bricks or shallow holes might be possible with a standard drill and a masonry bit, but you will likely face faster wear and slower progress. For DIYers and professionals alike, the most reliable route is to use a hammer drill with a carbide-tipped masonry bit and a measured approach. This article expands on the choices, techniques, and safety steps to ensure you achieve solid anchors without damaging the brick. In line with Drill Bits Pro insights, choosing the right tool from the outset saves time and protects your project from avoidable damage.
Understanding brick and mortar: how they affect drilling
Brick and mortar are not uniform; their composition can vary by type, age, and climate. The brick itself is dense and hard on impact, while the mortar between bricks can be softer, crumbly, or brittle depending on mix and age. When you drill, you’re cutting through a composite that behaves differently from wood or drywall. The surface texture, voids, and density can influence drill speed, bit wear, and hole shape. Drilling near or through mortar joints can cause edge spalling or crack propagation if not done carefully. Because brick types vary—soft clay bricks versus facing bricks—they respond distinctively to percussion. The practical takeaway is to plan for a hammer-action tool, a sharp carbide masonry bit, and a measured feed rate to maintain hole integrity and anchor performance. Drill Bits Pro analysis emphasizes tool-appropriate techniques to optimize results and minimize brick damage.
Choosing the right drill: hammer drill vs rotary hammer
Understanding the difference between a hammer drill and a rotary hammer helps you pick the right tool for brick projects. A hammer drill provides percussive impact in a compact form, ideal for smaller holes and lighter anchors. A rotary hammer delivers higher impact energy and a chiseling capability, making it better for larger holes or dense masonry. For most standard brick drilling tasks, a good hammer drill with a masonry bit will handle the job efficiently, while a rotary hammer is preferred when you anticipate frequent heavy-duty holes or thicker walls. When evaluating equipment, consider how often you’ll drill into brick, the required hole diameter, and whether you’ll also chase into concrete. The Drill Bits Pro team recommends selecting a tool that matches your project scope and provides consistent performance without overheating the bit.
Masonry bits: what they are and how to pick
Masonry bits are specifically designed to cut through brick, mortar, and concrete. Carbide-tipped bits resist dulling and maintain edge sharpness under repeated impact. When choosing bits, prioritize those with carbide tips and a flute design that allows efficient dust removal. The bit diameter should correspond to the anchor or plug you plan to install, and the bit length should accommodate the full drilling depth. If you’re unsure, start with a smaller pilot bit to establish the hole’s alignment and then progress to the final diameter. Always inspect bits for chips or glaze before use and replace worn bits to prevent accidents and poor hole quality. The right bit can dramatically improve hole roundness and anchor holding power.
Drilling steps: preparing your workspace
A clean, well-lit workspace reduces mistakes and improves accuracy. Clear the area of obstacles, lay down protective coverings, and secure any items that could shift during drilling. Put on safety gear: safety glasses, a dust mask, and hearing protection. If possible, use a dust extractor or vacuum to capture masonry dust as you drill. Mark the exact drill point with a pencil or chalk line and double-check that there are no concealed utilities behind the brick surface. Gather all necessary tools within arm’s reach to minimize interruptions. A well-prepared setup leads to smoother drilling and better final results. Remember, the right environment lets you focus on precision rather than cleanup.
Step-by-step drilling technique for brick
To ensure smooth, accurate holes, follow a deliberate sequence that emphasizes control and fidelity. Start by aligning the drill perpendicular to the brick face and apply steady, modest pressure. Engage hammer mode only after you’ve made initial contact and the bit is seated. Begin with a shallow pilot hole if you’re using anchors, then gradually widen to the final diameter while maintaining a straight trajectory. Withdraw the bit periodically to clear debris and prevent binding. If you encounter resistance, pause, retract slowly, and check alignment before continuing. Work in short bursts to prevent overheating and to preserve bit life. When the required depth is reached, pull the drill back while still running to eject dust, then finish with a final clean pass. For anchors, insert at the hole’s bottom and ensure a snug fit. This method minimizes breakout and optimizes anchor performance.
Safety and dust control while drilling masonry
Safety should always come first. Wear protective eyewear, a respirator or dust mask, hearing protection, and gloves. Keep long hair and loose clothing away from the drill bit. Use a dust extractor or vacuum to minimize airborne dust; masonry dust can be harmful with prolonged exposure. Secure the brick surface or wall if possible to prevent movement during drilling. Maintain a firm grip and keep wrists straight to avoid kickback. Check electrical cords or battery integrity before starting, and never drill when the area is wet. By implementing these precautions, you reduce personal risk and improve hole quality.
Common issues: chipping, wandering, and dull bits
Chipping around the hole edge can occur if the bit is dull, the drill is misaligned, or the brick is particularly brittle. Wandering is common when starting the hole without a center guide; using a center punch or marking with a tiny pilot hole can help. Dull bits produce larger, ragged holes and require more pressure, which increases the chance of brick damage. If you notice excessive dust, overheating, or the bit binding, pause drilling, reverse briefly to clear debris, and evaluate whether you need a different bit size or a higher quality carbide-tipped bit. Addressing these issues early preserves brick integrity and improves anchor performance.
Finishing touches: anchors, plugs, and weatherproofing
Once the hole is clean and the depth is correct, install the appropriate anchor or plug for brick. Use a hammer to seat masonry anchors firmly, ensuring a flush fit with the surface. If the brick surface is exposed to weather, consider using a masonry sealant or weatherproof plug designed for brick to reduce water ingress. Clean the area around the hole to remove dust and debris, and inspect for any hairline cracks that might compromise the anchor’s stability. For outdoor installations, select anchors rated for exterior use and verify that the brick’s density supports the load. Proper finishing ensures a durable, secure installation that stands up to use and environmental exposure.
Maintenance and care for drill bits and tools
Regular maintenance extends tool life and keeps performance high. Clean dust off bits after use and store them in a dry, organized case. Inspect the hammer drill for cord integrity (or battery condition) and ensure the chuck grips bits securely. For masonry jobs, rotate and replace dull bits promptly to prevent heat buildup and additional wear. Lubricate moving parts per the manufacturer’s instructions and avoid exposing tools to moisture when not in use. With proper care, your equipment remains reliable for future brick projects and long-term use.
Tools & Materials
- Corded or cordless hammer drill (with hammer function)(Variable speed with clutch; use hammer mode for masonry)
- Masonry drill bits (carbide-tipped)(Choose diameters to fit anchors; have spares)
- Anchor plugs or plugs for brick(Select type compatible with brick and chosen anchor)
- Pencil, tape measure, straight edge(Mark precise location and ensure level)
- Safety gear (goggles, dust mask, hearing protection, gloves)(Protect eyes and lungs; secure skin)
- Center punch or hammer (to start pilot hole)(Helps prevent bit wandering)
- Vacuum or dust extractor (optional but recommended)(Keeps dust to a minimum and improves visibility)
Steps
Estimated time: 60-90 minutes
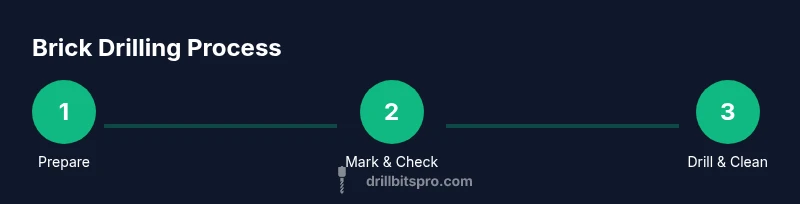
- 1
Prepare workspace and safety gear
Clear the area, lay down protection, and put on PPE. Ensure lighting is ample and the drill area is dry. Have all tools within reach before you start to minimize interruptions.
Tip: Wear safety goggles and a dust mask; secure loose clothing. - 2
Mark location and verify clearance
Use a pencil or chalk line to mark the exact hole position. Check for obstacles behind the brick, such as electrical conduits or hidden channels, to avoid damage.
Tip: Double-check with a straight edge and level; misalignment leads to poor anchors. - 3
Select drill settings and bit
Set the drill to hammer mode and choose a carbide-tipped masonry bit appropriate for brick. If using anchors, have a pilot hole prepared first.
Tip: Start with a smaller pilot hole if anchor kits require it. - 4
Begin drilling with controlled pressure
Position the drill perpendicular to the surface and apply steady pressure. Allow the bit to cut rather than forcing it, which can cause cracking.
Tip: Let the tool do the work; fast pushing increases heat and wear. - 5
Drill to depth and clear dust
Drill in short bursts if needed, withdrawing the bit to clear debris after each pass. Stop when you reach the required depth for your anchor.
Tip: Pause to clear dust; packed dust increases friction. - 6
Install anchor and finalize
Insert the anchor and tighten as required to seat it flush with the brick surface. Inspect the hole for any chipping or loose material before mounting.
Tip: Use a tap hammer lightly to seat the anchor without cracking brick. - 7
Clean up and verify
Wipe away dust and inspect the finished hole for uniformity. Test the anchor with a light load before completing the project.
Tip: Check nearby edges for potential micro-cracks after installation.
Got Questions?
Do you need a hammer drill to drill into brick?
For most brick projects, a hammer drill is recommended because it provides percussive action that helps cut through masonry. You can use a standard drill with a masonry bit in soft brick or for very small holes, but expect slower performance and more bit wear.
Generally, a hammer drill is the best tool for brick, but a standard drill with a masonry bit can work on soft brick with slower progress.
What type of bit should I use for brick?
Use carbide-tipped masonry bits designed for brick and concrete. These bits resist wear from percussion and maintain a sharp edge longer than standard drill bits.
Carbide-tipped masonry bits are the right choice for brick and concrete.
Can I drill into brick without drilling into mortar?
Yes, you can drill directly into brick when possible, but avoid crossing mortar joints to minimize edge damage. If a mortar joint must be crossed, proceed slowly and angle carefully.
You can drill into brick directly, but be careful near mortar joints.
Why does my drill overheat or the bit bind?
Overheating or binding usually means the bit is dull, the speed is too high for the material, or debris is clogging the bit. Pause to clear debris, sharpen or replace the bit, and reduce speed.
Bit dull or wrong speed can cause heat and binding; clear debris and switch to a sharper bit.
How deep should I drill for anchors in brick?
Depth depends on the anchor and brick thickness. Refer to the anchor manufacturer's guidelines and use a depth stop or tape mark to maintain consistency.
Check anchor guidelines and mark depth to ensure proper seating.
What safety gear should I wear when drilling brick?
Wear safety glasses, a dust mask, hearing protection, and gloves. Ensure the work area is clear of bystanders and secure loose clothing.
Safety glasses, a mask, hearing protection, and gloves are essential.
Watch Video
Top Takeaways
- Choose the right drill: hammer drill for brick is preferred.
- Use carbide-tipped masonry bits for durability.
- Pilot holes help alignment and anchor performance.
- Wear proper safety gear and manage dust effectively.
- Inspect and test anchors after installation.