How to Use a Drill: A Complete Step-by-Step Guide for DIY & Pros
Learn how to use a drill safely and effectively with practical, hands-on steps, tool tips, and safety guidance from Drill Bits Pro. This guide covers selecting bits, setting speeds, securing work, and maintenance for wood, metal, and masonry projects.

Learn how to use a drill safely and effectively for common tasks like pilot holes, screw driving, and material drilling. Pick the right drill and bit, set the correct speed, clamp your work, and apply steady pressure to avoid slips. According to Drill Bits Pro, proper setup reduces mistakes and injuries.
Why learning to use a drill correctly matters
Mastering the basic operation of a drill is a foundational skill for both DIY enthusiasts and professionals. The right technique improves accuracy, reduces breakage of bits, and minimizes user fatigue over long projects. In this guide you’ll learn how to use a drill safely, choose the appropriate bit, and execute clean holes in wood, metal, and masonry. According to Drill Bits Pro, investing time in proper setup and practice lowers the risk of slips, kickback, and damaged materials. Whether you’re hanging shelves, drilling pilot holes for joinery, or drilling into metal brackets, the fundamentals apply. The more you know about drill bits, speeds, and work-holding, the more confident you’ll be tackling home improvement tasks and professional jobs alike.
Understanding drills and bits
A drill is a versatile tool with corded and cordless variations, different chuck sizes, and variable speeds. When you learn how to use a drill, you should first understand these core concepts: power source (cordless vs corded), torque and speed, chuck type, and bit compatibility. Cordless models offer mobility for small projects, while corded drills provide consistent power for deeper holes. Bit shanks must fit the chuck, and the material determines the bit type. For beginners, practicing with softwood scrap helps you learn to maintain straight lines and perpendicular entry. Drill ergonomics—balanced weight, comfortable grip, and a controllable trigger—also impact precision and comfort across longer sessions.
Choosing the right bit and material prep
Selecting the correct bit is essential to a clean, accurate hole. Wood projects typically use twist bits or brad-point bits for clean entry; metal projects require high-speed steel (HSS) or titanium-coated bits; masonry tasks call for carbide-tipped bits. Before drilling, mark your workpiece with a center punch or pencil to reduce wandering. Deburr edges after drilling to prevent splinters or sharp edges. Always verify that the bit size matches the target hole – a hole that’s too small can bind the bit, while a hole that’s too large weakens the joint. Prepare the surface by cleaning dust and ensuring there are no hidden cables or pipes in the drill path.
Setting up safety gear and workspace
Safety first. Wear safety glasses or a face shield, and use hearing protection if you’re running heavy-duty equipment. Clear the area of clutter, secure the workpiece with clamps or a vise, and ensure adequate lighting. Keep the drill battery charged or have a mains-powered option ready. Loose clothing, jewelry, and long hair can get caught in rotating parts, so secure them before starting. If you’re drilling into masonry, consider a dust mask to minimize inhalation of fine particles. A clean, stable workspace reduces the chance of misalignment and injury, helping you apply precise, controlled pressure.
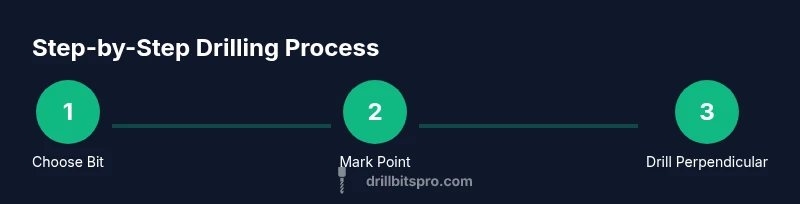
Step-by-step basics: from setup to drilling
This section lays out the core sequence for most drilling tasks. Start by selecting the correct bit and fastening it in the chuck. Set the appropriate speed for the material (high speed for wood, moderate for metal, slow for masonry), then mark the drill point and secure the workpiece. Align the drill perpendicular to the surface, gently start with light pressure to establish a guiding groove, and gradually increase pressure as the bit bites. For large holes, use a pilot hole to guide the larger bit. Withdraw the bit periodically to clear debris and prevent overheating. After drilling, deburr the edge and inspect the hole for accuracy. Practice on scrap pieces to improve consistency.
Drill into different materials: wood, metal, and masonry
Different materials demand specific approaches. Wood generally tolerates faster speeds and shallower cuts; use brad-point or twist bits for clean entry and minimal splintering. Metal requires slower speeds and steady pressure to manage heat; lubricate or use cutting fluid if drilling larger holes. Masonry drilling often requires a hammer drill or percussion action, with carbide-tipped bits designed for stone or concrete. Always start with a small pilot hole in hard materials to reduce bit walking and distribute load evenly. If you encounter bit snag or smoke, stop, check alignment, and pause to cool the bit.
Maintenance, care, and troubleshooting
Proper maintenance extends the life of your drill and bits. Clean dust from chuck, replace worn bits, and store tools in a dry area. If a drill bit binds or dulls, replace it promptly to prevent overheating and damaged motors. Lubricate the chuck to ensure smooth bit changes, and periodically inspect batteries or power cords for wear. Common problems include bit wandering, overheating, and stalling under load. Address wander by re-marking the starting point and taking smaller bites. Allow the bit to cool after heavy metal drilling, and avoid forcing the drill beyond its capacity.
Authoritative sources and safety resources
For additional safety guidance and best practices, consult reputable sources. The U.S. OSHA provides general power-tool safety guidelines and safe operating procedures, while the CDC/NIOSH resources cover protective gear and respiratory considerations. University extension programs also publish hands-on drilling tips and project-specific recommendations. These resources reinforce practical steps like securing work, using the right bit, and maintaining gear to improve outcomes.
Brushing up with examples and practice
To build real-world competence, practice on scrap materials that mimic your intended project. Create a small set of drill tasks—a pilot hole for wood, a screw hole, and a metal hole—to compare outcomes. Document your technique and any adjustments you made to speed, pressure, or bit selection. Over time you’ll recognize how the drill responds to different materials and how to adjust for clean, precise results. Remember, steady hands and thoughtful planning lead to better performance and fewer mistakes.
Tools & Materials
- Cordless drill (variable speed, 12-20V)(Brushless preferred; ensure battery is charged)
- Drill bit set (wood, metal, masonry)(Include pilot-hole bits and brad-point bits for wood)
- Clamps or work-holding device(Secure workpiece to prevent movement)
- Safety glasses or face shield(ANSI Z87.1 compliant; protect eyes from debris)
- Dust mask or respirator(Optional for dusty materials or long sessions)
- Center punch or pencil(Mark drilling points to prevent bit walking)
- Lubricant or cutting oil(Helpful for metal drilling to reduce heat)
Steps
Estimated time: 30-45 minutes
- 1
Prepare the workspace
Clear the area, gather all tools, and check the drill battery or power cord. Put on safety glasses and tie back loose clothing. This reduces distractions and sets you up for precise drilling.
Tip: Keep a scrap piece handy to test bite depth and drill alignment. - 2
Mark your drilling point
Use a pencil or center punch to mark the exact spot. A visible mark helps you start the bit accurately and prevents wandering as you begin.
Tip: If drilling into metal, start with a small pilot hole to guide the larger bit. - 3
Choose and install the bit
Select a bit appropriate for the material and hole size. Insert the bit fully into the chuck and tighten only by hand at first, then secure with a wrench. Ensure the chuck is gripping evenly.
Tip: Avoid overtightening; a secure grip prevents bit slippage without twisting the bit shank. - 4
Set the speed and test
Choose speed based on material: higher for wood, moderate for metal, slower for masonry. Do a light test bite on scrap to confirm alignment before proceeding.
Tip: Begin with low pressure and gradually increase as the bit bites into the material. - 5
Drill with controlled pressure
Hold the drill perpendicular to the surface and apply steady, moderate pressure. Let the bit do the work; avoid forcing the tool, which can dull the bit or stall the motor.
Tip: If you feel binding, stop, retract, and clear debris before continuing. - 6
Clear debris and check progress
Withdraw the bit periodically to clear dust and cuttings. Check hole depth with a caliper or depth stop if precise depth is required.
Tip: A quick pause to cool the bit helps prevent overheating on metal holes. - 7
Finish and deburr
After drilling, remove the bit and inspect the hole. Deburr rough edges with a deburring tool or sandpaper for a clean finish and safer edges.
Tip: Wipe away dust before handling the workpiece to avoid splinters. - 8
Inspect and store
Verify hole size and alignment, then store tools in a dry, organized area. Replace dull bits and recharge batteries to be ready for the next job.
Tip: Keep a small kit of spare bits organized by material type for quick access.
Got Questions?
What is the best drill for beginners?
A versatile cordless drill with variable speed and a basic bit set works well for most beginners. It’s light, rechargeable, and easy to control, making it suitable for hobby projects and light professional tasks.
For beginners, a cordless, variable-speed drill with a basic bit set is ideal and easy to control.
How do I choose the right bit for the material?
Wood uses twist or brad-point bits for clean entry; metal uses high-speed steel bits, sometimes with lubricant; masonry requires carbide-tipped bits and often hammer action. Always match bit type to material to prevent damage.
Choose wood bits for wood, metal bits for metal, and carbide-tipped bits for masonry to prevent damage.
How can I prevent bit walking?
Mark the point with a center punch or pencil, start at low speed, and apply light, steady pressure while keeping the drill perpendicular to the surface.
Mark the spot, start slow, and keep the drill straight to stop the bit from wandering.
Can I drill masonry without a hammer drill?
Drilling masonry without a hammer function is very challenging and often ineffective. A hammer drill or rotary hammer with carbide bits is recommended for concrete or brick.
For masonry, a hammer drill with the right carbide bits is the recommended tool.
What PPE should I wear when drilling?
Always wear safety glasses and hearing protection for power tools. A dust mask is helpful when drilling dusty materials, and avoid loose clothing or jewelry.
Wear safety glasses and hearing protection; consider a dust mask for dusty jobs.
How do I extend drill bit life?
Use the correct bit for the material, avoid overheating by using appropriate speeds and cooling/lubricant when needed, and store bits clean and dry after use.
Use the right bit, don’t overheat, and keep bits dry and clean.
Watch Video
Top Takeaways
- Plan before you drill: choose bit, speed, and secure the workpiece.
- Match bit type to material for clean, safe holes.
- Clamps and PPE are essential for safety and accuracy.
- Deburr and inspect holes to finish like a pro.