How to Drill a Hole in Wall: Practical Step-by-Step Guide
Learn how to drill a hole in wall safely and accurately. This comprehensive guide covers wall types, tool selection, depth control, anchors, and finishing checks to ensure a secure installation.

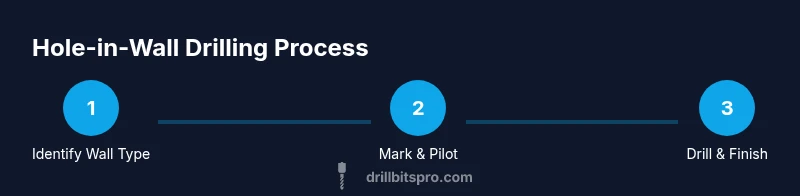
To drill a clean hole in a wall, start with the right bit and depth, locate studs and utilities, mark the spot, and drill a pilot hole before the final size. Use a masonry bit for concrete or a wood-bit for drywall; secure with a wall anchor if needed. Always wear safety goggles. According to Drill Bits Pro, plan your cut and go slowly.
Understanding wall types and safety basics
When you set out to drill a hole in wall, the type of wall matters as much as the hole size. Drywall, plaster, concrete, and brick each respond differently to drilling, so selecting the right bit and technique is essential. Drywall is relatively forgiving; plaster can be brittle, especially if there’s thin plaster on a lath. Concrete and masonry walls require carbide-tipped bits and slower, controlled drilling to prevent bit wear and wall damage. Before you begin, identify what the wall is made of and where utilities run. Use a stud finder to locate studs, pipes, and insulated regions. Turn off power in nearby outlets and watches for pipes in older homes. A clean, well-lit workspace reduces mistakes and improves accuracy. Drill Bits Pro emphasizes planning the path of the hole and avoiding hidden hazards to ensure a professional result. Remember that every wall is different, so adapt your approach to the material at hand and the fixture you intend to mount within the hole.
Selecting tools and drill bits for wall drilling
Choosing the right tools starts with understanding the material you’re drilling into and the target drill size. For drywall, you can usually use a standard drill with a lightweight bit, but for masonry or concrete, you need a hammer drill (or impact drill) with a carbide-tipped masonry bit. A pilot hole is often beneficial, especially for larger diameters, as it guides the bit and reduces stress on both the material and the drill. A depth stop or a piece of masking tape on the bit helps you control how deep the hole goes, which is critical to avoiding electrical wires or plumbing behind the wall. Keep a reliable stud finder, pencil, tape measure, and level handy to ensure precise placement. If you’re mounting a fixture, consider wall anchors rated for the expected load. Drill Bits Pro’s guidance highlights that the right bit and depth control are the most crucial factors for clean, secure results.
Marking the spot and planning depth
Marking the exact center of where you want the hole is more important than you might think. Use a pencil to mark a small dot and then check your plan from multiple angles to confirm alignment with any mounting hardware behind the wall. Decide in advance whether you’ll need a pilot hole and how deep the final hole should be. If you’re using anchors, the final hole diameter must accommodate the anchor’s body and its screw. Use tape around the drill bit at the expected depth to avoid going too deep. Double-check that there are no wires, pipes, or other hazards in the intended hole path. A careful marking phase reduces the risk of drips, cracks, or misalignment when you start drilling.
Pilot holes and final diameter: step-by-step drilling technique
Begin with a light touch and a small pilot hole to establish accuracy, then progressively widen to the desired diameter. For masonry walls, set the drill to a steady, low speed and apply gentle pressure—allow the bit to do the work rather than forcing it. For drywall or plaster, you may be able to skip a deep pilot in some cases, but a shallow pilot still helps control wandering. Keep the drill perpendicular to the wall for square holes and avoid tilting to prevent enlarging the hole in unintended directions. Clear dust and debris frequently to maintain visibility and prevent binding. If you encounter resistance, pause, verify you aren’t hitting a hidden obstacle, and reassess your approach. A well-executed pilot hole minimizes bit wear and improves accuracy for the final hole size.
Drilling through drywall, plaster, and masonry: material-specific tips
Drywall typically tolerates standard bits, but corners and edges can splinter if you aren’t careful. Use a sharp bit and low speed to prevent tear-out; consider a pilot hole for larger diameters. Plaster walls, especially those with a thick finish, can crack if the drill bites too aggressively, so back off and drill slowly with a carbide-tipped bit. Masonry walls require a masonry bit and often a hammer drill to penetrate the hard surface. Start with a small pilot hole and widen gradually, maintaining a perpendicular angle to keep the hole true. Always test the area with a light touch first to confirm whether any unexpected resistance exists. These practices reduce chipping and ensure the final hole is clean and properly sized for anchors.
Anchors, mounting, and load considerations
Anchors distribute load and keep fixtures secure when mounting into walls. Choose anchors based on wall material and load type. For drywall, toggle bolts or plastic anchors are common for medium loads; for masonry walls, use sleeve anchors or masonry anchors that fit the hole. Insert anchors gently, ensuring they sit flush or slightly recessed as required by the fixture. After installing anchors, insert screws and mount the fixture to verify fit and alignment. Take care not to overtighten, which can crack plaster or push the anchor out of the hole. Understanding load limits and anchor types is critical for long-term reliability, and choosing the right hardware based on the wall material is a key best practice from Drill Bits Pro.
Common mistakes and how to avoid them
Rushing the process leads to misaligned holes and damaged walls. Avoid drilling without checking for wires or pipes; always test with a stud finder and, if possible, pause to confirm there are no concealed utilities. Another frequent error is using the wrong bit for the material; a masonry bit on a drywall surface can overheat and wear quickly. Do not overdrill or go past the intended depth, which can damage fixtures or electrical components. A clean, systematic approach—mark, pilot, drill, deburr, anchor, mount—reduces errors and produces a strong, durable hole. When in doubt, re-check measurements and test fit before final mounting, as this saves time and repairs later.
Safety, cleanup, and verifying results
Always wear eye protection and a dust mask when drilling, especially in dusty environments or with masonry walls. After drilling, clean the hole to remove dust and debris that could interfere with anchors or screws. Verify the alignment by mounting the fixture temporarily and ensuring levelness. If a hole appears misaligned, you can adjust by drilling a secondary hole or applying a different anchor type. For masonry, inspect the surrounding wall for cracking or spalling; if you notice damage, stop and reassess the approach. A careful cleanup and verification routine helps guarantee a secure, professional-looking installation.
Troubleshooting and advanced tips for tricky walls
If you hit unexpected resistance, stop and reassess. A tip is to pause, check for a hidden obstacle, and back out slightly before re-entering at a slightly different angle. For stubborn plaster or brick, switch to a sharper bit, maintain steady, moderate pressure, and avoid overheating the bit. You can also try drilling at a lower speed to reduce heat and wear. If you’re drilling into concrete where anchors are required, pre-drill with a smaller pilot hole and gradually increase to the final diameter. Always keep your workspace tidy and safe to prevent slips and accidents.
Tools & Materials
- Cordless drill (or hammer drill) with variable speed(Ensure chuck accepts 1/16 to 1/2 inch bits; use low speed for masonry.)
- Masonry drill bit(Carbide-tipped for concrete or brick; match final hole size.)
- Depth stop or masking tape(Mark final depth on the bit or tape to avoid overdrilling.)
- Depth gauge or tape for depth control(Helps maintain consistent hole depth across multiple holes.)
- Stud finder(Locate studs and identify hidden wires or pipes.)
- Pencil(Mark the exact spot clearly.)
- Tape measure(Ensure accurate placement and symmetry.)
- Safety glasses(Eye protection against debris.)
- Wall anchors and screws(Select anchors suitable for drywall or masonry.)
- Dust mask(Optional for dusty environments or long drilling sessions.)
Steps
Estimated time: 20-40 minutes
- 1
Identify location and hazards
Use a stud finder to locate studs and a detector to identify live wires. Mark your target with a pencil and verify alignment from multiple angles. Ensure the immediate area is clear of obstacles before starting.
Tip: Double-check that utilities won’t run through your drilling path; safety first. - 2
Select the correct drill and bit
Choose a masonry bit for concrete/masonry walls or a standard bit for drywall. Attach the bit securely and set the drill to a slow, steady speed for best control. If you’re using anchors, confirm the final hole size matches the anchor diameter.
Tip: Test fit a scrap piece of wall material if available to confirm alignment. - 3
Set depth and mark the final hole
Apply a piece of tape on the bit to mark the final depth or use a depth stop. This prevents over-penetration and protects any hidden utilities behind the wall.
Tip: Start deeper than you think you need if you plan to remove the fixture and reuse the hole later. - 4
Drill a pilot hole
Begin with a small pilot hole to guide the larger bit. Keep the drill perpendicular to the wall and apply even pressure. Stop if you encounter resistance and reassess.
Tip: Let the bit do the work; avoid excessive force which can dull the bit. - 5
Drill to final diameter
Switch to the final bit size and drill slowly, maintaining a perpendicular angle. Clear dust frequently and avoid side-to-side movement that can widen the hole.
Tip: If drilling masonry, pause occasionally to allow cooling and prevent overheating. - 6
Deburr and inspect
Remove loose dust and inspect the edge of the hole for burrs. Use a deburring tool or a small file if needed to ensure a clean edge that won’t snag anchors or screws.
Tip: A clean edge helps anchors grip securely and reduces damage to the fixture. - 7
Install anchors and mount fixture
Insert the appropriate anchor and press or tap it until flush. Align the fixture and drive screws to secure while avoiding overtightening.
Tip: Choose anchors rated for the fixture’s load and wall type to prevent failure. - 8
Verify and cleanup
Test the mounted fixture for stability. Wipe away dust and ensure there are no stray burrs or loose hardware. Confirm the wall appears level and the fixture sits flush.
Tip: A quick post-install check saves time on future adjustments.
Got Questions?
Do I need a pilot hole when drilling into drywall?
In many cases a pilot hole helps control the drill and prevents tear-out, especially for larger holes. For small diameters, you can sometimes drill directly, but starting with a light pilot improves accuracy and reduces wall damage.
You’ll often want a pilot hole to guide the larger bit and prevent tearing; it makes the process easier and cleaner.
What bit should I use for concrete or brick walls?
Use a carbide-tipped masonry bit with a hammer drill or impact drill. Drill slowly with steady pressure to avoid overheating and bit wear. Ensure final hole size accommodates the anchor you plan to use.
For concrete or brick, pick a masonry bit and a slow, controlled drill to minimize wear.
Is it safe to drill near outlets or pipes?
Always turn off power to nearby outlets and verify there are no concealed pipes or cables. Use a stud finder and utility detector, and drill only after confirming the area is clear.
Turn off power to nearby outlets and verify there are no wires before drilling.
How do I know the hole diameter is right?
Measure the anchor or screw diameter and start with a pilot hole a size or two smaller. Increase gradually to the final size while maintaining perpendicular drilling.
Match the hole to the anchor, drilling progressively to the final size if needed.
Can I drill plaster walls without cracking them?
Yes, with care. Use a carbide-tipped bit, keep speed moderate, and proceed slowly to avoid cracking the plaster. A shallow pilot can minimize stress near edges.
Be gentle and slow to avoid cracking plaster; a pilot hole helps.
What safety gear should I wear?
Wear safety glasses to protect eyes and a dust mask if drilling dusty materials. Keep hair tied back and avoid loose clothing that could get caught in the drill.
Eye protection and a mask are important when drilling, plus keep the area tidy.
Watch Video
Top Takeaways
- Plan hole location and depth before drilling
- Use the correct bit for wall material (masonry vs drywall)
- Start with a pilot hole to improve accuracy
- Choose proper anchors for load and wall type
- Always wear PPE and keep the workspace tidy