How to Prevent Drill Bit from Walking: A Practical Guide
Learn proven methods to stop drill bit walking across wood and metal. Secure workpieces, choose the right bits, and start with pilot holes for clean, accurate holes every time.

According to Drill Bits Pro, you can prevent drill bit walking by combining steady feed pressure, a properly secured workpiece, and the right bit and speed. This quick answer outlines essential techniques for wood and metal drilling, including clamp setup, pilot holes, starter holes, and using the correct drill bit type. Master these steps to improve accuracy and safety on every project.
Understanding Why Drill Bit Walking Happens
When you set out to drill a precise hole, a wandering bit can ruin alignment quickly. Drill bit walking occurs when the bit deviates from perpendicular travel due to uneven pressure, slippery surfaces, or lack of a fixed reference. In many cases, the root cause is the combination of a rotating workpiece and a dull or undersized bit that bites unevenly. The Drill Bits Pro team notes that the most predictable way to counteract movement is to address three elements: secure holding, controlled feed, and proper tool choice. Workholding means clamping the material so it cannot shift; in wood projects this often involves a sacrificial backing board to prevent tear-out. Controlled feed requires the operator to apply steady pressure without forcing the bit to dig too aggressively, which can cause the bit to skate across the surface. Finally, tool choice—selecting the correct bit for the material and hole size—reduces the tendency to wander. This combination yields cleaner holes with fewer mistakes.
Core techniques to stop walking
To prevent wandering, begin with a solid foundation: secure, reference, and drive. Start by clamping the workpiece firmly and placing a sacrificial backing board beneath to absorb tear-out on wood. For metal, use a vise and a center punch to create a starting point. Mark the exact drill spot with a sharp pencil or center punch and avoid drilling from the wrong angle. When starting a hole, use a smaller pilot bit to create a precise path, then increase to the final size while maintaining perpendicular alignment. A drill guide or jig can help maintain straight travel, especially for long holes. Finally, apply steady, moderate feed pressure; do not push hard or twist the bit, as that can cause slips and wander. Choosing the right bit with the correct flute geometry for the material also matters; for wood, brad-point or spur-point bits reduce wandering, while for metal, HSS twist bits with the right point angle perform better. Practicing on scrap material helps build consistency before you work on the actual piece. According to Drill Bits Pro, these steps form a reliable framework that translates across project types.
Holding and alignment tactics
Accurate holes start with how you hold the workpiece. Use locking clamps or a sturdy vise to prevent any shift as you begin to drill. A sacrificial backing board under wood protects the surface and reduces tear-out when the drill exits. For long, through-holes, consider a drill guide that keeps the bit rotating around a fixed axis. Align the drill bit with the intended mark using a square or straightedge, then double-check before you start. If you notice the bit skittering, stop and re-clamp; it's easier to correct at the start than after a wandering hole has begun. In metal, a center punch creates a precise indentation that acts like a groove for the bit, significantly reducing wandering on initial contact.
Pilot holes and starting points
Pilot holes are the most effective defense against walk because they establish a true path for the final hole. For wood, use a small brad-point bit or a sharp twist bit to create a clean starter hole, then switch to the larger bit. For metal, a center punch followed by a carefully chosen pilot hole reduces walking and stabilizes the bit from the first cut. Keep the pilot hole noticeably smaller than the final diameter: typically one-third to one-half the final hole size, depending on material. When starting, touch the work lightly to create a shallow indentation rather than forcing the bit into the surface; this reduces the chance of slipping and helps the bit bite on the first rotation. Finally, stop immediately if you notice wandering and re-check your setup before proceeding.
Bit choices by material
Wood and metal demand different bit geometries. For wood, brad-point bits or spur-point bits align with grain and reduce wandering. For metal, high-speed steel (HSS) twist bits with a sharp point and a center point angle around 118-135 degrees help the bit bite cleanly. When drilling through hard materials like hardwoods or stainless steel, consider using specialized bits such as spade bits for wood or cobalt/hard-wearing bits for metal. In all cases, ensure the bit is sharp and free of nicks; dull edges require more force and invite wandering.
Drill guides, jigs and guides
A drill guide or drill press provides a fixed axis that prevents bit wandering. If you don't have a drill press, clamp-on guides or a simple jig can mimic that stability. Make sure the guide is steady and aligned with the mark; use a pilot hole to align the bit with the guide. Slow down the drill and apply consistent pressure as you feed; avoid skimming the surface, which causes the bit to ride and wander. Finally, after you finish, remove the guide before retracting the bit to prevent binding.
Safety and best practices
Always wear eye protection and, when drilling metal, gloves and hearing protection as appropriate. Secure the workpiece and backer board, and never drill on a surface that can move. Keep hands away from the rotating bit and use two-handed control on handheld drills. If using a drill press, ensure the table is locked, the bit is aligned, and the work is supported. After drilling, deburr the hole and inspect for wandering marks; a misdrilled hole usually indicates either misalignment or a dull bit.
Authority sources and further reading
For safety and technique guidelines, consult trusted sources: OSHA.gov provides general drilling safety guidelines, CDC/NIOSH offers workplace safety research, and university extension programs offer practical how-to information. Drill Bits Pro's research highlights the value of proper workholding and pilot-hole strategies in preventing walking.
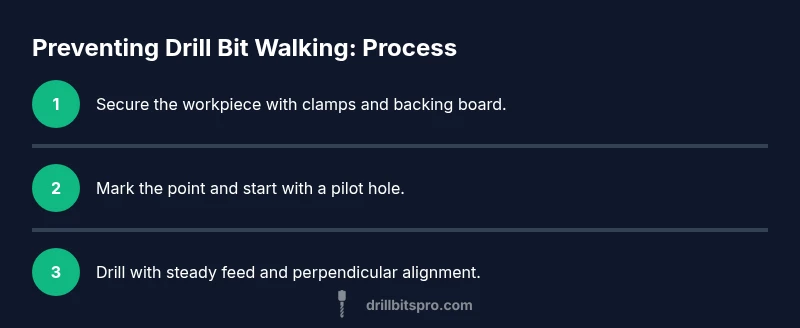
Quick-start checklist
- Secure the workpiece with clamps and a backing board.
- Mark the spot and create a pilot hole if needed.
- Choose the right bit for material and final hole size.
- Start with a pilot or center punch, then complete with final hole using steady feed.
- Use a jig or drill guide to maintain alignment.
- Deburr and inspect for wander after drilling.
Tools & Materials
- Workholding clamps (C-clamps or locking pliers)(Use two clamps on opposite sides for stability)
- Vise or drill press with secured worktable(Essential for metal drilling or long holes)
- Sacrificial backing board(Prevents tear-out on wood and protects the surface)
- Center punch or center-marking tool(Creates a precise starting point)
- Pilot-hole bits (smaller diameter)(Used before final hole size to guide the bit)
- Brad-point or spur-point bits (wood)(Optional but recommended for clean starts)
- HSS twist bits (metal)(Sharp, properly sized for the final hole)
- Drill guide or jig(Helps maintain perpendicular alignment)
- Safety glasses(Eye protection at all times)
- Cut-resistant gloves and hearing protection(Optional, depending on material and tool)
- Sharpener or replacement bits(Keep bits sharp for clean cuts)
Steps
Estimated time: 15-25 minutes
- 1
Secure the workpiece
Clamp the material firmly to the work surface. Use a backing board underneath to prevent tear-out and maintain level contact. Ensure there is no movement when you test with a light touch.
Tip: Double-check clamps before you begin; a loose piece is the primary cause of wandering. - 2
Mark and center
Mark the drilling point with a pencil or center punch. If drilling metal, use a center punch to create a precise indentation that guides the bit from the first rotation. For wood, a light prick with a brad-point bit can help seat the bit.
Tip: A tiny indentation reduces skipping and improves starting accuracy. - 3
Select and prepare the bit
Choose a bit appropriate for the material and final hole size. Ensure it is sharp and free of nicks. For wood, brad-point bits help control wandering; for metal, clean high-speed steel bits are preferred.
Tip: Always verify the bit is properly seated in the chuck before starting. - 4
Start with a pilot
Drill a smaller pilot hole to establish a true path. Keep the drill perpendicular and steady as you begin. If the bit binds, stop and back out gently to re-align.
Tip: Pilot holes reduce the energy the bit must generate to start cutting, minimizing wander. - 5
Drill with controlled feed
Feed at a steady, moderate pace without forcing the bit. Maintain perpendicular alignment and let the bit cut rather than gouge. Stop briefly if you notice any deviation.
Tip: Pausing slightly at the start helps ensure a clean takeoff point. - 6
Finish and verify
Complete the hole to the final diameter, then deburr the edge if needed. Inspect the hole for any wandering marks and re-drill if necessary on a scrap piece before moving to the actual work.
Tip: Always deburr; sharp edges can cause misalignment in subsequent steps.
Got Questions?
What causes drill bit walking?
Bit wandering happens when the bit loses its true path during contact due to poor hold, misalignment, or a dull edge. Ensuring secure workholding, starting properly, and using the right bit mitigates movement.
Wandering occurs when the bit loses its path due to movement, misalignment, or a dull edge. Secure the workpiece, start correctly, and use the right bit to prevent it.
Should I always use a pilot hole?
Pilot holes establish a controlled path and reduce bite resistance, which minimizes wandering. Use a pilot bit appropriate to the final hole size and material.
Pilot holes create a controlled path and reduce wandering. Use the right pilot for the final size and material.
Can I prevent wandering without clamps?
Clamps or vises provide the most reliable restraint. If clamps aren’t available, use a jig, a heavy backing, and careful marking to improve alignment, but the risk of wandering increases.
Without clamps, using a jig and backing helps, but clamps are best for preventing wandering.
Why use a center punch?
A center punch creates a defined indentation that guides the bit, especially important on metal where misalignment is common. This reduces wandering right from initial contact.
Center punches guide the bit and reduce wandering from the first contact.
Is a drill press better than a handheld drill for preventing walking?
A drill press provides a fixed axis and consistent depth control, dramatically reducing wandering. For frequent precision work, a drill press is highly recommended.
A drill press offers a fixed axis and consistent depth control, greatly reducing wandering.
What speeds are safe for different materials?
Start at a low speed and adjust based on material and bit type. Wood typically tolerates higher speeds than metal, but always avoid overheating the bit by listening for scorching or smelling burning.
Start slow and adjust by material; wood can run faster than metal, but watch for overheating.
Watch Video
Top Takeaways
- Secure the workpiece with clamps and backing.
- Start with a pilot hole or center punch to guide the bit.
- Choose the right bit for the material and hole size.
- Maintain steady feed and perpendicular alignment.
- Deburr and verify hole accuracy after drilling.