How to Use a Drill Properly: A Practical Guide
Learn safe, effective drilling techniques for wood, metal, and masonry with step-by-step guidance from Drill Bits Pro. Master bit selection, speed control, and safety to complete projects confidently and efficiently.

Follow a clear, safety‑driven workflow to use a drill properly: select the right bit for your material, secure the workpiece, start at a light speed with a pilot hole, and maintain a straight, steady pressure. Keep your drill aligned, apply steady feed, and deburr afterward to finish cleanly. This will reduce wandering, wear, and breakage while improving precision.
Why Proper Drill Use Matters
If you’re asking how to use drill properly, the answer begins with safety, control, and material awareness. Proper technique saves time, extends bit life, and prevents costly mistakes like wood splitting, metal galling, or oversized holes. In this section we explore the core reasons to adopt disciplined drilling habits and how they translate into practical, repeatable results. Drill Bits Pro analyses indicate that consistent setup and careful alignment are among the most impactful habits for both DIY projects and professional jobs. Building a routine around setup, marking, and bite begins with a mindset: plan first, then drill with purpose.
Key Principles of Safe Drilling
Safety and control are your anchors. Always wear approved eye protection and use hearing protection when working in loud environments. Work in a clean, stable area and clamp the workpiece tightly to prevent movement. Choose sharp, material-appropriate bits, and never force a dull tool through material. Maintain perpendicular alignment to avoid wandering, and pause to clear chips when drilling deep holes. These principles reduce kickback, bit wear, and damage to the workpiece. Drill Bits Pro emphasizes that consistent grip and posture are as important as the tool itself.
Choosing the Right Drill and Bits
Not all drills and bits are created equal. For wood, high‑speed steel or carbide tipped wood bits perform well, while metal drilling benefits from cobalt or high‑speed steel bits, sometimes with lubrication. Masonry requires a carbide‑tipped masonry bit and a hammer‑action drill for best results. Corded models offer steady power for long sessions, but modern cordless drills provide convenient mobility without sacrificing performance. Always match the bit type, tip geometry, and shank size to the material and hole diameter you need.
Setup and Safety Checklists
Before you touch the trigger, verify the drill is in good condition. Inspect the chuck for secure bit grip, check the battery or cord, and ensure the trigger feels smooth. Clamp the workpiece to a solid surface, mark the drilling point, and create a small pilot hole if the material requires it. Put on safety glasses, a mask if dust is expected, and hearing protection for extended use. Keep a vacuum or dust collector nearby to manage debris. These steps form a safety net that prevents mishaps and maintains accuracy.
Speed, Feed, and Drill Alignment: The Technique Differences by Material
Wood drilling thrives on moderate speed and steady feed with a sharp wood bit. For metals, start slower and punch in pilot holes to control wandering, then increase speed as the chip formation becomes clean. Masonry uses low to mid speeds with a hammer action and deliberate, incremental pressure. Ensure the drill is perpendicular to the work surface; even slight angular drift creates angled holes or bit chatter. If you feel the bit binding, stop, back out, re‑center, and resume with reduced pressure.
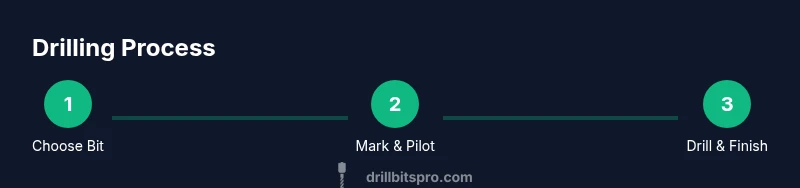
Step-by-Step: How to Use a Drill Properly Across Common Materials
Wood: begin with a sharp wood bit, use a center punch if needed, drill a pilot hole, then widen to final diameter with steady pressure. Metal: apply a pilot hole, use cutting fluid, and advance slowly to prevent work hardening. Masonry: start with a small pilot, then step up to the final size, keeping the drill perpendicular and using a hammer action if available. Deburr edges after drilling and inspect the hole for squareness and roundness.
Common Mistakes and How to Fix Them
Wandering holes stem from dull bits, lack of center marks, or weak clamping. Over‑aggressive feeding causes bit cam-out or breakage. Not using a pilot hole in metal can cause rough starts and misalignment. Always test on scrap material if possible, stop to check alignment, and replace worn bits promptly. Fixing these issues early saves time and material.
Tools & Materials
- Corded or cordless drill(Choose based on job length and need for portability.)
- Assorted drill bits (wood, metal, masonry)(Ensure sharpness and correct shank size for your chuck.)
- Center punch(Helps prevent wandering on metal workpieces.)
- Clamps or a vise(Secure the workpiece firmly to your bench or table.)
- Safety glasses(Eye protection is essential at all times.)
- Dust mask or respirator(Use in dusty environments or when drilling dense materials.)
- Measuring tape and marker/pencil(Accurate marking prevents misplacement.)
- Lubricant or cutting fluid (for metal)(Reduces heat build-up and prolongs bit life.)
- Work surface and supports (sawhorses, bench(Stable setup avoids movement during drilling.)
- Vacuum or dust collection(Helps maintain visibility and cleanliness.)
Steps
Estimated time: 45-60 minutes
- 1
Inspect and select the right bit
Start by choosing a bit that matches your material and hole size. Inspect for chips, burrs, or dull edges; replace if damaged. For metal, consider a pilot hole to reduce wandering and heat buildup.
Tip: Always verify the bit is properly seated in the chuck before powering up. - 2
Secure the workpiece
Clamp the material firmly to a stable surface. Loose workpieces shift and produce inaccurate holes or dangerous kickback. If you’re drilling near edges, place a sacrificial scrap beneath to prevent tear-out.
Tip: Use multiple clamps for oddly shaped pieces or long boards. - 3
Mark the drilling location and set pilot
Mark the exact center with a pencil. Use a center punch on metal to prevent the bit from skittering on the surface. Start with a smaller pilot hole to guide the larger bit.
Tip: A center punch creates a physical dent that guides the bit and improves accuracy. - 4
Set speed and apply light contact
Select a moderate speed appropriate for the material and bit size. Begin with light pressure to ensure the bit bites cleanly without wandering, then progressively increase pressure as the bit engages.
Tip: Avoid high torque at start; let the bit find its bite first. - 5
Drill with straight alignment
Keep the drill perpendicular to the surface. If you must adjust, stop, realign, and resume rather than forcing a skewed hole. Periodically back the bit out to clear chips.
Tip: Use two hands or a secondary support to maintain straightness. - 6
Deal with deep holes and exiting material
For deep holes, pause to clear chips and prevent clogging. When breaking through, reduce pressure slightly to minimize splintering on exit. Consider a countersink for a clean finish.
Tip: Slowly back out the bit as you reach the exit plane to control breakout. - 7
Deburr and finish
After the hole is drilled, deburr any burrs with a deburring tool or sandpaper. For metal, ensure the edges are smooth to avoid sharp burrs; for wood, a light chamfer improves the final appearance.
Tip: A clean edge prevents snagging during assembly. - 8
Inspect and store
Check hole diameter and alignment against the plan. Clean the bit and store it in a dry, organized case to prevent corrosion and damage.
Tip: Keep a dedicated bit tray to preserve edge quality and reduce misplacement.
Got Questions?
What safety gear should I wear when using a drill?
Wear safety glasses at minimum; hearing protection is advised for long sessions, and a dust mask helps in dusty environments. Keep hair and clothing away from the chuck and avoid loose items near the drill. Always work in a well‑ventilated area.
Wear safety glasses, hearing protection, and a dust mask when appropriate, and keep loose clothing away from the drill.
How do I prevent the drill from wandering during a start?
Use a center punch on metal and start with a small pilot hole. Mark the center clearly and clamp the workpiece securely to stop movement. Ensure the bit is sharp and properly seated in the chuck.
Center-punch the metal, start with a pilot hole, and clamp the piece securely to stop wandering.
How do I choose the right drill bit for a material?
Match the bit type to the material: wood bits for wood, high‑speed steel or cobalt for metal, carbide‑tipped masonry bits for masonry. Consider bit coatings and shank size to fit your drill chuck.
Choose a wood bit for wood, metal bit for metal, and masonry bit for masonry, ensuring the shank fits your drill.
Can I use a regular drill for masonry?
Yes, with a carbide-tipped masonry bit and a hammer action drill. Use slow to moderate speed and controlled pressure to prevent bit breakage. Do not rely on standard drill settings alone for masonry.
Use a hammer drill with a masonry bit and drill slowly with steady pressure.
What maintenance helps a drill last longer?
Keep bits sharp and clean, wipe down the chuck, store bits dry, and inspect the cord or battery regularly. Lubricate metal bits if cutting fluids are used, and replace worn parts promptly.
Keep bits sharp, store them dry, and check the drill and bits for wear regularly.
What should I do if the bit overheats?
Stop drilling to let the bit cool, back the bit out to clear chips, and consider using cutting fluid or a lower speed. For metal, avoid forcing the bit through the material.
If the bit overheats, pause and let it cool, then resume with lower speed and light pressure.
Watch Video
Top Takeaways
- Secure your workpiece before drilling.
- Choose sharp, material-appropriate bits.
- Drill straight with steady pressure and proper alignment.
- Deburr and inspect holes for a clean finish.