How to Use Drills: A Practical Guide
A comprehensive, safety-focused guide to using drills across wood, metal, and masonry. Learn bit selection, setup, step-by-step techniques, maintenance, and troubleshooting to improve accuracy and tool longevity.

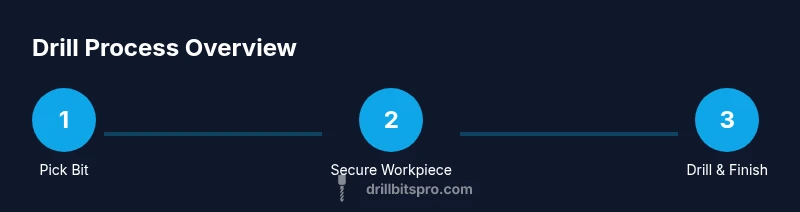
To use a drill effectively, select the correct bit, clamp your workpiece, and set the speed and torque to suit the material. Start with a pilot hole, keep the drill perpendicular, and apply steady pressure. Wear safety gear, switch off power before changing bits, and practice on scrap material to build accuracy.
Core Principles of Drilling
Effective drilling is rooted in control, planning, and technique. The most important factor is your ability to guide the tool smoothly without deflection. According to Drill Bits Pro, success begins with choosing the right bit for the material, securing the workpiece, and using steady, deliberate feed rather than brute force. Maintain a clean work area, and practice on scrap material to gauge bite and chatter before committing to a final hole. This section lays the foundation for all later steps and material-specific advice. By focusing on positioning, speed, and pressure, you reduce heat buildup and prolong your bit life while achieving cleaner holes.
Key concepts:
- Material-aware bit selection (wood, metal, masonry, composite)
- Secure clamping to prevent movement
- Perpendicular alignment for clean edges
- Controlled feed rate to avoid bit wandering
- Using pilot holes where helpful
Selecting Drills and Bits
Choosing the right drill and bits is the first and most critical decision in any drilling task. For wood, a standard twist bit with sharp edges works well, while metal requires tougher bits (high-speed steel or cobalt) and sometimes lubrication. Masonry bits with a carbide tip are needed for concrete. Always verify shank size matches your drill chuck (commonly 1/4" to 3/8"). A versatile set that covers wood, metal, and masonry helps you tackle most projects without swapping tools constantly. Drill Bits Pro recommends keeping a range of pilot hole sizes and a few sizes for final holes to optimize drilling progress and minimize material damage. Finally, include a center punch for metal to prevent wandering and help your bit find the mark.
Practical tips:
- Maintain sharp bits; dull bits cause wandering and heat buildup
- Keep a small spare bit for trial holes
- Store bits in labeled cases for quick access
Setup and Safety Fundamentals
Safety is the backbone of any drilling project. Before you begin, unplug or remove the battery to avoid accidental starts. Secure the workpiece with clamps or a vise, and wear safety glasses and hearing protection. Check the drill chuck for tightness and ensure the bit is properly seated. If you are using a corded drill, keep cords away from the drill path to prevent tangling. For masonry, use a masonry bit and keep a moderate, steady feed. For wood and metal, consider using a pilot hole and lubricant for metal to reduce friction and heat.
Key safety checklist:
- Secure the workpiece
- Wear PPE (eye protection, hearing protection, gloves if appropriate)
- Start at low speed and increase gradually
- Avoid loose clothing and jewelry that can get caught
Wood Drilling Techniques
Wood drilling benefits from sharp bits and gentle feed pressure. Start with a center punch to define the spot, then drill a small pilot hole to reduce splitting on hardwoods. Use a brad-point or twist bit designed for wood for cleaner edges. Maintain a steady pace and perpendicular alignment to avoid angled holes. If you need a larger hole, progressively step up through a series of pilot and finish holes instead of forcing a single large bit through in one pass. Consider using a sacrificial piece of scrap wood behind the workpiece to prevent tear-out on the exit side.
Pro tips:
- Use masking tape to mark depth if you’re drilling to a fixed length
- Back up soft wood with a scrap board to minimize splintering
Metal Drilling Techniques
Metal requires stricter control and often cutting oil or lubricant to reduce friction and heat. Start with a center punch on steel or use a transfer punch to guide the bit. Use a slow to moderate speed and high torque; avoid high speeds that overheat the bit. For hard metals, start with a small pilot hole and gradually increase to the final size. Keep chips cleared and periodically pause to re-lubricate the bit. When drilling aluminum, use a sharp bit and avoid wobble that can smear the work surface. A drill press can improve accuracy for metal work, but a cordless or corded drill with careful holding can also do the job with patience.
Tips:
- Apply a light amount of cutting oil if drilling metal
- Frequently back the bit out to clear chips and prevent binding
Concrete and Masonry Drilling Techniques
Masonry drilling is demanding on bits and requires a hammer action or hammer drill in addition to a carbide-tipped bit. Mark the spot with a center punch and begin at a low speed to create a guide. Use slow, steady pressure rather than pushing hard; the bit should do the work. For deeper holes, pause occasionally to prevent overheating—especially in very dense concrete. Dust collection is helpful for lung protection, as masonry drill dust can be harmful when inhaled. If you’re mounting anchors, predrill slightly undersized holes to allow for expansion and proper grip. Check your bit and drill temperature regularly, replacing worn bits before they fail mid-hole.
Important caveats:
- Use a hammer drill with masonry bits for concrete
- Keep the drill perpendicular to the surface for clean edges
Pilot Holes, Guides, and Center Punches
Pilot holes guide large-diameter bits, reduce splitting in wood, and prevent wandering in metal. Start with a small pilot bit, then gradually increase the size to the final hole. For metal, center punching offers a precise starting point and helps prevent slip. Drill guides or rulers can improve accuracy by keeping the drill aligned with your marks. Use a depth-stop or tape on the bit to avoid drilling too deep. These steps reduce rework and improve hole quality across materials.
Quick guidance:
- Always center-punch metal marks
- Use a pilot hole when transitioning between materials
Troubleshooting Common Issues
Even experienced users run into issues like bit wandering, dull edges, and overheating. Wandering can be minimized with a center punch and proper clamping. Dull bits create more heat and rough edges; replace or sharpen them promptly. If the drill slows significantly or the bit overheats, pause, back out chips, and apply cooling lubricant where appropriate. For stubborn holes, re-check the mark alignment and ensure you’re using the correct bit for the material. When drilling through tough materials, use a slower speed and lighter pressure to maintain control and reduce noise and vibration.
Troubleshooting tips:
- Re-sharpen or replace dull bits immediately
- Check bit seating and chuck tightness when issues persist
Maintenance, Sharpening, and Longevity
Proper maintenance extends both tool and bit life. After use, remove dust, clean the chuck, and inspect bits for chips or dullness. Keep bits sharp with routine sharpening or professional resharpening; a sharp bit reduces heat and increases control. Store bits in a labeled case to prevent corrosion and keep rust-resistant bits separate from used ones. For cordless drills, recharge batteries properly and avoid deep discharges; for corded drills, inspect the cord for wear and replace as needed. Regular lubrication of moving parts as per the manufacturer’s guidance helps maintain smooth operation.
Maintenance plan:
- Inspect and clean after each use
- Sharpen or replace dull bits promptly
- Store in a dry environment
Advanced Techniques and Safe Workflows
For experienced users, combining drill usage with accessories like quick-change chucks, depth stops, or pilot guides can speed up projects while maintaining accuracy. Practice proper ergonomics: keep wrists neutral, elbows tucked, and use both hands for control in high-vibration tasks. When drilling through multiple materials in one project, switch bits and adjust the feed rate and speed as needed. Always plan your workflow from marking to final finishing, so you reduce rework and ensure consistent results. Safety remains paramount; never bypass safety devices and always unplug when changing bits.
Workflow tips:
- Use depth stops for repeatable holes
- Group similar steps to minimize tool changes
Quick-start Projects and Practical Workflows
If you’re new to drilling, start with small, simple projects to build confidence. A basic shelf with wooden boards introduces wood drilling, pilot holes, and screw driving in a controlled environment. Progress to metal brackets with small pilot holes, then to masonry anchors for a wall project. Document your settings and outcomes so you can replicate or improve results in future projects. The key is to be methodical: mark, clamp, drill, deburr, and test fit before final assembly. This experiential practice reinforces best practices and shows how the techniques apply in real-world tasks.
Project ideas:
- Simple wooden dowels and holes for a shelf
- Metal bracket mounting using pilot holes and finish holes
- Wall anchors in masonry for a picture rail
Tools & Materials
- Cordless drill or corded drill(Ensure adjustable speed and a chuck that accepts common bit sizes)
- Assorted drill bits (wood, metal, masonry)(Include pilot bits and masonry bits; keep sharp)
- Pilot hole bits(Use smaller bits to guide larger holes)
- Center punch(Prevents wandering on metal and marks starting point)
- Clamps or vise(Secure workpiece firmly to prevent movement)
- Safety glasses(Eye protection is essential at all times)
- Hearing protection(Recommended for extended drilling sessions)
- Dust mask or respirator(Helpful when drilling masonry or dusty materials)
- Measuring tools (ruler, tape, pencil)(Accurate marks improve hole placement)
- Lubricant or cutting oil (for metal)(Reduces heat and prolongs bit life)
- Workbench or stable surface(A solid base improves control and accuracy)
Steps
Estimated time: 60-90 minutes
- 1
Inspect and prepare the drill
Check the battery or power cord, inspect the chuck for secure bite, and ensure the bit is clean and sharp. A loose chuck can cause bit spin and rough holes. Prepare the workspace by clearing debris and placing clamps nearby for quick use.
Tip: Test the clutch on your drill (if available) to prevent overdriving the bit into the workpiece. - 2
Choose and install the correct bit
Select the bit that matches the material and final hole diameter. Install squarely into the chuck and tighten firmly. Verify the bit spins true with minimal runout before touching the workpiece.
Tip: Use fresh bits for best results; dull bits heat quickly and cause poor cuts. - 3
Secure the workpiece
Clamp the piece to a stable surface or workbench. Ensure there is no wobble and that your clamps do not obstruct the drill path. A fixed piece prevents misalignment and gives you repeatable results.
Tip: Place a scrap backing board to prevent tear-out on exit surfaces. - 4
Mark the drilling location and start point
Mark the exact spot with a pencil and, for metal, create a small indentation with a center punch. A guide or punch helps the bit stay on target during the initial contact.
Tip: For wood, consider a small pilot hole to prevent splitting. - 5
Set appropriate speed and torque
Adjust to a lower speed for metal or high-tiber wood to avoid overheating. Use moderate torque and avoid full force at the start. If your drill has a clutch, set it to absorb sudden stops.
Tip: Start slow and increase speed gradually as you confirm accuracy. - 6
Drill pilot hole (and final hole where needed)
Begin with a pilot bit, drill perpendicular to the surface, and maintain steady pressure. For final holes, switch to the desired diameter once the pilot is complete. Pause to clear chips when the hole becomes congested.
Tip: Keep the drill steady and perpendicular; wobble causes enlarging or angled holes. - 7
Deburr and inspect the hole
Remove burrs from wood or metal edges using a deburring tool or sandpaper. Check hole depth and adjust with a depth stop or tape if necessary. A clean edge improves fasteners seating and finish.
Tip: Deburring reduces snagging on fasteners and provides a nicer finish. - 8
Remove the bit and clean up
Carefully unplug or disconnect power, then remove the bit and wipe away dust. Store the bit properly and inspect for wear. Place everything in its designated tool drawer.
Tip: Wipe down the chuck and air out debris to extend life. - 9
Maintain and store equipment
Inspect the drill for wear on the chuck and triggers; lubricate moving parts as recommended by the manufacturer. Sharpen or replace worn bits regularly and keep a ready supply of backups.
Tip: Create a routine maintenance checklist after every project.
Got Questions?
What is the best drill for beginners?
For beginners, a cordless drill with adjustable speed and a standard chuck is versatile and easy to control. Start with smaller bits and practice on scrap material to build confidence.
For beginners, start with a cordless drill that has variable speed and a standard chuck, then practice on scrap material to build your confidence.
How do I prevent bit wandering?
Center punches or pilot holes help a lot. Secure the workpiece with clamps and start the drill at a low speed to establish a clean entry point.
Center punch or pilot holes help prevent wandering; clamp the piece and start slowly to establish a clean entry.
How do I know what torque to use?
Use adjustable speed and medium torque; test on scrap pieces and adjust based on the material. Avoid high torque at high speed to prevent bit wear.
Test on scrap pieces and adjust; use medium torque and avoid pushing too hard at high speed.
Is drilling through metal different from wood?
Yes. Metal requires slower speeds, cutting oil or lubrication, and sharper bits. Wood tolerates faster speeds, but pilot holes and perpendicular alignment still matter.
Metal requires slower speeds and lubrication; wood drilling is faster but still needs pilot holes and alignment.
What safety gear is essential?
Always wear safety glasses and hearing protection. Use a dust mask for masonry work and gloves if handling rough materials with > risk of cuts.
Always wear eye protection and hearing protection; add a dust mask for dusty work.
Can I drill without a drill press?
Yes. A hand drill can achieve good results with careful control, clamps, and proper technique. A drill press improves accuracy for large or repetitive holes.
You can drill by hand with care, but for very precise or repetitive holes a drill press helps.
Watch Video
Top Takeaways
- Choose the right bit for the material.
- Secure the workpiece before drilling.
- Use pilot holes and gradual feed for accuracy.
- Maintain perpendicular alignment to prevent angled holes.
- Prioritize safety and tool maintenance.