What to Do When Drill Bit Broke in Hole: Step-by-Step Guide
Learn practical, safety-first methods for removing a broken drill bit from a hole, plus techniques to prevent repeats. A thorough, drill-pro friendly approach for DIYers and pros.

If a drill bit breaks in a hole, stop immediately, assess the break, and choose a safe removal method based on material. Common approaches: grab exposed shank with locking pliers, back it out with a left-hand drill or extractor, or drill a relief hole to free the bit. If jammed, seek professional help.
Quick assessment after a drill bit breaks in a hole
When you encounter a broken drill bit in a hole, your first move is to stop and evaluate the situation. Check the hole for burrs, signs of binding, and whether the bit remains partially exposed or is completely lodged. The material you’re drilling (wood, metal, or masonry) already guides your next move, but you also need to verify if the hole is through or blind and whether there’s any risk of the bit breaking off further. According to Drill Bits Pro, a calm, planful start reduces damage to the workpiece and minimizes the risk of personal injury. Remember to wear safety goggles and gloves, and disconnect power before attempting any removal. Being mindful of heat buildup is essential, as overheated metal can smear or seize the bit further. If you notice smoke or unusual resistance, stop immediately and reassess.
In many DIY projects, a broken bit is not a total loss. Small shanks that remain accessible are usually removable with simple tools, while deeper jams may require specialized extraction equipment. The keyword what to do when drill bit broke in hole should guide you toward a safe, repeatable approach rather than a hurried, risky pull. Keep notes on what you tried and the hole’s condition for future reference.
Selecting the safest removal method for your material
The removal method depends heavily on the material you’re drilling. Wood typically allows easier bit extraction via twisting or drilling a relief hole; metal can seize and require precision with extractors or reverse-rotation tools; masonry demands slow advancement and sometimes specialized carbide extraction bits. If the bit is only partly exposed, you may be able to grip it with locking pliers; if the exposed portion is too short, a left-handed drill bit can often rotate the bit out. Drill Bits Pro suggests prioritizing methods that avoid enlarging the hole or creating new burrs. Start with the least invasive approach and move to more assertive methods only if the bit remains stubborn.
These scenarios highlight why a flexible toolkit matters. Keep in mind that attempting to pull a stuck bit with bare hands is dangerous; use appropriate pliers or extraction tools. When possible, orient yourself to apply steady, controlled pressure rather than jerky movements, which can push the bit deeper.
Tools and techniques for extraction: what actually works
Extraction effectiveness rises when you have the right toolkit and plan. Locking pliers can grab the exposed shank if there’s enough bite. A left-handed drill, used in reverse, can often back a bit out if the shank has a grip point. Drill bit extractors are specifically designed to bite into the broken piece and rotate it out; they’re particularly effective when there’s a central opening or the bit remains relatively straight. A small center punch and hammer can create a pilot relief in metal to reduce resistance, but use light taps to avoid deepening the hole. When working with masonry, lubricants and slow feed rates help prevent cracking, and sometimes a carbide-tipped extractor is required. Remember to work in short, controlled passes to minimize heat and stickiness.
Always clean the area before attempting a new method. Clear chips, oil, and debris to improve grip and reduce the chance of the bit binding again. If after several attempts the bit still refuses to budge, it may be best to stop and seek professional equipment or services to avoid damaging the hole.
Safety reminders and common mistakes to avoid
A broken bit in a hole can become a safety hazard if you rush. Don’t hammer or pry with brute force; that can deform the hole or cause the bit to snap deeper. Never re-use a dull extractor or over-tighten a locking plier, as this can slip and injure you. Always unplug the drill before changing bits or attempting extraction. If you notice metal shavings, dispose of them safely and avoid inhalation by wearing a mask when necessary. Avoid using heat to try to free a bit in metal, as heat can warp the surrounding material or complicate removal. Finally, maintain your drill, stop using a worn bit, and consider sharpening or replacing bits to prevent future breakage. These practices align with best-practice guidelines from Drill Bits Pro and professional trades.
Prevention: best practices to reduce future breakage
Prevention starts before you drill. Use sharp bits appropriate for the material, maintain correct drill speed, and apply steady pressure with a stable workpiece. Always drill a pilot hole when starting with a large bit; the pilot reduces lateral strain that can cause breakage. Lubricants or cutting oil are especially helpful on metal and hard composites. Ensure your bit and chuck are properly secured before starting. Regularly inspect bits for dull edges or chips; replace worn bits promptly. In masonry, use carbide-tipped bits and avoid forcing the bit into too-hard material. With the right technique, you’ll see fewer breaks and cleaner holes, which translates to faster, safer projects.
When to call a professional or use specialized equipment
If the bit is deeply lodged, damaged the hole, or you’re working in a critical part of a structure, a professional service is warranted. Industrial environments often require extraction tools that aren’t common in home workshops. Drilling up to the point of resistance and then removing the bit with professional-grade extractors is safer than risking damage, which could compromise the integrity of the workpiece. A pro can also advise whether to repair the hole with plug inserts or to re-drill in a new location. In many cases, a professional service is worth the cost to avoid costly repairs.
Quick-path considerations by material type
Wood: usually the simplest scenario; you can often back out with pliers or a small extractors. Metal: back out via reverse drilling or extractors; the shank must be gripped securely. Masonry: rely on carbide tips and slow progress; use a drill with appropriate torque settings. If you’re unsure about the material you’re working with or the bit is severely stuck, take a step back and reassess or consult a professional. This approach helps you address the problem without unnecessary risk.
Tools & Materials
- Locking pliers (vise-grip)(Need a solid grip on exposed shank)
- Left-handed drill bit or screw/bit extractor set(Backs out or bites into the broken piece)
- Center punch and small hammer(Create relief point if needed)
- Scratch awl or thin punch(For initial alignment)
- Lubricant or cutting oil(Reduces heat and improves chip flow)
- Safety glasses and gloves(Protect eyes and hands)
- Hammer drill or power drill with adjustable speed(Stability and control)
- Small carbide-tipped drill bits (for relief)(Helpful in metal or masonry)
- Magnet (strong magnet or pick-up tool)(Might retrieve loose chips or small fragments)
Steps
Estimated time: 45-90 minutes
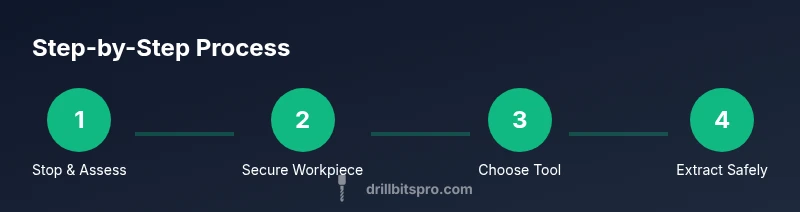
- 1
Stop and assess
Power down the drill and inspect the break. Determine whether the bit is exposed, partially stuck, or fully lodged. Decide on a safe strategy before touching the bit, and prepare your tools.
Tip: Wear safety glasses and keep your hands clear of rotating parts. - 2
Secure the workpiece
Clamp the workpiece firmly so it cannot shift during extraction. Misalignment can increase damage or make removal harder.
Tip: A stable base reduces the risk of gouges or slips. - 3
Expose the shank or create relief
If you can see the exposed shank, you may grip it with locking pliers. If not, apply a center punch lightly to create a relief point for the extractor.
Tip: Avoid hitting the bit; gentle steps prevent deeper wedging. - 4
Choose the removal method
Decide between locking pliers, left-handed drill, or a screw extractor based on visibility and access. Start with the least invasive method.
Tip: Avoid twisting hard with pliers if the shank isn’t securely in grip. - 5
Perform the extraction
Apply steady, opposite-direction force using your chosen method. Keep the drill’s rotation slow and controlled to prevent binding.
Tip: If the bit doesn’t move after several seconds, pause and reassess to prevent damage. - 6
Finish and recheck
Once removed, inspect the hole for burrs and integrity. Clean debris, consider drilling a relief hole or re-drilling as needed, and test-fit a fresh bit at a slow speed.
Tip: Deburr the hole to ensure a clean finish for the next step.
Got Questions?
Can I remove a broken drill bit from metal using only pliers?
Pliers can help if the bit is exposed and grippable, but this method often risks slipping or further damage. Prefer a proper extractor or reverse drilling for metal when available.
Pliers can work if the bit sticks out, but often it slips. Use extractors or reverse drilling for metal when you can.
What if the bit is buried deep and not accessible?
If the bit is deeply lodged, avoid forcing it. A professional with specialized extraction tools may be necessary to prevent hole damage.
If it’s buried deep, don’t force it. Seek professional help to avoid damage.
Should I heat the area to loosen a stuck bit?
Heat can warp the material or expand the hole, making removal harder. It’s generally better to rely on extraction tools and gradual removal.
Heat is usually not recommended; use proper extraction tools instead.
Is it safe to reuse the hole after removing the bit?
Yes, if the hole remains clean and undamaged. Deburr if needed and re-drill with a smaller pilot before retrying a larger bit.
If the hole is clean and undamaged, you can reuse it after deburring and re-drilling with a pilot hole.
What safety gear should I always wear?
Wear safety glasses, gloves, and, if grinding or drilling with metal, a dust mask. Keep hands away from rotating parts and ensure the work area is stable.
Always wear eye protection and gloves, and keep the area stable and clear.
When should I call a professional instead of DIY?
If the bit is highly accessible or critical to a load-bearing structure, or if you’re unsure about the material, seek professional help to avoid compromising safety or integrity.
Call a pro if it’s critical or you’re unsure about the material.
Watch Video
Top Takeaways
- Stop and assess the situation before acting
- Choose removal method based on material and access
- Use proper extraction tools to avoid hole damage
- Prioritize safety and use PPE at all times
- Prevent future breaks with sharp bits and correct speeds