Which Drill for Plasterboard: A Practical DIY Guide
Discover the best drill and bits for plasterboard, plus safe anchoring and technique tips. This practical guide from Drill Bits Pro helps DIYers and pros drill clean, secure holes in drywall with confidence.

To plasterboard, use a cordless drill with a sharp drywall bit (or a twist bit) matched to your anchor size. Avoid hammer mode, which can crack plaster. Start with a small pilot hole (about 3/16 inch/5 mm) and widen only as needed for the anchor. If you can't find a stud, choose appropriate drywall anchors and drill the recommended hole size for them. For heavier loads, locate a stud for extra support. This approach minimizes damage and keeps finishes looking professional.
Plasterboard drilling: what makes it different
Plasterboard (often called drywall) is lightweight and hollow, so drilling needs care to avoid cracking, mushrooming, or creating oversized holes that weaken the wall. The right drill and bit reduce dust and prevent damage to underlying lath or wiring. The Drill Bits Pro team emphasizes choosing tools that create clean entry holes while letting you install anchors securely. In practice, the goal is to produce a precise, shallow hole that accepts your fastener without tearing the paper skin of the plasterboard. When you work with plasterboard, you’re guiding a metal bit through a soft, paper-coated surface that sits over a rigid support structure. Hitting a stud will give you a solid anchor, while striking only plaster (no backing) means you must rely on a plastic or metal drywall anchor. The result should be neat holes with minimal dust, easy-to-remove marks, and reliable holding power for light to medium loads. For most hanging tasks, you can achieve this with a cordless drill set to a low-to-moderate speed and a sharp drywall bit. According to Drill Bits Pro analysis (2026), selecting the right bit reduces finish damage and improves anchor security, especially for repeated uses.
Choosing the right drill and bits
For plasterboard, you don't need a hammer drill. A cordless drill with adjustable speed is ideal. If you plan to install light fixtures or thin wall art, a standard twist bit or a drywall bit is sufficient. When anchors are involved, select a hole size that matches the anchor's outer diameter—usually 3/16" to 1/4" (5–6 mm). The drywall bit's edge should be sharp to prevent tearing the paper; consider carbide-tipped bits for long-term wear, especially if you'll drill multiple holes. According to Drill Bits Pro, testing a small pilot hole first helps prevent misalignment. Always keep bits perpendicular to the wall to ensure clean edges. If you need to drill near a stud, use a smaller pilot hole to avoid wandering and to preserve the stud's surface. Use a stud finder to confirm location before drilling, and plan anchor choices around load requirements.
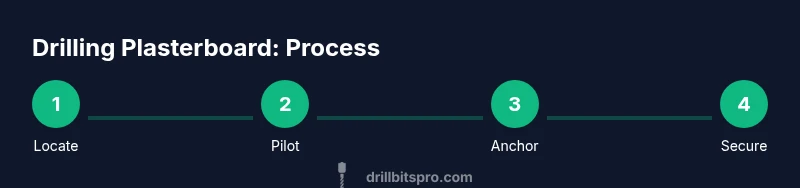
Step-by-step drilling technique
- Locate your target area using a stud finder and mark the spot with a pencil. 2) Choose a drill bit size that matches your anchor. 3) Set the drill to a low speed and begin with a pilot hole. 4) Drill straight and shallow to minimize chipping, then widen only as needed. 5) Clean the hole edges with a small brush or compressed air to prepare for the anchor. 6) Insert the anchor and proceed to drive the screw. Pro tip: keep the drill steady and perpendicular to the wall to avoid wandering. If you hit resistance, back out and check alignment rather than forcing the bit through. For guided accuracy, use a depth stop or a piece of tape on the bit to limit depth. For heavier loads, consider locating a stud or using larger, rated anchors. This sequence minimizes damage and ensures a clean finish.
Anchors and load considerations
Drywall anchors come in several varieties: plastic expansion anchors, self-drilling drywall anchors, and toggle-type anchors. The choice depends on the expected load and wall thickness. Plastic anchors work well for light items like frames; self-drilling anchors are convenient and require no pre-drilled pilot holes in some cases, but you still need the correct hole size. Toggle anchors offer strong holding power for medium loads but require a larger hole and careful installation. When possible, mounting into a stud provides the strongest support for heavier items. If you cannot locate a stud, combine a high-quality drywall anchor with careful hole sizing and avoid exceeding the anchor’s load rating. Drill Bits Pro’s guidance emphasizes verifying the anchor type against the load, and testing the holding power in a small, inconspicuous spot before heavy use.
Safety, dust, and finish care
Drilling plasterboard creates a fair amount of dust and small debris. Wear safety glasses to protect eyes and consider a dust mask in poorly ventilated spaces. Keep the work area clean, and place a drop cloth or old sheet on the floor to catch dust. Use a sharp bit to reduce friction and heat, which can cause delamination of the plaster. Avoid drilling through multiple layers at once; if you suspect a hidden wire or pipe, use a detector to verify location. After drilling, inspect the edges for burrs or loose paper and trim if necessary. Clean-up is straightforward: vacuum the area and wipe the surface to prevent chip buildup on fixtures. The goal is a neat, precise hole that accepts the anchor without tearing the plaster.
Common mistakes and fixes
Common mistakes include using a hammer drill on plasterboard, drilling too fast, or applying excessive pressure. Hammer mode can crack the plaster and strip the wall’s finish. Another frequent error is choosing too large a hole for an anchor or misjudging the anchor type. If a hole seems oversized, back out and reseal with a new anchor or re-drill with a smaller bit. Always confirm the presence of wiring and pipes behind the wall before drilling. If you must install in a corner or near plumbing, use a stud finder and seek professional advice for high-load applications. For repeated projects, keep a small set of drywall anchors and spare bits to maintain consistency. Drill Bits Pro’s approach centers on precision, safety, and reliable holding power.
Quick-start checklist
- Locate stud positions with a stud finder and mark the spot
- Choose the correct drill bit size for your anchor
- Set drill to low speed and drill perpendicular to the surface
- Drill a pilot hole if needed, then widen to fit the anchor
- Insert anchor and drive screw slowly, checking alignment
- Clean up dust and inspect finish
Tools & Materials
- Cordless drill (with variable speed)(Battery charged; avoid hammer mode)
- Drywall drill bits (sharp twist bit or drywall bit)(Sizes: 3/16" (5 mm) and 1/4" (6 mm) recommended)
- Drywall anchors suitable for plasterboard(Plastic or metal anchors; match hole size to anchor)
- Pencil and measuring tape(For location marks and alignment)
- Stud finder(Locate studs or confirm no stud behind wall)
- Safety gear (eye protection)(Safety glasses; dust mask optional)
- Dust sheet or tarp(Protect floors and furniture)
- Center punch or small punch(Helps prevent bit wandering)
Steps
Estimated time: 20-30 minutes
- 1
Locate spot
Use a stud finder to locate a suitable spot and mark the center with a pencil. Check for hidden wires or pipes nearby before drilling. Confirm the distance from edges to avoid splitting the plasterboard.
Tip: Double-check your marks with a level and measure from nearby fixtures to ensure alignment. - 2
Choose drill bit size
Select a drill bit that matches your anchor’s diameter. For most drywall anchors, 3/16" to 1/4" is common. If you’re unsure, start smaller and test with a practice hole on a scrap piece of drywall.
Tip: A pilot hole helps guiding the bit and reduces tear-out. - 3
Set drill and begin
Set the drill to a low speed. Gently touch the bit to the plaster, keeping it perpendicular to the surface. Apply light pressure and let the bit do the cutting.
Tip: Avoid pressing hard; let the bit cut through the paper and plaster without forcing it. - 4
Drill to depth
Drill until you reach the requested depth for the anchor. If using a depth stop, set it before starting. Stop immediately once depth is reached to prevent overshooting.
Tip: If the bit slows, pull out and re-align rather than forcing further. - 5
Insert anchor
Tap the anchor gently into the hole until it sits flush with the surface. Widening the hole can compromise the plaster's integrity, so avoid over-enlarging.
Tip: Use a small mallet or your finger to seat the anchor evenly. - 6
Drive screw
Align the fixture, insert the screw into the anchor, and tighten to secure. Stop when snug to avoid cracking the wall or stripping the anchor.
Tip: If the wall begins to crack, back out and reassess placement or anchor type.
Got Questions?
Can I use a hammer drill on plasterboard?
No. Hammer mode can crack the plaster and damage the finish. Use a regular drill with a drywall bit for clean holes.
Don't use hammer mode; a standard drill with a drywall bit is the safer choice.
What size pilot hole for drywall anchors?
Most drywall anchors require a 3/16" to 1/4" pilot hole, but always follow the anchor manufacturer's spec. If in doubt, start smaller and test fit.
Typically 3/16 to 1/4 inch pilot holes, but check the anchor you’re using.
Do I need to locate a stud for every project?
Not always. For light loads, drywall anchors are fine. For heavier loads, mounting into a stud provides the strongest support.
If the item is heavy, locate a stud; otherwise use rated drywall anchors.
Can I reuse anchors after removal?
Some anchors can be reused if they’re still in good shape and the wall is intact, but replacements are often safer for long-term use.
They can sometimes be reused, but replacements are usually better for durability.
What about plaster over lath walls?
These walls behave similarly to modern drywall for minor loads, but the underlying lath can affect holding power. Use appropriate anchors and avoid excessive loads.
Most guidelines still apply, but be cautious with older walls.
Watch Video
Top Takeaways
- Use drywall bits, not hammer mode, for plasterboard.
- Pilot holes and correct anchor sizes are essential for hold.
- Locate studs when possible for heavy loads.
- Safety gear and clean-up improve outcomes.