Drill Without a Machine: Practical Hand-Drilling Guide
Master hand-powered drilling with a brace, hand drill, and center punch. Learn wood, metal, and masonry techniques, safety tips, and step-by-step methods for when power tools aren’t available.

We covered earlier: You can drill holes without a machine using a brace and bit or a hand drill, with clamps and a center punch to secure your work. This guide provides safe, practical methods for wood, metal, and masonry, plus setup and safety tips to keep projects moving when power tools aren’t available.
Why manual drilling makes sense in certain situations
There are times when a machine-driven drill isn’t available or practical. You might be working in a tight space, on a noisy job site, or with a battery that needs recharging. In these moments, a hand tool setup can keep projects moving. According to Drill Bits Pro, hand-powered drilling remains a practical fallback when power tools are unavailable, especially for quick, small-diameter holes in wood or light metal. By using a brace and bit or a simple hand drill, you can control every aspect of the hole—placement, start, and exit—without relying on electricity. This approach isn’t about replacing power tools, but about expanding your toolbox so you can finish tasks that a corded drill or cordless driver would slow down or interrupt. Planning your cut, choosing the right bit, and securing your workpiece are the basics that determine success before you even touch metal or wood. With patience, the right technique, and clean safety habits, manual drilling delivers reliable results for many standard projects.
Core handheld tools you can rely on
A successful hand-drilling setup begins with a small kit of dependable tools. The traditional brace and bit is the classic choice for woodworking, offering steady torque and excellent control on center-punched marks. A modern hand drill or eggbeater can also work, especially for metal and softer plastics. Keep a selection of bits tuned to your material: sharp wood bits for braces, sharp high-speed steel (HSS) bits for metal, and a masonry bit if you must attempt tile or brick with a hand tool. A center punch helps start the hole precisely, while clamps and a backing block protect the work surface and reduce tear-out. Finish with safety goggles, gloves, and a dust mask as needed. With everything organized, you’ll see how confidence grows as you match the tool to the job rather than forcing a fit. Drill-bits quality matters—keep your bits sharp and replace worn ones promptly.
Workspace setup and safety basics
Before a single mark is made, prepare your workspace to minimize mistakes and injuries. Choose a sturdy, flat surface and secure the workpiece with clamps so it won’t shift during drilling. Use a backing board behind the hole to prevent splintering or tear-out on exit. Mark the hole with a pencil and a center punch to produce a tiny starter indentation; this helps the bit bite instead of wandering. Eye protection is non-negotiable when you’re working with metal chips or splinters; gloves can help, but avoid loose-fitting gear that can snag on bits. If you’ll be drilling metal, have a small dab of lubricant handy to reduce heat and prolong bit life. Keep a clean area, a clear line of sight to the drill path, and your bits organized by material. A calm setup reduces fatigue and increases accuracy when you’re working by hand.
Wood drilling with a brace and bit
Wood is the most forgiving material for hand drilling, and the brace-and-bit method remains fast when used correctly. Start by clamping your workpiece and placing a backing block behind the area you’ll bore. Mark the exact location, then tap a center punch or nail just enough to dent the surface. Fit a bit slightly smaller than your final diameter and drill a shallow pilot hole at a comfortable speed, applying steady, even pressure. Once the pilot is established, switch to the larger bit and progressively enlarge the hole in small steps. Maintain perpendicular alignment to the surface to avoid angled holes. If the wood is prone to tear-out, apply a light pressure and use a backing block to support the exit. Always retrieve the bit smoothly; avoid twisting mid-hole. When finished, deburr the edges with a file or sandpaper. This process yields clean, accurate holes for dowels, screws, or hardware mounting.
Metal drilling by hand: tips and limits
Drilling metal by hand is slower and demands more control than using a powered drill, but it can be done with a brace and a sharp HSS bit or a purpose-built hand drill. Begin with a firm clamp and a center-punched starting point. Apply light, steady pressure and keep the bit cool by occasionally lifting to clear chips; for larger holes, you’ll need to work through progressively larger bits. Lubricants reduce friction and heat; a drop of light machine oil on the bit can increase life and improve cut quality. If you’re drilling steel or aluminum, avoid overheating the bit, which dulls it quickly. Maintain alignment with the work surface and avoid bending or side-to-side motion. For very tough metals or thick stock, hand drilling is impractical; consider borrowing a drill or using a hand-operated reamer after the hole is started. Patience and sharp bits make all the difference here.
Masonry and tile challenges without a hammer drill
Masonry and tile respond poorly to brute force when there’s no hammer action. Hand drilling for these materials requires specialized bits and immense patience. If you must try, start with a carbide masonry bit in a brace, but be prepared for slow progress and frequent bit wear. Keep the drill tip perpendicular and apply minimal, even pressure; let the bit do the work. Use a spray bottle to cool the bit and reduce dust, and pause to clean chips away. For tile, consider tapping in from the edge or scoring first with a carbide wheel, then carefully drilling at the starting point. For thick masonry, a mechanical hammer drill remains the safe, practical choice. Manual approaches are best reserved for small, shallow holes in soft stone or brick where a proper tool is unavailable.
Center punching, pilot holes, and hole finishing
Starting with a center punch creates a precise starting point and minimizes wandering. After punching, drill a small pilot hole, typically using a bit one size smaller than your final hole. This staged approach reduces drift and improves accuracy. When finishing, if the material requires a countersink, switch to the appropriate bit and carefully finish the edge. Deburr rough edges with a file or sandpaper to prevent snags or injuries. Use a chamfer tool if you need a neat edge on a hole for a screw head. In metal work, apply a tiny amount of lubricant and wipe away chips to keep the bit cool and performing well.
Common mistakes and how to avoid them
Not clamping the workpiece leads to movement and inaccurate holes. Using a dull bit increases heat and produces rough edges. Starting without a center punch can cause wandering; always begin with a visible indent. Applying too much pressure can burn the bit or deform the material; instead, use steady, moderate pressure. Neglecting lubrication when drilling metal accelerates wear. Finally, rushing through steps or skipping pilot holes can ruin the hole geometry and require rework. The antidote is patience, sharp bits, proper backing, and keeping your workspace organized.
Cleaning up and maintenance after manual drilling
After you finish, remove chips, wipe down your bits, and store them in a protective case to prevent dulling or rust. Inspect bits for signs of wear; replace any that are chipped or cracked. Clean the workspace and remove dust; a light oil can help prevent rust on metal bits. For reusable backing blocks and clamps, wipe away adhesive or wood dust to ensure a snug grip next time. Regular maintenance prolongs tool life and keeps your hand-drilling setup ready for the next project. Proper storage also helps prevent injuries from loose bits that rust or degrade with moisture.
Tools & Materials
- hand brace (brace drill)(Traditional manual drill with a comfortable grip and a ~1/2-inch chuck.)
- brace bits(Assorted wood-boring bits; keep sharp and dry.)
- center punch(Marks starting point to prevent wandering.)
- hammer(Light taps to seat center punch and to start small holes.)
- clamps(Secure workpiece firmly to prevent movement.)
- wood backing block(Prevents tear-out on exit.)
- pencil(Marks hole location clearly.)
- safety glasses(Eye protection for chips and dust.)
- tape measure(Accurate layout of holes.)
- work surface(Sturdy bench or table space.)
- lubricant/oil (for metal)(A drop helps dissipate heat and extend bit life.)
Steps
Estimated time: 60-90 minutes
- 1
Secure the workpiece
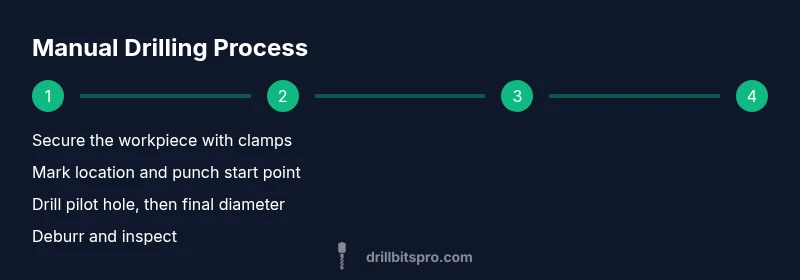
Clamp the material to a stable surface using at least two clamps. Place a backing block behind the hole to prevent tear-out on exit. This setup prevents movement as you begin boring.
Tip: Always use a backing block to protect the exit surface. - 2
Select the tool and bit
Choose a brace and bit for wood, or a hand drill with an appropriate bit for metal. Ensure the bit is sharp and properly seated in the chuck to avoid slipping.
Tip: Test bite on a scrap area to confirm alignment before drilling. - 3
Mark location and start indent
Mark the hole with a pencil, then create a small starter indentation with a center punch. This helps the bit grab and minimizes wandering.
Tip: Use a light hammer tap to avoid deforming the surface. - 4
Drill a pilot hole
Begin with a small pilot hole to guide the larger bit. Maintain perpendicular alignment and steady pressure to prevent drift.
Tip: Keep the bit vertical and clear debris frequently. - 5
Enlarge hole gradually
Move to progressively larger bits in small steps until you reach the final diameter. This reduces binding and heat buildup.
Tip: Never force a bit; if it stalls, lift and clear chips. - 6
Finish the hole
Drill to final diameter with even pressure. Deburr edges with a file or sandpaper to remove sharp burrs.
Tip: Controlled, patient feeding yields cleaner holes. - 7
Optionally lubricate for metal
Apply a light lubricant to the bit and surface to reduce heat during metal drilling. Wipe away excess residue.
Tip: Lubricant improves bite and prolongs bit life. - 8
Inspect and deburr
Check hole for burrs and misalignment. Remove sharp edges, and test fit hardware if applicable.
Tip: A clean edge prevents snags and ensures fit. - 9
Cleanup and storage
Wipe bits dry, remove chips, and return tools to a dry case. Verify all bits are sharp before next use.
Tip: Proper storage prevents rust and dullness.
Got Questions?
Is it safe to drill into metal without power tools?
Yes, with the right bits, clamps, and lubrication. It’s slower and requires patience to avoid overheating or bit breakage.
Yes—use a sharp bit, clamp securely, and lubricate to keep the bit cool.
What materials work best with hand drilling?
Wood is the easiest, followed by soft metals. Masonry and tile are challenging without a hammer drill and special bits.
Wood and soft metals are most practical for hand drilling.
What’s the best hand tool for beginners?
A brace and bit is ideal for wood; a simple hand drill can handle metal with the right bits.
Start with a brace and bit for wood and practice on scrap.
Can I drill large holes by hand?
Large holes are difficult by hand and may require powered tools; plan to borrow or rent equipment for big holes.
Large holes are tough without a drill—consider power tools for big diameters.
How do I avoid wandering holes?
Center punch the start point and use a pilot hole before the final diameter to guide the bit.
Punch the spot first, then drill a small pilot hole to guide you.
Is safety gear essential for hand drilling?
Yes. Safety glasses, gloves, and a dust mask help protect you from chips and debris.
Always wear safety gear to protect your eyes and hands.
Watch Video
Top Takeaways
- Hand drilling is a viable fallback when power tools aren’t available
- Secure, mark, and punch correctly to prevent wandering
- Progressive hole enlargement yields cleaner, more accurate holes
- Lubrication improves metal drilling performance
- Always deburr and maintain tools after use