How Much Drill a Well: Costs, Steps, and Planning
Learn how much drill a well costs, what drives price, and how to budget a residential well. Depth, geology, permits, and equipment influence the total. This guide from Drill Bits Pro helps you plan a practical, realistic budget for a water well project in 2026.

This guide explains how much drill a well typically costs and what factors shape the total. You’ll learn about depth, geology, permitting, equipment, and labor, plus how to estimate a budget for residential or small-scale well projects. By understanding these drivers, you can plan a practical, defensible budget up front. How much drill a well depends on site conditions and chosen methods.
Understanding how much drill a well and why it matters
The exact question often comes down to variables rather than a single number. The phrase how much drill a well encapsulates both upfront and life-cycle costs, from obtaining permits to pump testing after completion. According to Drill Bits Pro, the overall cost will hinge on depth to reach a viable aquifer, the geology encountered, and the drilling method selected. In the context of residential or small-scale wells, the goal is to balance reliability with affordability, while ensuring water quality and long-term access. Throughout this article we will use the phrase how much drill a well to emphasize the decision framework—not a single price tag. Expect a broad range rather than a precise figure, and plan for contingencies that commonly arise in field conditions.
Key cost drivers in well drilling
Several core factors repeatedly shape how much drill a well will cost. Depth is the most obvious driver: deeper bores require more drilling time, larger crews, and longer drilling rigs, which all push the price higher. Geology matters just as much: hard rock, high clay content, or aquifers with complex water quality can require specialized tooling and methods, increasing both equipment needs and labor costs. Permits and site assessments are essential in most regions and add administrative time and fees. The drilling method (open-hole, rotary, air-rotary, or percussion) dictates gear rental or purchase, rig size, and the possibility of intermediate casing. Finally, post-drilling steps—casing installation, well development, disinfection, water testing, and pump installation—add further cost but are critical for safe, reliable performance. Drill Bits Pro’s analysis highlights that each project is unique; the same depth in two different sites can yield substantially different budgets due to local geology and permit requirements.
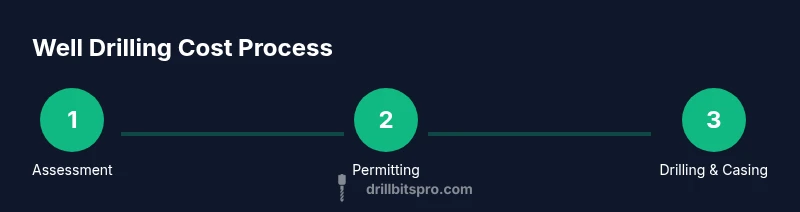
Step-by-step overview of the drilling process (high level)
Understanding the high-level steps helps you price the job more accurately. First, a site assessment and permitting check set expectations and identify constraints. Next, a method choice and equipment plan align with local geology. Then the drill crew starts boring, progresses through planned depths, and documents core samples. After reaching target depth, casing and a sealing system are installed, followed by well development, disinfection, and quality testing. Finally, a pump, storage, and electrical connections are completed, and the system is commissioned. Each stage can influence the total cost through time, risk, and material use.
Common methods and equipment used in well drilling
Well drilling methods range from traditional cable tool drilling to modern rotary methods. Open-hole rotary is common for domestic wells, using a rotating bit and drilling fluid to manage cuttings and cool the bit. Air-rotary mixes air or inert gas with mud to flush debris, which can reduce water contamination risk in some soils. Percussion drilling uses a heavy hammering action suitable for certain rock formations but may require different casing strategies. Equipment needs include a drilling rig appropriate for expected depth, drill pipe, casings, grouting materials, and pumping equipment. Access to the site, power supply, and water supply for drilling mud or air flushing are practical considerations that affect scheduling and cost.
Estimating time and budget: planning for a well project
Time and budget estimates begin with a thorough site analysis. Anticipate several phases: permitting and approvals, site prep and access, drilling operations, casing installation, well development, and system commissioning. Each phase carries potential delays—weather, equipment availability, or regulatory changes—that can affect the schedule and cost. While every project is unique, aligning your plan with a phased budget and a contingency reserve is wise. Drill Bits Pro recommends preparing for variability in depth, material needs, and testing requirements, and documenting all assumptions for the final budget.
Permits, safety, and environmental considerations
Permitting and environmental assessments are not optional in many jurisdictions. Costs arise from application fees, compliance checks, and potential impact studies. Safety concerns include handling heavy equipment, drilling chemicals, and confined workspaces. Prioritize PPE, fall protection, utility locates, and clear communication plans with all crew members. Environmental considerations may involve water rights, groundwater protection, and wildlife or habitat impact assessments. A well-planned project accounts for these factors so you avoid costly setbacks or regulatory penalties.
Best practices and real-world decisions
In real-world projects, the question how much drill a well often reflects choices about depth strategy and resource reliability. A practical approach is to consult with multiple reputable drillers, obtain written estimates, and request a clear scope of work with inclusions and exclusions. Consider phased drilling: bore to a shallower depth for an initial test and then decide whether deeper work is warranted. Documentation, testing results, and a robust contingency plan improve decision quality and budgeting. The Drill Bits Pro team has observed that transparent planning and staged investments reduce the risk of budget overruns and failed wells.
Case studies: when budgets shift and why
Case studies show that drilling depth, groundwater quality, and site access often determine whether a project stays within budget or requires additional funds. In one example, a mid-depth bore reached a productive aquifer after adjusting the casing strategy, lowering ongoing pumping costs and reducing the risk of future remediation. In another scenario, difficult access or rocky terrain increased rig time and transport costs, underscoring the importance of early site planning and cost-tracking. These real-world lessons reinforce the value of a flexible budget and clear scope.
Tools & Materials
- Drilling rig or reputable contractor rental(Ensure rig depth capacity matches anticipated well depth)
- Appropriate drill bits and casings(Select sizes based on target depth and casing diameter)
- Drilling mud or flushing fluid(Needed for some rotary methods; alternatives exist per geology)
- Casing, screen, and grout materials(Essential for sanitary well construction and long-term integrity)
- Water testing kit or certified lab access(Test for bacteria, nitrates, and total dissolved solids)
- PPE and safety gear(Hard hat, safety glasses, gloves, high-visibility gear)
- Site access equipment (gravel, mats, ramps)(Helps protect equipment and minimize ground damage)
- Permitting and site plans(Copies, approvals, and any required hydrological assessments)
Steps
Estimated time: 3-7 days (excluding extended lab tests or permitting delays)
- 1
Assess site and obtain permits
Begin with a site assessment to evaluate access, proximity to utilities, and regulatory requirements. Submit permit applications where required and compile any hydrological data or well test results to inform depth decisions.
Tip: Document every constraint early; it saves time and reduces change orders. - 2
Choose drilling method and equipment
Select a drilling method based on geology and depth targets. Coordinate with the rig operator to ensure equipment capacity matches the planned bore and casing size.
Tip: Get multiple quotes and request a written scope of work with depth milestones. - 3
Prepare the site and establish access
Clear the drilling area, install access mats if needed, and set up waste containment. Ensure power supply or generator access and secure a safe work zone for personnel.
Tip: Mark underground utilities with locating services before any excavation. - 4
Set up safety and quality controls
Install barriers, PPE, and emergency procedures. Prepare sampling plan and labeling for groundwater tests and samples.
Tip: A pre-job safety briefing helps prevent common on-site incidents. - 5
Drill borehole to planned depth
Operate the rig to reach target depth, logging depth and lithology at intervals. Maintain drilling fluid flow, monitor cuttings, and adjust weight on bit as needed.
Tip: Pause to check core samples or cuttings for unexpected formations. - 6
Install casing and grout if required
Lower the casing, seal the annulus with grout, and verify vertical alignment. Ensure sanitary seals and proper depth to prevent surface contamination.
Tip: Confirm seals and liner integrity with a pressure test where appropriate. - 7
Develop and test the well
Develop the well to remove drilling fines, then test water yield and quality. Collect samples for lab analysis and review results with the local health authority if needed.
Tip: Schedule testing soon after development to capture performance metrics. - 8
Install pump, electrical, and finalize
Install a suitable pump and storage tank, wire the system, and perform a final inspection. Validate pump performance and water quality, and finalize any required permits or records.
Tip: Keep a maintenance plan and water-test schedule after commissioning.
Got Questions?
What factors most influence the cost to drill a well?
Depth, geology, drilling method, permitting, and post-drilling testing are the primary cost drivers. Site access and equipment availability also play significant roles. Understanding these factors helps you build a more accurate budget.
The biggest cost drivers are depth, geology, the drilling method, and required permits. Access and equipment availability also matter.
Do I need a permit to drill a well?
In most regions, yes. Permits cover drilling activity, water testing, and well construction standards. Check with local building and environmental agencies to determine requirements and timelines.
Most places require a permit for drilling a well. Check with local authorities for exact rules and timelines.
How long does well drilling typically take?
Drilling duration varies with depth and geology but generally spans several days to a week. Permitting, site prep, and testing can extend the timeline.
Drilling itself usually takes a few days, but permitting and testing can extend the schedule.
Can I drill a well myself to save costs?
DIY drilling is not recommended for safety, legal, and water quality reasons. Professional drillers ensure proper casing, sealing, and sanitary standards.
Professional drilling is strongly advised for safety and compliance.
What maintenance is needed after a well is drilled?
Regular water testing, pumping system maintenance, and periodic filtration or treatment as needed help ensure long-term reliability and safety.
Test water regularly and maintain the pump to ensure ongoing safety and performance.
How should I budget for unexpected costs?
Include a contingency fund (e.g., 10-20%) for unexpected geology, equipment, or regulatory delays. Document all assumptions and update estimates as tests come in.
Keep a contingency fund and update estimates as new information comes in.
Watch Video
Top Takeaways
- Define depth targets early to bound costs
- Expect variability based on geology and permitting
- Get written quotes with clear scope and contingencies
- Plan for post-drilling testing and system commissioning
- Prioritize safety and regulatory compliance