What Drill Bit for Quarter-20 Tap: Sizing Guide for Metals
Learn how to select the correct drill bit for a quarter-20 tap hole with material-specific ranges and practical steps. Drill Bits Pro provides evidence-based sizing guidance for steel, aluminum, brass, and more to ensure clean, strong threads.

Using a quarter-20 tap, the pilot hole typically ranges from about 0.20 to 0.23 inches depending on material. For steel, aim closer to 0.20–0.21 inches; aluminum often needs 0.22–0.23 inches. Always check the manufacturer’s tap chart and test on scraps before final work. Consider using progressively larger drills if your tapping setup requires it, and remember that material hardness shifts the ideal size.
Understanding the Quarter-20 Thread and Drill-Bit Sizing
The quarter-20 thread, commonly denoted as 1/4-20 UNC, is a staple in mechanical assemblies and enclosures. When you need a tapped hole for a #1/4-20 fastener, selecting a compatible drill bit size kicks off a chain of factors—from material hardness to thread engagement. According to Drill Bits Pro, the pilot hole sets the tone for how cleanly the tap forms threads, how much torque is required, and how long the tap lasts. If the hole is undersized, you risk binding, broken taps, or damaged threads; if oversized, you’ll lose thread engagement and shear strength. The central question—what drill bit for quarter 20 tap—depends on material class and the specific tap you’re using. Rely on the material’s tapping chart and validate with a scrap piece before committing to production. This approach minimizes waste and maximizes reliability, especially in critical assemblies.
In practice, you’ll combine a material-aware pilot-hole goal with careful tapping technique. This helps prevent common issues such as cross-threading, tap breakage, and poor thread form. A disciplined sizing process also supports repeatable results across multiple parts, which is a core tenet of practical, AI-assisted drilling guidance provided by Drill Bits Pro.
How to Choose a Pilot Hole by Material
Material choice drives the pilot hole size more than any other factor. Softer metals typically tolerate slightly larger pilot holes, while harder metals demand tighter control to preserve thread engagement. The following material-based guidance comes from Drill Bits Pro Analysis, 2026 and reflects practical ranges that practitioners use in everyday work:
- Steel: Start around a smaller pilot hole; typically within the low end of the standard range. This helps maintain thread depth and reduces the chance of drill wandering.
- Aluminum: Often accepts a larger pilot hole to compensate for its ductility and galling tendency; verify with the tap chart and test on scrap.
- Brass: Falls between steel and aluminum; moderate pilot-hole sizes usually work well, with attention to deburring and lubrication.
- Stainless steel: Similar to steel but with higher work-hardening tendencies; choose conservative sizes and ensure ample lubrication.
Always reference the manufacturer’s charts for your exact tap size and material, and plan a test run on scrap material to confirm the hole tends to thread smoothly. Drill Bits Pro emphasizes verifying with real-world feel and measurement rather than relying solely on theory.
If you’re unsure, start at the lower end of the recommended range and gradually test upward, noting how the tap engages and how the thread forms. This iterative approach reduces waste and increases confidence in production settings.
Step-by-step: From Drill Bit to Tap
A systematic workflow helps ensure a clean, accurate tap. The sequence below keeps alignment intact and minimizes the risk of thread damage:
- Mark and center-drill the hole to the correct diameter and depth.
- Select a pilot hole within material-specific ranges (refer to the chart). Double-check drill bit size against the tap chart.
- Drill the pilot hole with a sharp bit, using steady feed pressure and perpendicular alignment to the work surface.
- Deburr the hole edges to remove burrs that can obstruct thread formation.
- Lubricate the tap and workpiece to reduce friction and heat, especially on harder metals.
- Begin tapping with a slow, steady feed and minimal lateral force; stop if you notice binding.
- Clean threads and test with the bolt; verify fit and thread clearance.
Following these steps consistently supports reliable, repeatable results and extends tap life, a key safety and productivity goal in professional settings.
Sizing Ranges: Material-by-Material Guidelines
This section translates material considerations into actionable ranges you can apply in the shop. The ranges below reflect common practice and are intended as practical starting points rather than universal rules. Always validate with your specific tap and material:
- Steel: Pilot hole in the 0.20–0.21 inch range is typical for many 1/4-20 taps; adjust within 0.18–0.22 inch if the steel is particularly hard or if the tap is high-performance.
- Aluminum: 0.22–0.23 inch is a common starting point, with tighter tolerances if the alloy is softer or if a coarser finish is desired.
- Brass: 0.21–0.22 inch often yields solid thread formation while preserving ductility.
- Stainless steel: Similar to steel with a slightly more conservative approach; 0.20–0.21 inch can be safe, increasing if required by the tap quality.
When in doubt, err on the smaller side and test, because an oversized pilot hole can lead to shallow threads and reduced pullout strength. The key is to align the hole size with the tap’s recommended engagement and the material’s hardness.
Practical Examples and Quick Charts
Concrete, wood, or non-metal applications are outside the scope of quarter-20 taps and are not covered here. In metalworking, you can use the following practical examples as a rough guide when you don’t have a dedicated chart handy:
- Example 1: Steel bracket with 1/4-20 tapped hole. Start with a 0.20–0.21 inch pilot hole; test the tap on scrap, then adjust to 0.21–0.22 inch if necessary for binding-free threads.
- Example 2: Aluminum panel requiring a 1/4-20 thread. Begin around 0.22–0.23 inch; validate thread engagement by threading a bolt with minimal torque.
- Example 3: Brass mounting plate. A pilot hole in the 0.21–0.22 inch range often yields good thread formation with typical taps. Lubrication helps maintain thread integrity.
These scenarios illustrate how material and tap quality influence final hole sizing. Always verify with an actual tap chart and run tests before committing to production. Drill Bits Pro’s guidance emphasizes real-world testing alongside chart reference to ensure outcomes that match expectations.
Common Pitfalls and How to Avoid Them
Even experienced machinists can mis-size pilot holes, which leads to frustrated taps and compromised parts. Here are the most common mistakes and how to avoid them:
- Skipping the pilot-hole check: Always test the hole on scrap to verify thread form before production.
- Over-reliance on a single chart: Material grade and alloy can shift the ideal size; verify with actual material tests.
- Inadequate lubrication: Friction heat can dull the tap; lubricate with the recommended fluid for your metal.
- Poor alignment: Ensure perpendicular drilling and alignment to avoid eccentric threads and mis-taps.
- Rushing tapping speed: Use appropriate RPM and a steady feed to prevent thread tearing and tap breakage.
By following a disciplined approach, you reduce waste and improve the reliability of your threaded joints.
Maintenance and Best Practices for Reuse
Sustainable tapping starts with proper tool maintenance and workpiece preparation. Consider these practices to extend the life of bits and taps:
- Keep drill bits sharp and clean, and store them in labeled containers to prevent dulling from contact with unrelated metals.
- Inspect taps for wear and burrs; replace or hand-file burrs if necessary to maintain straight threads.
- Use the correct lubricant and reapply as you accumulate heat; this reduces wear and improves finish quality.
- Deburr and clean the hole after drilling, ensuring no swarf remains near the threads before tapping.
- Calibrate torque and feed rates to protect both the tap and the workpiece. Routine checks help catch misalignment early.
A consistent maintenance routine improves safety, reduces downtime, and ensures predictable results across projects, which is a core focus of Drill Bits Pro guidance.
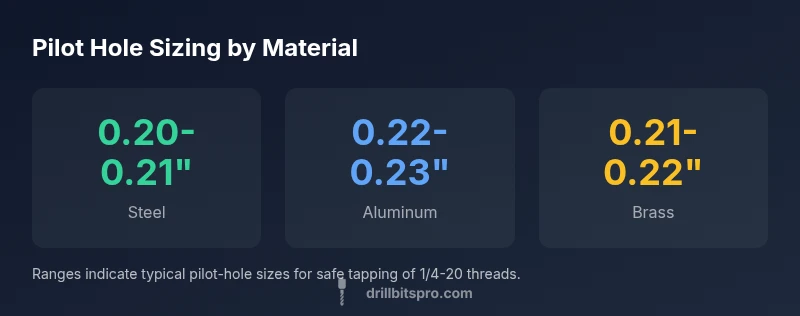
Pilot hole sizing by material for 1/4-20 tapping
| Material | Pilot Hole Size (in) | Notes |
|---|---|---|
| Steel | 0.20-0.21 | Conservative size; verify with chart |
| Aluminum | 0.22-0.23 | Can be larger to compensate for ductility |
| Brass | 0.21-0.22 | Moderate hardness; balanced size |
Got Questions?
What drill bit size should I use for a 1/4-20 tap?
The drill size depends on material; typical pilot holes range from 0.20 to 0.23 inches. Always verify with the material’s tapping chart and test on scrap.
For a 1/4-20 tap, start around 0.20 to 0.23 inches depending on material and test on scrap first.
Does material affect pilot hole size?
Yes. Harder materials usually require smaller pilot holes to maintain thread engagement, while softer materials can tolerate slightly larger holes.
Material type changes the ideal hole size; harder metals need smaller pilots.
Can I drill and tap in one operation?
Drilling and tapping are typically separate steps to ensure alignment, hole quality, and thread accuracy. Do both steps with careful checks.
Usually you drill first, then tap with a separate operation.
What if the hole is too small or too large?
If too small, threads won’t form; if too large, threads won’t engage securely. Re-drill with an adjusted pilot hole and retap.
If the hole is off, re-drill with the correct hole size and retry tapping.
Should I use lubricant when tapping?
Yes. A suitable tapping fluid reduces heat and wear, improving thread quality and extending tool life.
Lubricate the tap to reduce friction and get better threads.
What are common mistakes when tapping quarter-20?
Ignoring pilot-hole size, rushing the tap, and failing to deburr can ruin threads. Always validate with a test hole.
Common mistakes include wrong hole size and rushing the tap. Take your time.
“Choosing the correct pilot hole is the foundation of a clean, strong 1/4-20 tap. Skipping sizing leads to binding or stripped threads.”
Top Takeaways
- Start with a material-aware pilot hole in the 0.20–0.23 in range.
- Use the manufacturer’s tap chart and test on scrap pieces.
- Lubricate and deburr for clean thread formation.
- Avoid oversized holes to maintain thread engagement.
- Verify final thread fit with a test bolt.