Can Drill Go Through Brick? A Practical Masonry Guide for DIY
Learn how to drill through brick safely and effectively. This guide covers brick types, bit selection, hammer drill technique, pilot holes, anchors, and a step-by-step method for reliable brick drilling.

Yes. A brick surface can be drilled effectively when you use a masonry bit, a hammer drill, and the right technique. Start with a small pilot hole, apply steady, moderate pressure, and let the bit do the cutting. Finish by cleaning the hole and adding an appropriate brick anchor. This approach minimizes dust, avoids brick spalling, and ensures a secure fastening.
Can brick drilling be done safely and effectively?
According to Drill Bits Pro, brick drilling is a common DIY task when you respect the material's properties and choose the correct tools. Brick is denser than most woods and has different internal structures, which means you can’t rely on the same methods used for drywall or softwood. The key is to pair the right masonry bit with a drill that can deliver controlled impact and rotation. A typical brick-facing surface will respond differently from solid brick or hollow-core bricks, and your approach should adapt accordingly. Always check for hidden utilities behind the brick and avoid drilling through electrical conduits or plumbing once a point is identified. In practice, brick drilling should be performed with a plan, proper PPE, and clean-up routines to manage dust and debris.
This section lays the groundwork for a successful brick drilling project by highlighting material considerations, tool requirements, and safety practices that DIYers and professionals rely on when can drill go through brick. You’ll see how the material properties influence drill speed, bit selection, and hole depth, and how those choices translate into reliable anchors for fixtures.
Brick types and how they affect drilling
Brick comes in several varieties, including common fired brick, engineering bricks, and brick veneer. Each type has unique density, texture, and mortar content that can affect drilling performance. Common bricks are generally easier to drill with a standard masonry bit, while harder bricks like engineering or dense facing bricks resist cutting and may require slower speeds, sharper bits, and more patience. Mortar joints between bricks create softer interfaces that can cause the drill to grab or wander if you aren’t precise. Veneer brick, while thin, still requires careful technique to avoid cracking the brick or damaging the underlying structure. Understanding brick type informs your choice of drill settings, bit type, and the need for pilot holes.
Drill Bits Pro analyses emphasize tailoring your approach to brick texture and the wall’s construction. By recognizing brick class, you can anticipate the effort required, the risk of cracking, and the appropriate anchor system for your project. This knowledge helps you avoid common pitfalls and ensures your hole remains safe and structurally sound.
Choosing the right masonry bit and drill
Selecting the correct masonry bit is essential for clean, straight holes. Carbide-tipped bits are well-suited for brick because they maintain sharp edges and resist dulling. The bit diameter should match the anchor size or the screw you intend to use, with a pilot hole sometimes recommended for denser bricks to reduce bit stress. When paired with a hammer drill, you’ll benefit from intermittent percussive action that assists cutting through brick without overheating the bit. The drill itself should be capable of running in hammer mode without overheating, and you should verify that the chuck accepts the bit securely. Remember that high torque can cause the bit to wander if the surface isn’t properly marked, so secure your starting point with a guide.
Drill Bits Pro’s guidance highlights that using the correct tool alignment minimizes bit wear and helps achieve precise hole depth. If you’re using a corded drill, ensure your power source is stable, and consider a rotary hammer for larger holes or thicker brick walls. If you’re drilling into brick veneer or shallow brick, a lower-speed setting with steady pressure can yield cleaner results while protecting the surface.
Safety and workspace preparation
Before you drill, prepare a safe, clean workspace. Wear protective eyewear, a dust mask, and gloves to guard against brick dust and sharp edges. Clear the area of obstacles, cover nearby surfaces to catch dust, and consider sealing off the room to minimize debris spread. Mark the drill point with accuracy, then double-check measurements. Have a vacuum or brush ready to clear dust after each stage to maintain visibility and reduce the risk of misalignment. If you’re drilling near electrical outlets, pipes, or masonry anchors, use a stud finder and utility scanner to confirm hidden hazards. A tidy, safe workspace reduces the likelihood of mistakes and injuries.
Drill Bits Pro’s observations stress the importance of PPE and a methodical approach, which helps DIYers stay safe while tackling brick drilling projects. Proper safety habits also reflect well on professional results, especially when you’re working in occupied spaces or on higher walls.
Marking the drill point and starting a pilot hole
Accurate marking is critical for a clean hole. Use a pencil or chalk to mark the exact center, then create a shallow guide with a small punch or nail to prevent the bit from slipping. Start with a small pilot hole to establish the hole’s path and reduce stress on the masonry bit. Hold the drill at a perpendicular angle to the wall to prevent bit drift, and begin at a slow speed to let the bit cut into the brick rather than skimming the surface. If the surface is very hard, pause to cool the bit momentarily, then resume with slightly increased pressure.
Drill Bits Pro notes that pilot holes help ensure the main hole follows the intended path and improves alignment for anchors. This step is especially important in brick where the surface can have a high coefficient of friction and where a wandering bit can ruin your hole geometry.
Drilling technique: from pilot hole to through-brick hole
With the pilot hole established, switch to the larger masonry bit that matches your anchor diameter. Engage hammer mode on the drill to apply percussive action as you feed the bit slowly into the brick. Maintain steady, even pressure rather than forcing the drill; let the bit do the cutting. If you encounter dense layers or mortar, pause to cool the bit and recheck alignment. Periodically remove the bit to clear debris from the hole, which helps prevent binding and overheating. When you reach the planned depth, stop and inspect for fit before inserting anchors.
This is where technique counts. Drill Bits Pro’s practical guidance recommends incremental depth increases and frequent removal of debris for clean, accurate holes that accept anchors firmly.
Anchors, fasteners, and finishing the installation
After drilling, clean the hole thoroughly and dry-fit the anchor to confirm fit. Apply a small amount of foam, mortar, or a plug if specified by the anchor system to ensure a snug seat. Insert the anchor and drive the screw to the recommended torque, stopping if you see the brick surface start to crack or crumble. If you’re anchoring into hollow brick or brick with a hollow core, select a plug or sleeve designed for hollow masonry to achieve better grip. Finish by wiping away dust and ensuring the fixture sits flush against the surface.
Proper anchoring in brick requires attention to depth, hole diameter, and the brick’s integrity. Drilling Bits Pro’s approach emphasizes verifying anchor compatibility and testing one hole before proceeding with multiple fixtures.
Common mistakes and how to avoid them
Common mistakes include using an incorrect bit, drilling too quickly, or applying excessive pressure, which can overheat the bit and crack brick. Wandering starts when starting marks aren’t precise or the drill isn’t perpendicular. Skipping pilot holes or neglecting to clear debris leads to poor hole geometry and weak anchors. To avoid these issues, take time to mark accurately, use the right bit, drill at controlled speeds, and frequently clean the area during drilling. If you notice significant chipping or brick breakout, reduce pressure and verify you’re using a suitable bit for the brick type.
Post-drill tasks: cleaning up and anchoring
Once holes are complete, sweep or vacuum dust from the work area and inspect the holes for uniform depth and clean edges. If there’s any loose mortar in the walls, chisel it away carefully to maintain a clean hole profile. Insert anchors and fasten the fixture with a suitable screw at the recommended torque. Finally, test the fixture’s hold and assess if additional reinforcement is needed. Clean-up and careful inspection help ensure long-term performance and safety.
When to hire a professional or avoid brick drilling
If you’re working with very hard brick, large-diameter holes, or walls with utility runs, consider a professional with experience in masonry drilling. For structural or load-bearing applications, it’s prudent to consult a licensed contractor. If the brick is facing or veneer, or if you’re unsure of the wall’s composition, seeking expert input can prevent costly mistakes. In some cases, alternative mounting methods, such as surface mounting or using masonry-safe adhesive systems, may be more appropriate.
Authority sources
- https://www.osha.gov
- https://extension.illinois.edu
- https://www.cdc.gov
Tools & Materials
- Hammer drill or rotary hammer(Prefer hammer mode for masonry; ensure bit is properly clamped and the chuck is secure.)
- Masonry drill bits (carbide-tipped)(Choose bit diameter to match anchor size; use sharp bits for clean cuts.)
- Measuring tools (tape measure, pencil, square)(Accurate marks prevent misalignment and wasted effort.)
- Safety gear (goggles, dust mask, gloves)(Protect eyes, lungs, and hands from dust and sharp edges.)
- Anchors and screws suitable for brick(Select appropriate type (plastic, metal, or sleeve) and length for load.)
- Vacuum or brush for debris(Clean hole of dust to prevent binding and ensure anchor seating.)
- Optional: chisel for mortar cleanup(Useful for smoothing pilot holes or mortars around the edge.)
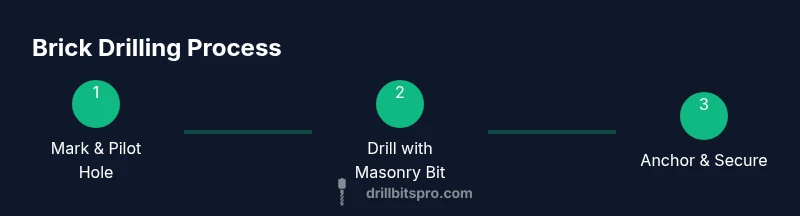
Steps
Estimated time: 40-60 minutes
- 1
Prepare workspace and PPE
Clear the area, lay down drop cloths, and put on safety goggles, a dust mask, and gloves. Check for nearby utilities and ensure stable footing. If possible, seal the area to minimize dust migration and create a controlled environment for drilling.
Tip: Wear PPE before you touch the drill to set a safety baseline. - 2
Mark drill point and select bit
Measure carefully and mark the exact center of your hole with a pencil. Choose a bit diameter that matches your anchor and brick type; a smaller pilot bit helps guide the larger masonry bit. Recheck measurements before starting.
Tip: Double-check the mark using a square to ensure perpendicular alignment. - 3
Configure drill settings
Set the drill to hammer mode at a moderate speed. If you’re using a corded drill, ensure the power source can sustain continuous operation. Secure the bit firmly in the chuck before starting.
Tip: Test the setup on a scrap brick to confirm settings work without binding. - 4
Drill a pilot hole
Begin with a shallow pilot hole to guide the main bit. Keep the drill perpendicular to the wall and apply steady, light pressure to avoid wandering. Stop if the bit overheats and allow it to cool briefly.
Tip: Pilot holes reduce the load on the larger bit and improve hole accuracy. - 5
Drill through brick with masonry bit
Switch to the larger masonry bit that matches the anchor. Maintain controlled pressure and allow the hammer action to do the cutting. Periodically pause to clear debris from the hole to prevent clogging.
Tip: Let the bit do the work; forcing the drill increases heat and risk of cracking. - 6
Deepen hole and clean debris
Drill to the desired depth, then remove the bit and clear out dust. Check the depth with a probe or the anchor itself to confirm it will seat properly. Clean edges of the hole for a flush anchor seating.
Tip: Regular debris removal keeps the hole clean for accurate anchoring. - 7
Install anchor and secure fixture
Insert the anchor and drive the screw to the recommended depth. If you encounter resistance, back out and re-check hole depth and alignment. Ensure the fixture sits flush against the brick.
Tip: Do not overtighten; excessive torque can crack bricks or distort the anchor. - 8
Inspect and finish
Confirm the fixture is secure and level. Wipe away remaining dust and inspect for any cracks around the hole. If necessary, apply sealing or mortar to protect the area from moisture and deterioration.
Tip: A quick post-check helps ensure long-term durability.
Got Questions?
Can I drill through brick without a hammer drill?
A hammer drill or rotary hammer is highly recommended for brick drilling because it provides the percussive action that softens the brick and speeds cutting. A standard drill will struggle and can overheat or wear quickly. If you must try with a non-hammer drill, use a smaller pilot hole and go very slowly, but expect poorer results.
A hammer drill is highly recommended for brick drilling because it helps cut through brick more efficiently than a regular drill.
What size hole should I drill for a wall anchor in brick?
Hole size should match the anchor diameter specified by the anchor system. Use a pilot hole if recommended for dense brick, and always test fit the anchor before inserting screws. Do not exceed the recommended depth to avoid damaging the brick and mortar.
Use the anchor’s specified hole size and test fit before final installation.
Can I drill into brick veneer or hollow brick safely?
Brick veneer involves a thin brick surface over a structural backing. It can be drilled, but care is needed to avoid penetrating into the backing material. Use lighter techniques and verify the underlying structure before anchoring. When in doubt, consult a professional.
Bricks veneers can be drilled, but you must protect the backing and verify the wall’s structure before anchoring.
What safety gear should I wear when brick drilling?
Wear safety goggles to protect eyes from debris, a dust mask to avoid inhaling brick dust, and gloves to guard your hands. Hearing protection is optional but helpful for longer drilling sessions. Ensure the workspace is well-ventilated.
Goggles, a dust mask, and gloves are essential when brick drilling to stay safe.
What should I do if the brick cracks around the hole?
Stop drilling if you notice cracking. Check your bit, speed, and pressure, and consider restarting the hole in a slightly different location or using a smaller pilot hole. Assess whether a different anchor or mounting method is needed to avoid further damage.
If you see cracking, stop, reassess, and adjust technique or location.
Watch Video
Top Takeaways
- Choose the right masonry bit for brick drilling.
- Use a hammer drill and pilot holes for precision.
- Mark, drill, and clean step by step for clean holes.
- Choose appropriate anchors and test fit before final installation.
- Prioritize safety and proper cleanup for durable results.